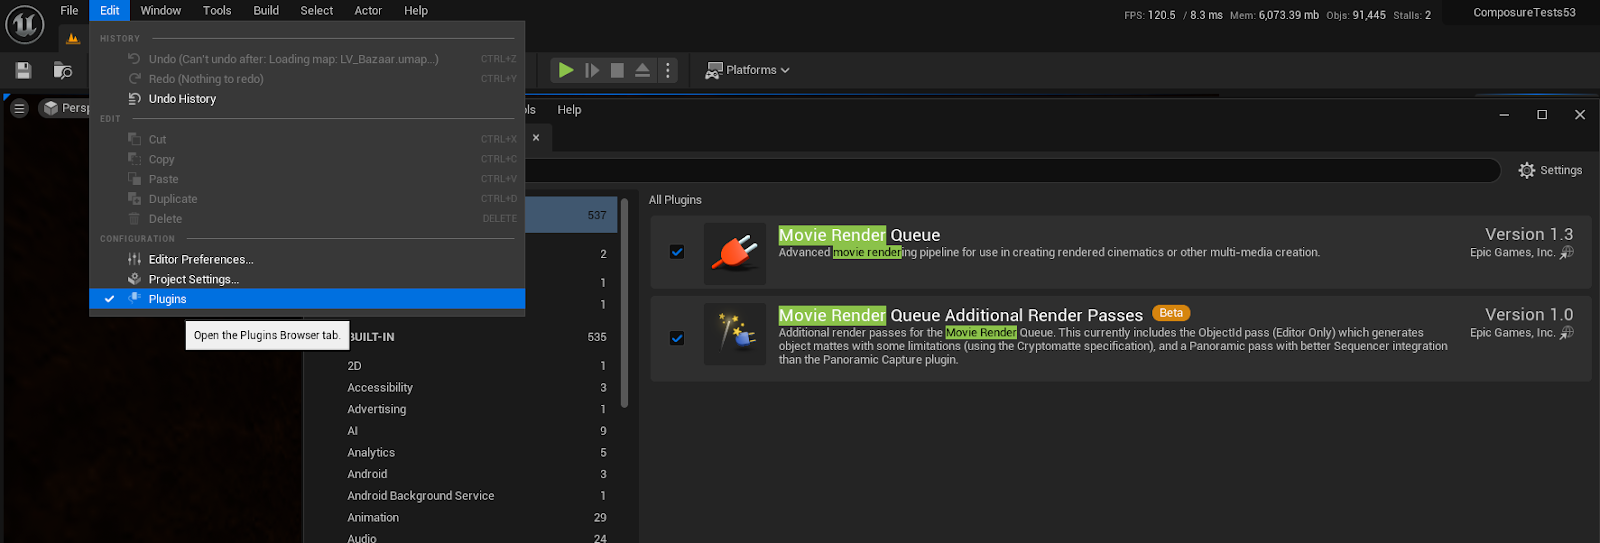
- In your Unreal project go to Edit>Plugins and search Movie Render, to enable the Movie Render Queue plugin:
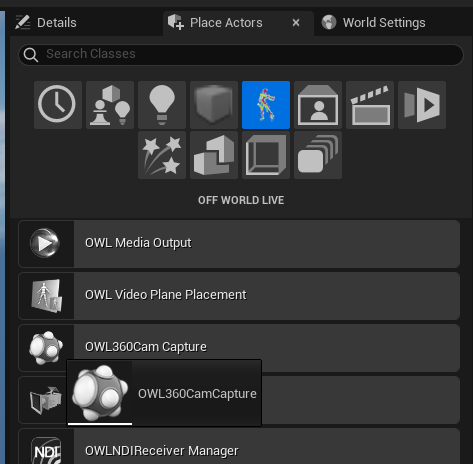
- Go to Place Actors and in the Off World Live section find the OWL 360 Camera and drag and drop it into your level:
- This camera can be used to:
- Configure your content output using the settings in the camera Details panel, including color grading and Post Process effects. See guide here.
- Preview your content using the Render Target output and NDI/ Spout if you want to preview in a headset to set up your shots before render them. See guide here.
- Set up your sequences for rendering (see below).
-
The Details Panel of the OWL360CameraActor manages settings which automatically carry through to the final Movie Render Queue output. Any settings which are adjusted in the Movie Render Queue settings (such as resolution or alpha) will override those set in the Actor:
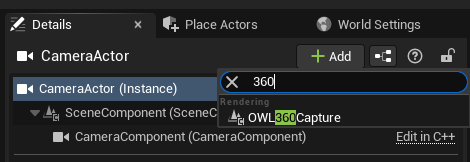
- If you want to render using a sequence from an existing Cinecam, you can just attach an OWL 360 Capture component to the Cinecam like this. This has the same Details panel as the OWL 360 Actor and should be used in the same way:
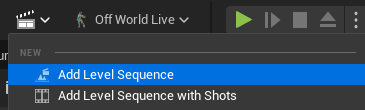
- To render, you need to have a sequence from which you can open Movie Render Queue. To create a sequence go to Cinematics>Level Sequence to create a new level Sequence:
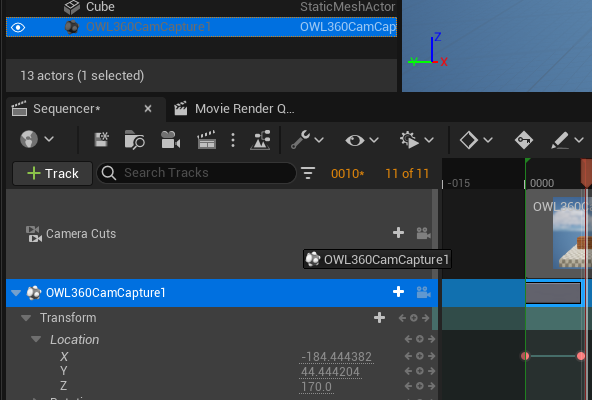
- You can now add a 360 camera to this sequence use the Add button to add the 360 Camera to your Level Sequence. This will auto populate in your list if you have the 360 camera selected, or you can find it by name in the search list below.
- This should add both the OWL360Camera, and also a camera cuts track above the camera:
-
The camera cuts track is essential for telling MRQ which camera cut to render, and can be added manually using the Add button if not there automatically. Using add > Camera Cut Track:
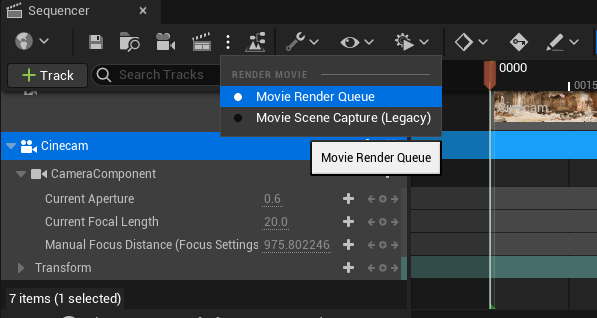
- When you are happy with your sequence, click on the three dots next to the Clapperboard Icon and make sure Movie Render Queue is set as the default rendering option:
- With the MRQ window open click where it says unsaved config to set up your render config:
- You can turn off or delete the Deferred rendering pass because this will create a standard 2D render of your scene:
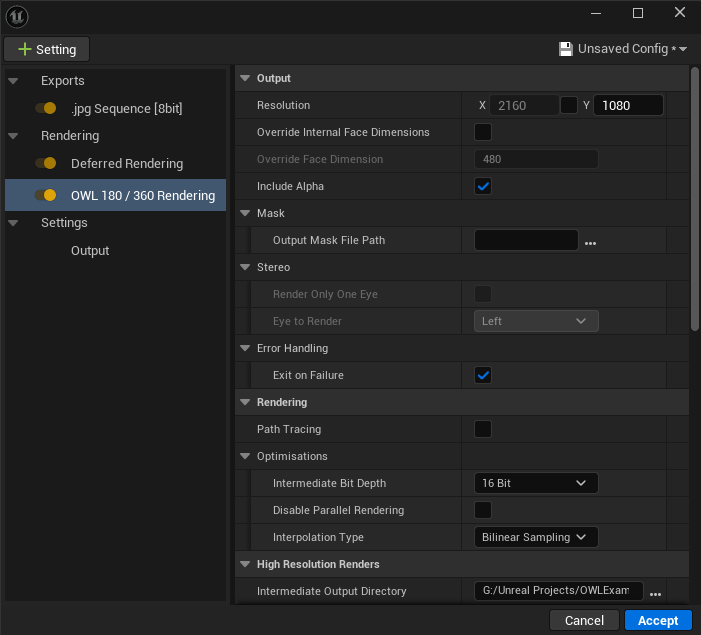
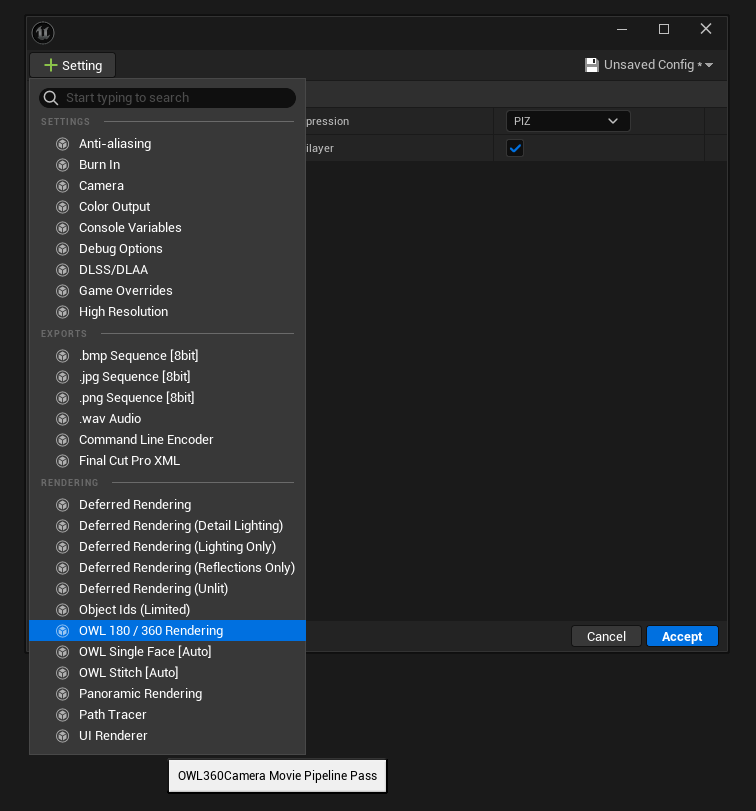
- Next, press +Setting and select the OWL 360 Camera rendering option:
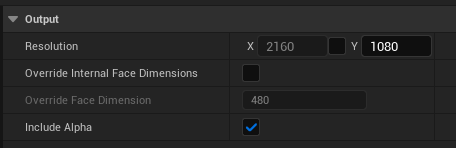
- Here you can find settings for your render including:
- Resolution: (this is your final render resolution).
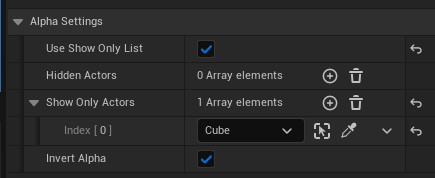
- Alpha: (tick this setting if you have Alpha set up via the Show Only settings in the OWL 360 Camera in your level). See guide here:
- Mask: (use this setting if you are rendering a custom projection and need to add your .png mask). See guide here.
- Stereo: (if you want to render each eye individually, Stereo projection is set in the OWL 360 Camera in your level):

- Error Handling: This allows you to chose to exit from the render if one of the frames is corrupt.

- Path-Tracing: (tick this and then set your samples in the Path Tracing MRQ settings). See guide here.
- Optimisations:

- Intermediate Bit Depth: This is the color format of your render. Basic licenses are limited to 8bit but Pro licenses can use 16 and 32 bit. See guide here
- Disable Parallel Rendering: This is a Pro feature which lets you render frames in sequence rather that in parallel. This is useful in heavy renders where parallel rendering can lead to a VRAM crash.
- Interpolation Type: Here you can set the sampling type for your render.
- Advanced:

- Rendering Hooks: This is a Pro feature which allows you to use hooks to gain low-level access to sections of the OWL rendering pipeline. See guide here. This is also used to add Burn-Ins.
- Maintain Frame Order: This is a Pro feature relating to Tiling/ High Resolution Rendering.
- If you are using custom outputs like, for example, the FFmpeg output and require frame order synchronisation, then check this box.
- Otherwise, by default the OWL stitch process runs in parallel and exports frames to disk as soon as they ready (so it is possible that some frames arrive out of sequence).
-
Be aware that in order to correctly sequence frames, completed frame data is stored in memory until previous frames have been rendered. This will increase memory usage.
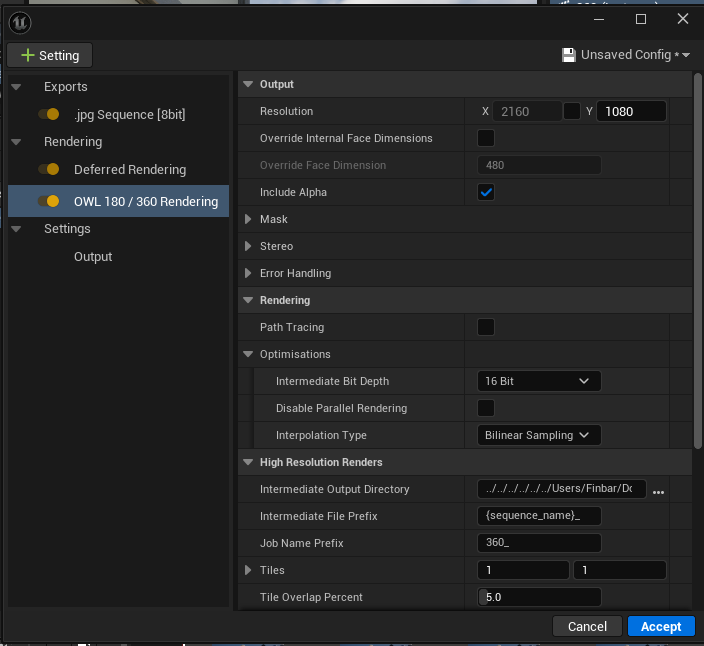
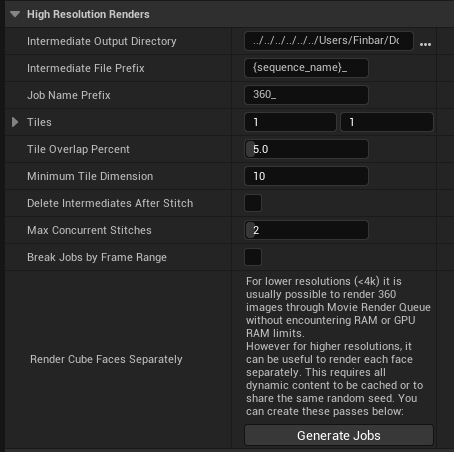
- High-Resolution rendering: Above around 8kx8k it can be useful to use tiling to manage memory when rendering. See guide here.
- Disable Multisample Effects: Stitched images can cause visible seams when using post-processing effects that blend pixels together. These include effects like Depth of Field, Temporal Anti-Aliasing, Motion Blur and Chromatic Aberration. When these Post Processing effects are used then each final output pixel is composed of the influence of many other pixels, seams can occur in a stitched image. This can be mitigated by a Face Blend Percentage, but can also be turned off on a pre-render basis instead of having to disable each setting in-editor.

- Adding post-process materials: An array of additional post-processing materials to run after the frame is rendered. These can be rendered as separate frames in JPG, BMP or PNG format, or packed into a single file in EXR format. This will impact render times. This is generally for color grading workflows. See guide here.
- Stencil clip layers: Render separate layers for a list of selected actors, defined by the Actor Layers or Data Layers arrays. This is useful for compositing in Post-Production Software. EXRs have the ability to pack these layer s in to a single file, whereas other image formats will render these layers as separate files. See guide here:
-
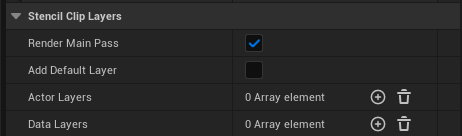
Render Main Pass: Renders the Main Pass as well as the Stencil Clip Layers, This can be turned off if you’re only doing a stencil-layer based render and don't need the main non-stencil image.
-
Add Default Layer: An additional stencil layer will be renders which contains all objects which do not belong to layers specified in the Stencil Layers. This is useful to wanting to isolate one or two layers but still have everything else to composite them over without having to remember to add all objects to a default layer.
-
Actor Layers: Select the layers to render as part of the composite output. These layers are established by the Layers Panel.
-
Data Layers: If using a World Partition map use Data layers to specify the composite layers instead of Layers.
-
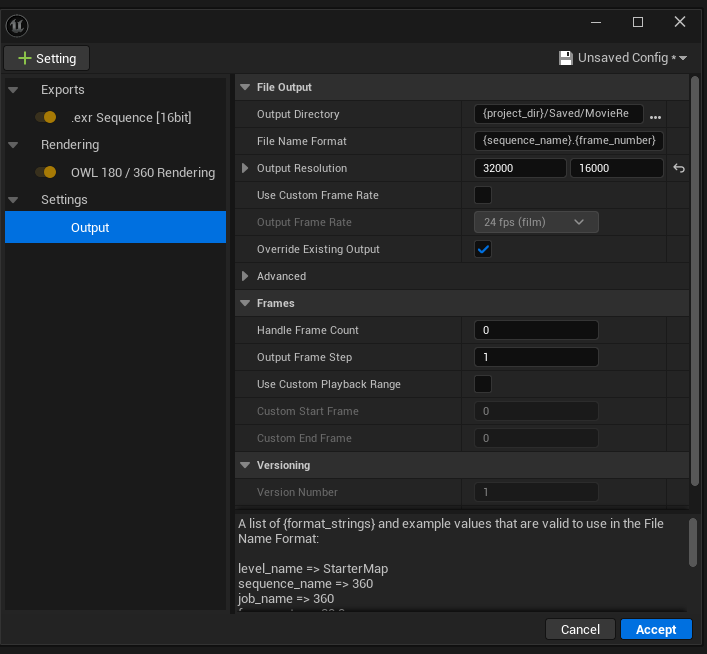
- For your general render settings such as Frame Rate, Frame Count, file management etc. you continue to use the 'Output' section in Movie Render Queue:
- When you are done with your render settings you can save this Config by clicking where it says Unsaved Config and selecting Save as Preset:
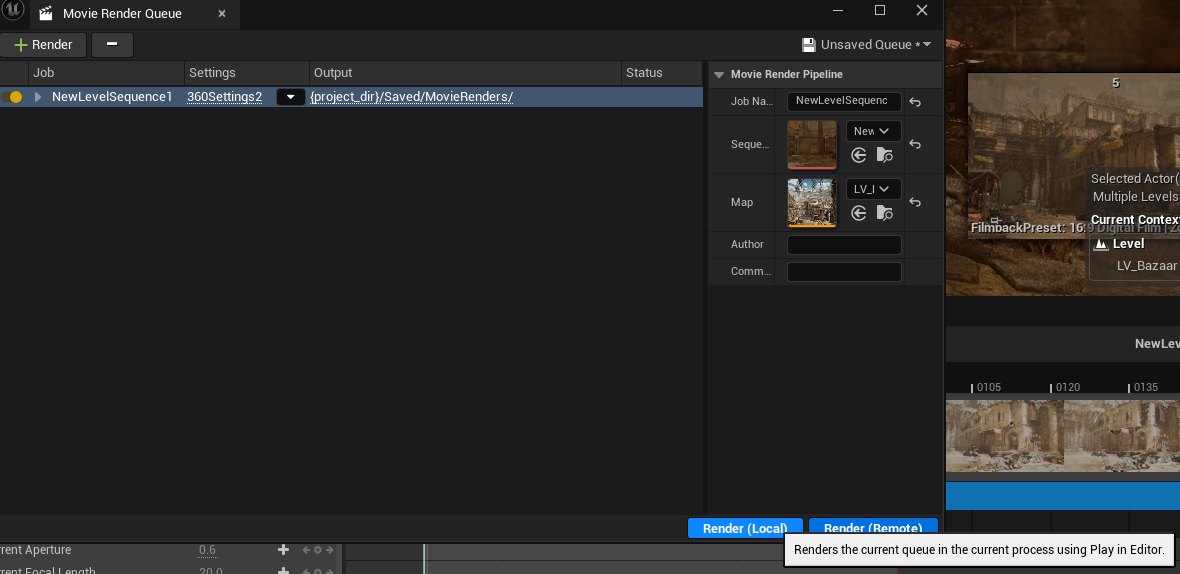
- Now hit accept to add this Render Config to the Render Queue.
Then select Render (Local) to Start the render!


Older Plugin Set Up
- In your UE project go to Edit>Plugins and search 'Movie Render', to enable the Movie Render Queue (MRQ) plugin:
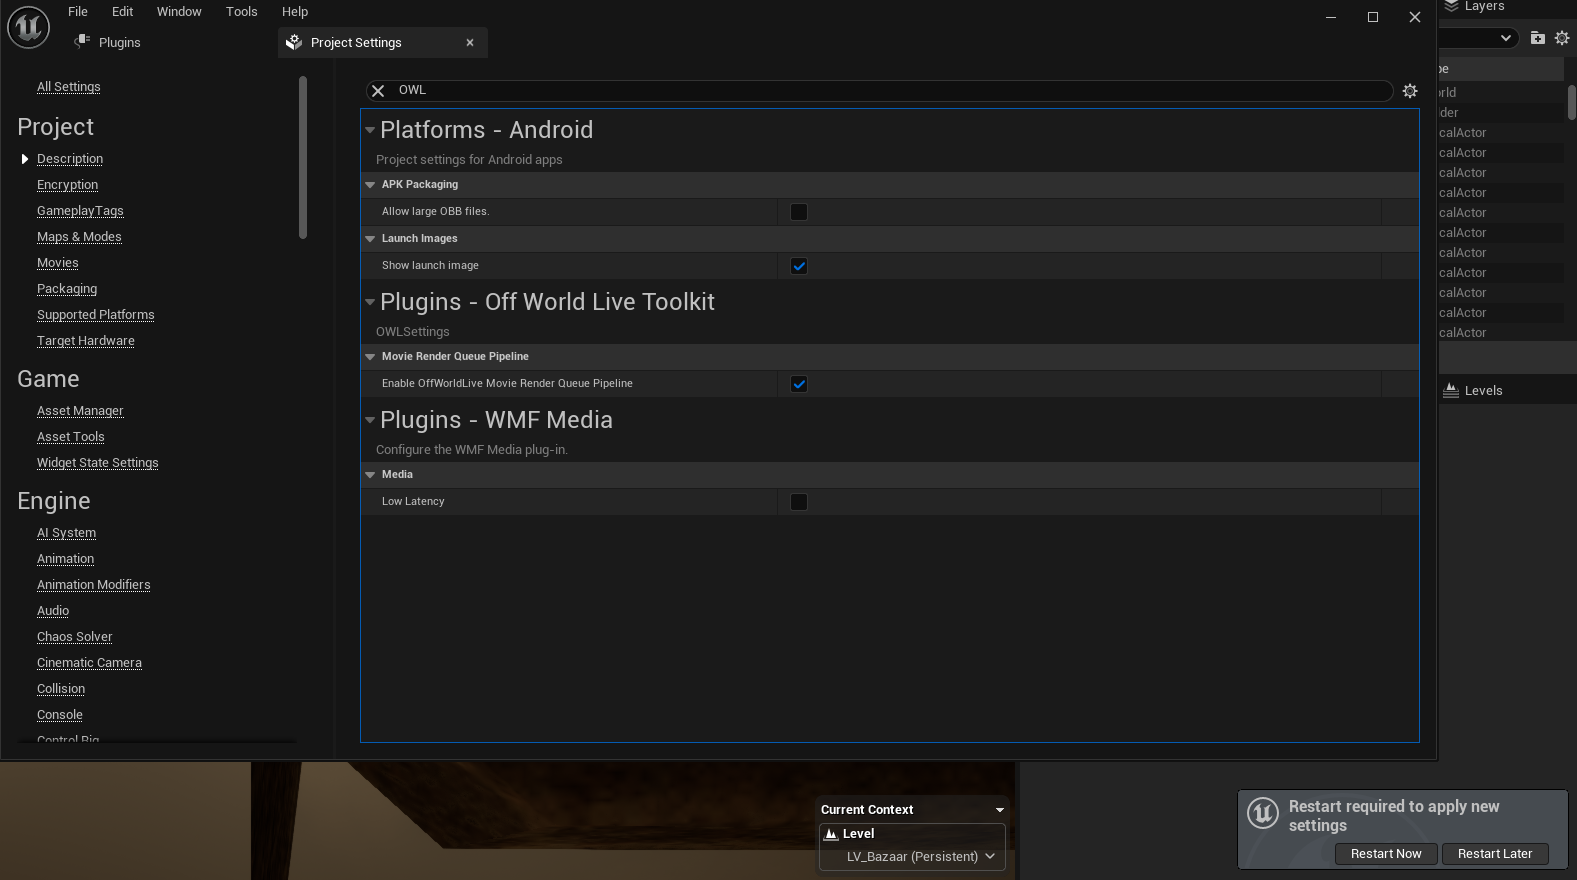
- Before Restarting the engine go to Edit>Project settings, Search “OWL” and make sure Enable OffworldLive Movie Render Queue Pipeline is ticked:
- Restart Unreal.
- In Editor create an OWL 360 Camera (it's recommended to only add one OWL 360 Camera to your scene), either by:
- Drag-and-dropping it from Place Actors into your scene:
- Attaching an OWL 360 Capture Component to an existing camera or actor (this is best if you have a sequence already set up):
- Drag-and-dropping it from Place Actors into your scene:
- Please use the details panel of the OWL 360 Camera/ Component to:
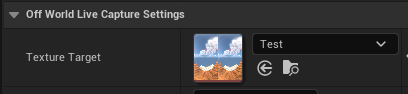
- Preview your output using the Render Target. If you select this, you should 'Pause Rendering' when not previewing because it uses valuable GPU capacity. It is not required for Movie Render Queue. (see full guide):
- Select/ Hide elements for Alpha output using the Show Only/ Hide Only selectors (see full guide):
- All other settings should be controlled in the Movie Render Queue UI as shown below.
- Color adjustment should be done using a Post Process Volume NOT using the Post Process Settings on the 360 Camera as explained here.
- Preview your output using the Render Target. If you select this, you should 'Pause Rendering' when not previewing because it uses valuable GPU capacity. It is not required for Movie Render Queue. (see full guide):
- To render from Movie Render Queue you need to create a Sequence by clicking the clapboard icon in Editor and selecting Add Level Sequence:
- If you have created a new Sequence, drag your camera (OWL 360 or Unreal camera as in Step 4.2) into the Sequence window:
- Whenever you want to render, click the clapboard icon at the top of the Sequencer and select Render Movie>Movie Render Queue:
- In your Movie Render Queue 'Settings' add the OWL 180/ 360 Rendering option:
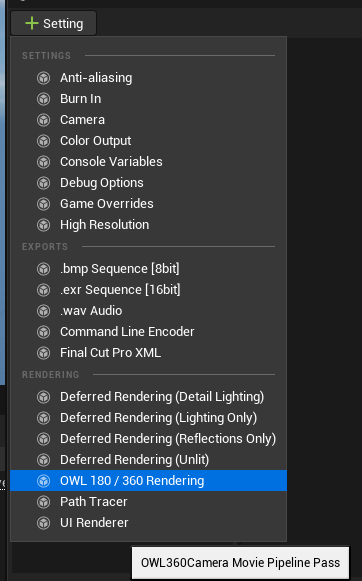
- This option allows you to control the different 360/ 180 degree settings of your render. It should be used in combination with the main MRQ Output settings as described below:
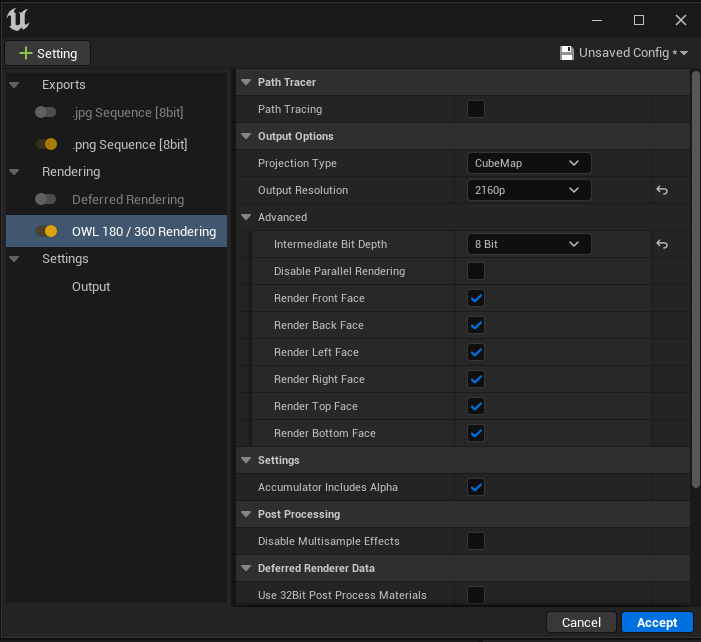
- In the OWL 360 Rendering Settings section you can select:
- Select Path Tracing: The tickbox switches path-tracing on and all Path-Tracing settings should be selected in the Movie Render Queue Path Tracer section.
- Projection Type: Here you can select between Equirectangular, Cubemap, VR 180 (Stereo), 180 Mono Equirectangular and DomeMaster.
- Output resolution: This will override your output resolution in the main MRQ Output section. You can select Custom for larger resolutions.
- Advanced> Intermediate Bit Depth: This selects the color depth of your render.
- Advanced> Disable Parallel Rendering: This should be used for very high resolution or high RAM usage renders. It renders each frame sequentially preserving memory.
- Advanced> Selective Cube-Face Rendering: This renders certain cube-faces in case your projection surface doesn't require full 360 coverage.
- Settings> Accumulator Includes Alpha: Tick this if you have used the Show Only capability in the OWL 360 Cam to output alpha as described in step 5.2. PNG format is recommended. For color correct layers used in compositing please use Stencil Clip Layers with .EXR and 32 bit colors (below).
- Post Processing> Disable Multisample Effects: This disables additional pixel sampling for effects like Depth-of-Field, Motion Blur, Anti-Aliasing and Ambient Occlusion.
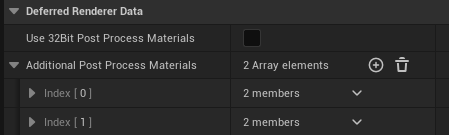
- Deferred Renderer Data> Use 32Bit Post Process Materials: This should be selected if you will composite/ color grade in external software such as DaVinci or Premier Pro using .exr format. (See full guide here).
- Deferred Renderer Data> Additional Post Process Materials: Here you can add Post Process Materials as required. (See full guide here).
- Stencil Clip Layers: This is for rendering multiple layers for use in a separate compositing software with .exr format. (See full guide here). You can select:
- Render Main Pass: Tick this if you want to render the full output in addition to your layers.
- Add Default Layer: This will render anything that's not assigned to a layer in the two options below.
- Actor Layers: Select any Actor Layers you want to render here.
- Data Layers: Select any Data Layers you want to render here.
- Click 'Accept' when you have selected the settings you need and then in the main Output section select:
- The Output Directory where you want to save the rendered frames.
- Your File Name Format (if you need to change this).
- Your Frame Rate (you can select from the drop down in Unreal) and Frame Count.
- Click 'Accept' and you will return to the main Movie Render Queue page where you can now click 'Render'!
- Your files will now be saved to the folder selected in step 12.1.