N.B if you want to use Composure in a packaged project please follow these steps and these
Learn how to create three different content layers in Unreal Engine's Composure and output them in a single 'Comp':
Please use 'Linear color space only' in your Alpha Project Settings as recommended for Composure. You can change this by going to Project Settings> search 'alpha' and select from the drop down: 

If you want to render landscapes and foliage, please ensure to use OWL Composure elements for all layers of your Comp as described below.
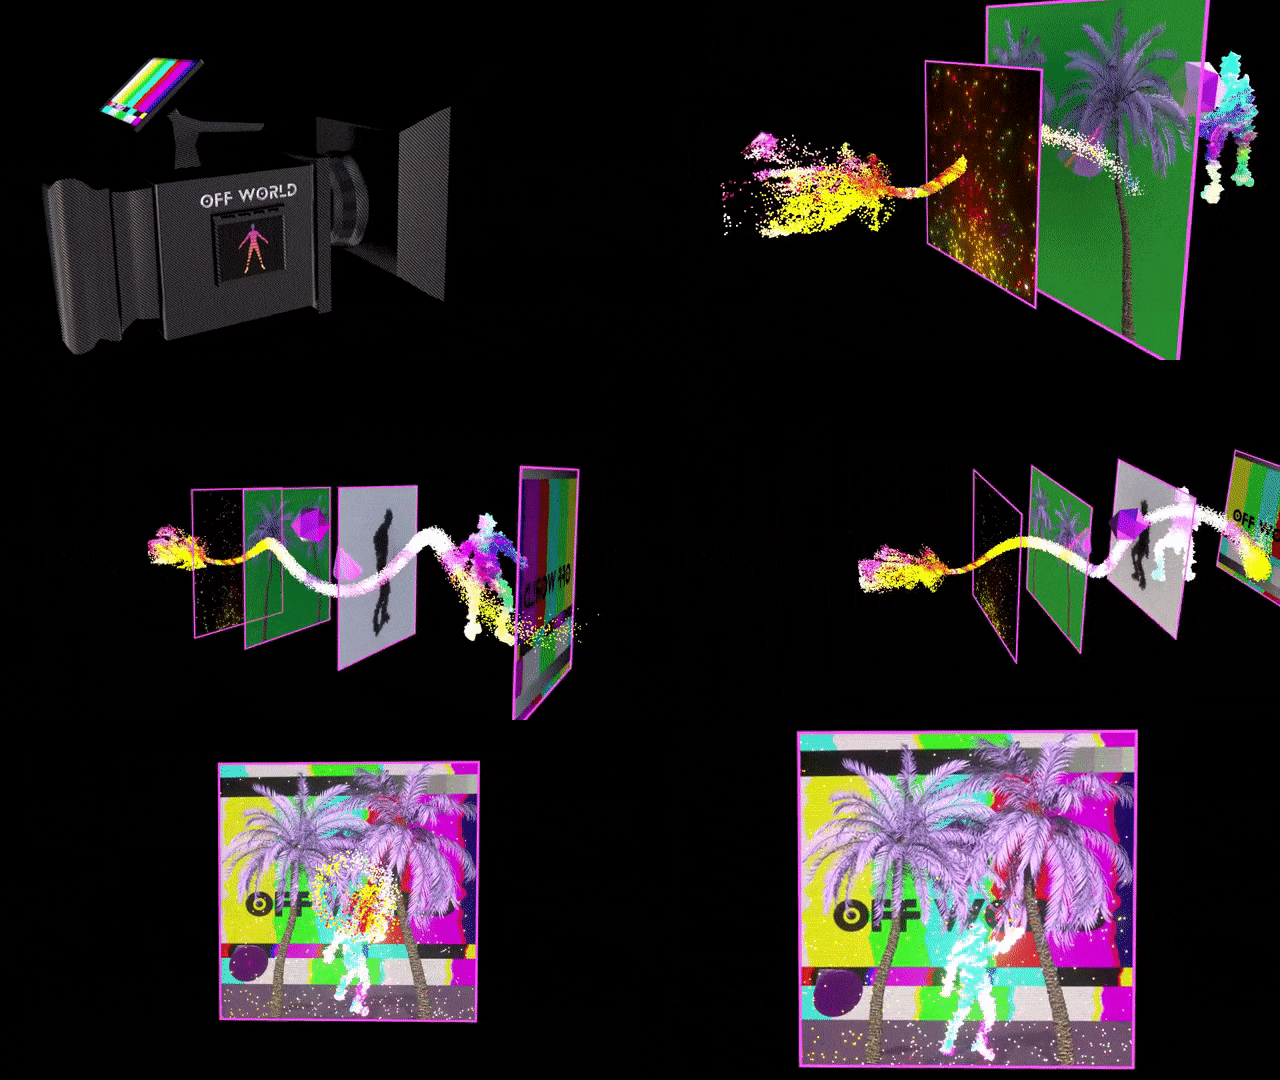
- 'Compositing' is the process of layering multiple media planes on top of each other to create a final blended output:
.gif)
- In this example we will create a composite of three layers for a final video output like this:
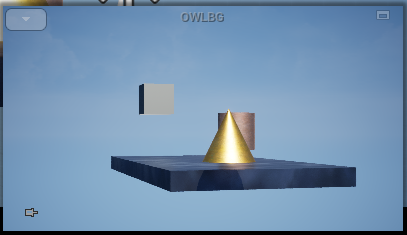
- OWL BG Element: This is a background virtual space into which our media content will be placed:
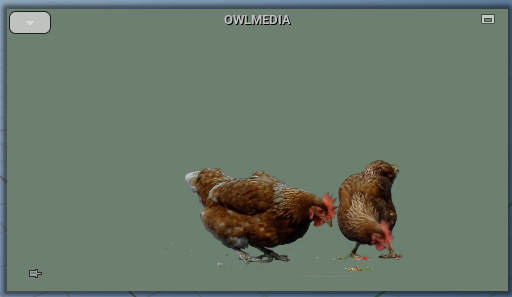
- OWL Media Plate: This is the recorded video or live video feed that we want to layer into our virtual scene (this can also be chromakeyed):
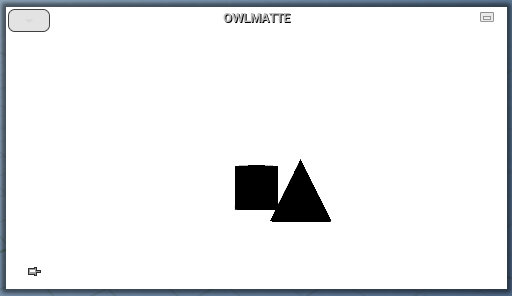
- OWL Matte: This is the layer we want to use to cut out foreground elements from the media plate (garbage matte) so that they show in front of the video feed and make it look like the video elements are behind:
- The final result is a combination of the three layers like this:
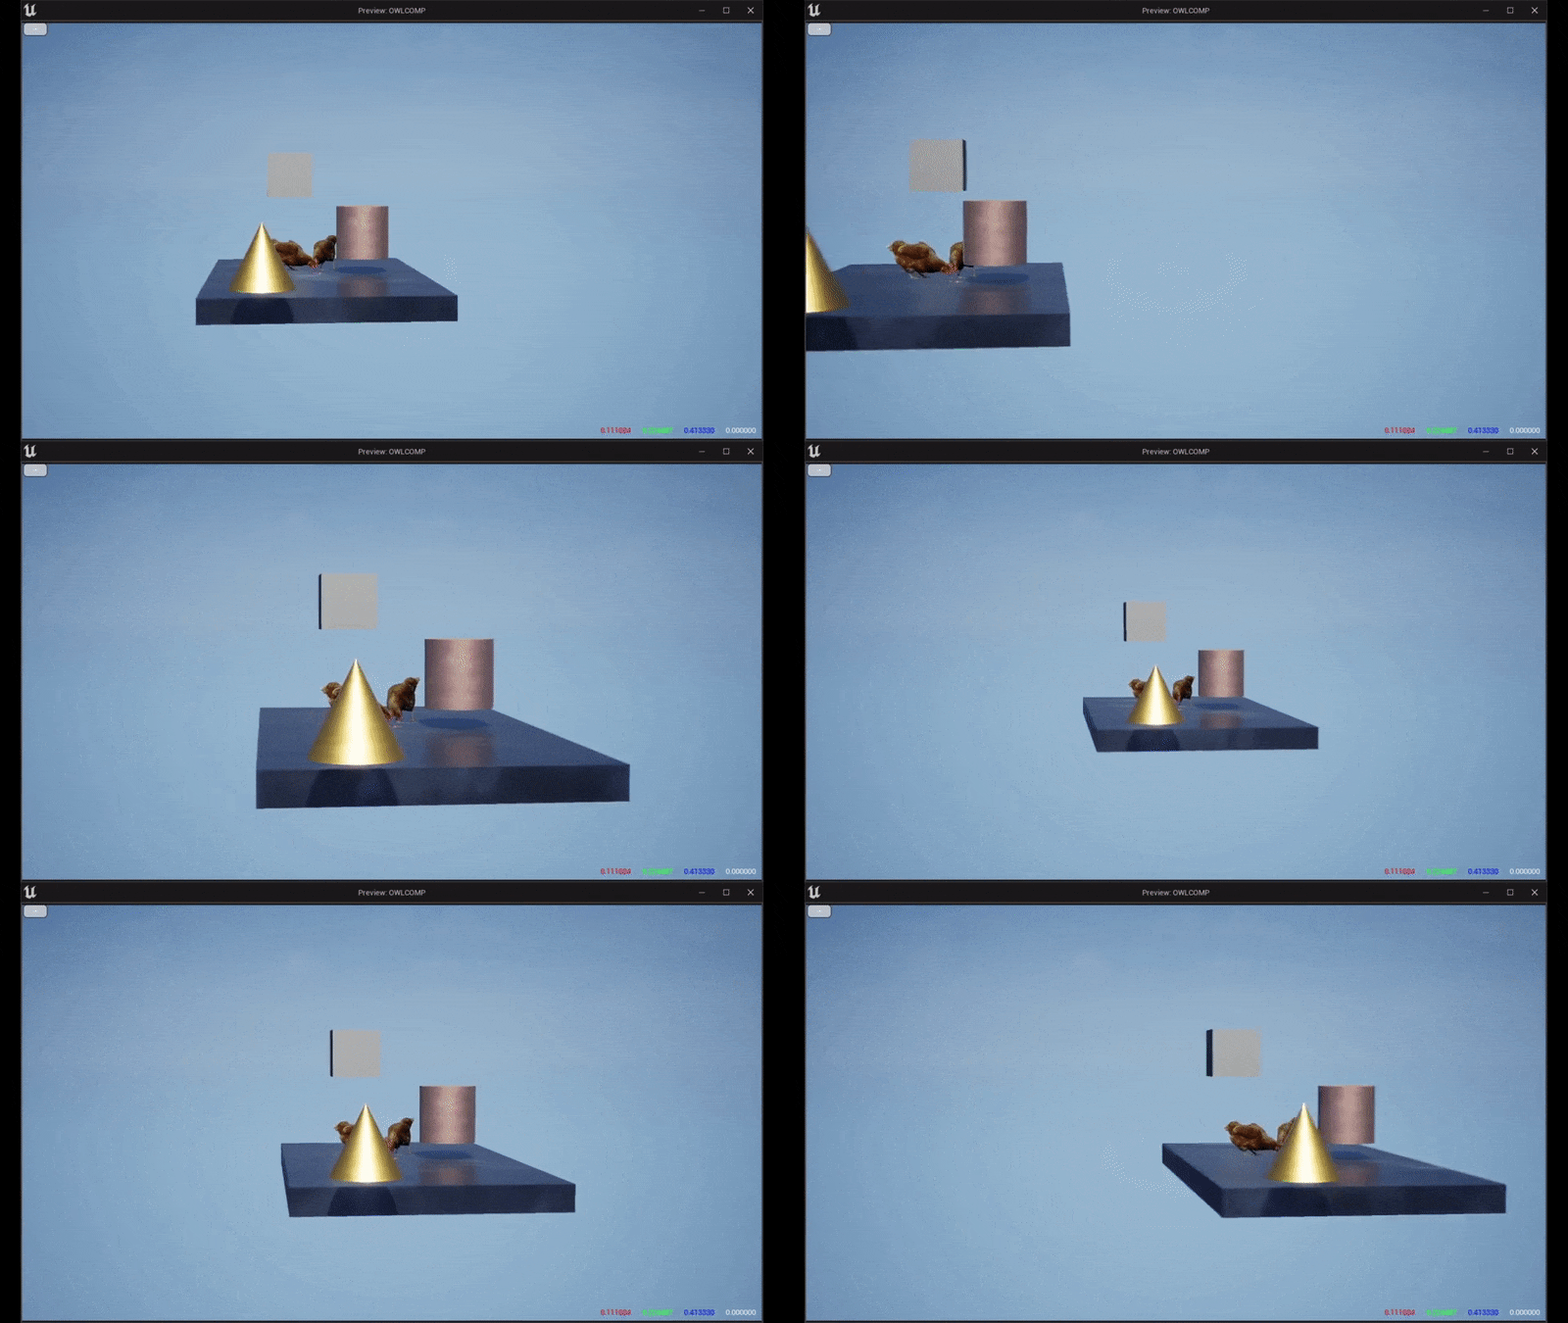.gif)
- OWL BG Element: This is a background virtual space into which our media content will be placed:
- First create the 'Comp' which will combine these three layers:
- Go to Window> Virtual Production and select Composure Compositing:
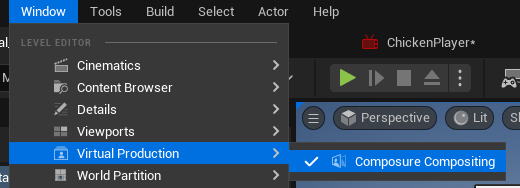
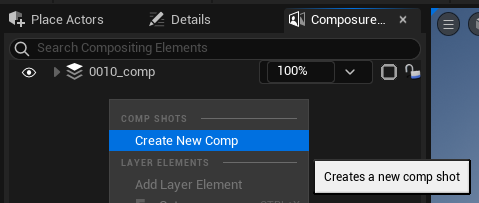
- Right-click in the new panel and select 'Create New Comp':
- In the list of options select 'Empty Comp Shot':
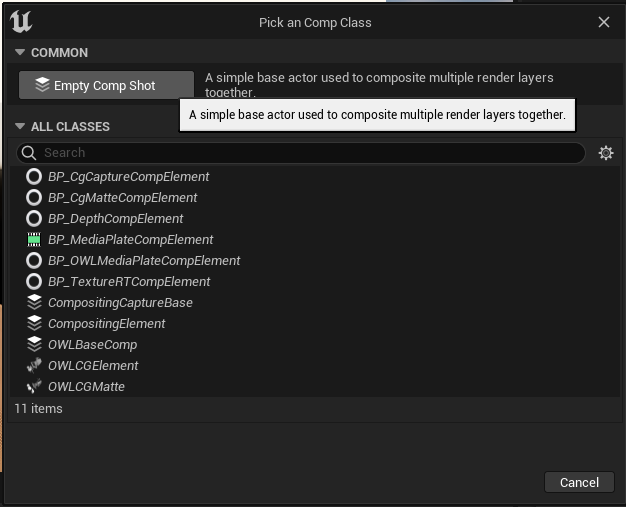
- Name the Comp how you like:

- Go to Window> Virtual Production and select Composure Compositing:
- Next, we will add the OWL CG Element layer:
- Right click on the main Comp you have just added and select 'Add Layer Element':
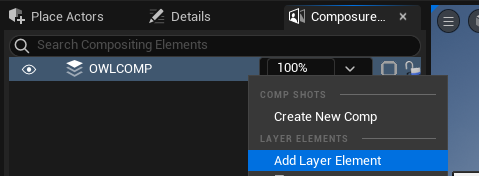
- In the pop-up go to 'All Classes' and select 'OWL CG Element':
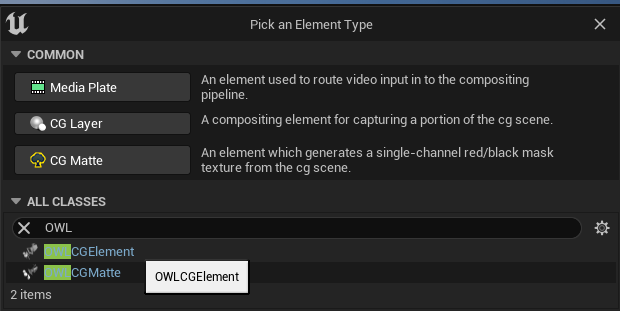
- Now in your main Comp you will see a cg_element which you can rename as you like (use OWLBG if you are a beginner):

- This OWL CG Element will automatically attach to any Camera that you have in your scene and show you it's output in a thumbnail (bottom right).

- If you don't have a Camera, add a Cinecam or OWL Cinecam from your 'Place Actors' panel.
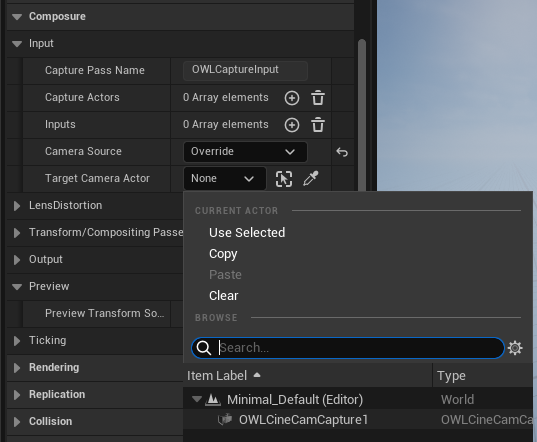
- If you have multiple Cameras and you want to attach the CG Element to one of them, go to the Details panel of the CG Element> Composure> Input> Camera Source> Override and select the Camera you want to track from the list:
- Right click on the main Comp you have just added and select 'Add Layer Element':
- Now we can add the Media Plate layer:
- Right click on the main Comp you have just added and select 'Add Layer Element':

- In Common select 'Media Plate':

- Now in your main Comp you will see a Media Plate which you can rename as you like (use OWLMEDIA if you are a beginner):

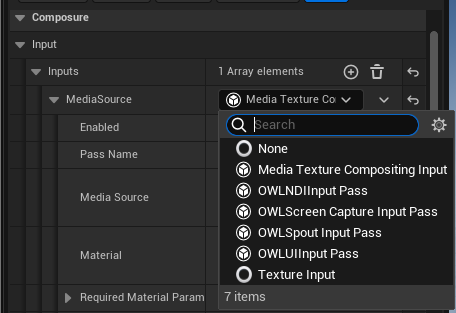
- To add a video input in the Details panel of the Media Plate go to Composure> Input> Media Source. You can select between an Unreal Media Texture (for Video Playback) or OWL NDI/ SPOUT/ Screen Capture Input Passes (for live-video streaming):
- You will now see your video input appear in your Media Plate thumbnail:
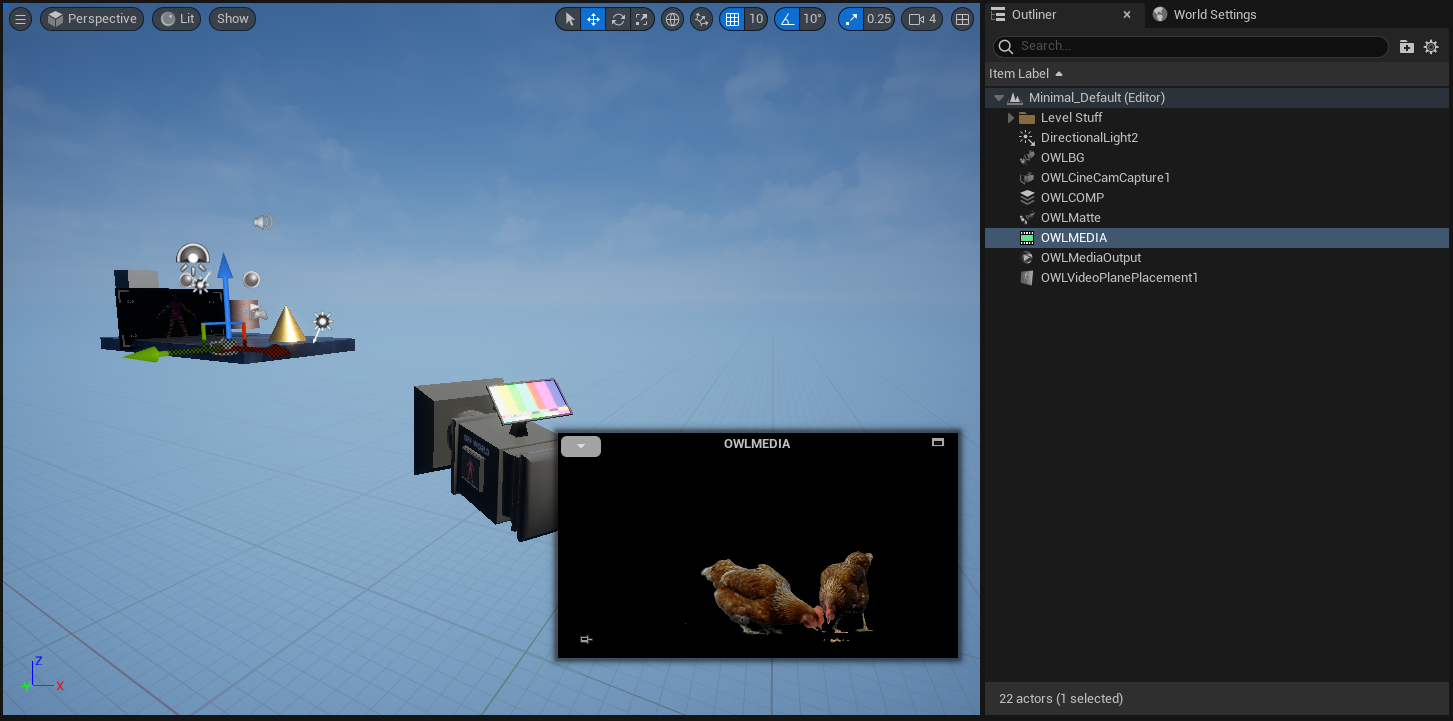
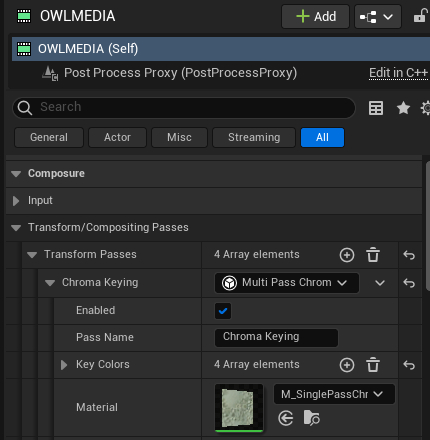
- If you need to Chromakey your video feed then you can use the Chromakey 'Transform Passes' to do so as explained here:
- Right click on the main Comp you have just added and select 'Add Layer Element':
- Now we can add the OWL Matte layer. This will cut out the shapes of our selected elements from the layer below it (in our case the Media Plate) making it look like those elements are in front of it:
- Right click on the main Comp you have just added and select 'Add Layer Element':

- In the pop-up go to 'All Classes' and select 'OWL CG Matte':

- Now in your main Comp you will see an OWL CG Matte which you can rename as you like:

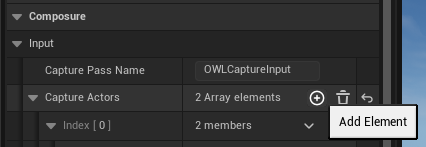
- In the Details panel of the Matte you can go to Composure> Input> Capture Actors and click plus to select a group of objects to include:
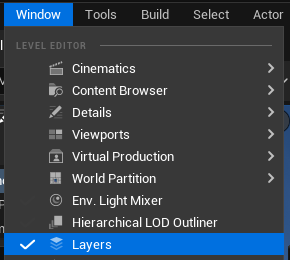
- To create a group of Actors you need to add a Layer in Unreal by going Window> Layers:
- Now go to your Unreal Viewport and select the Actors you want to include in your Layer (click Control to select multiple at once) and then right click in Layers to Add Selected Actors to New Layer:
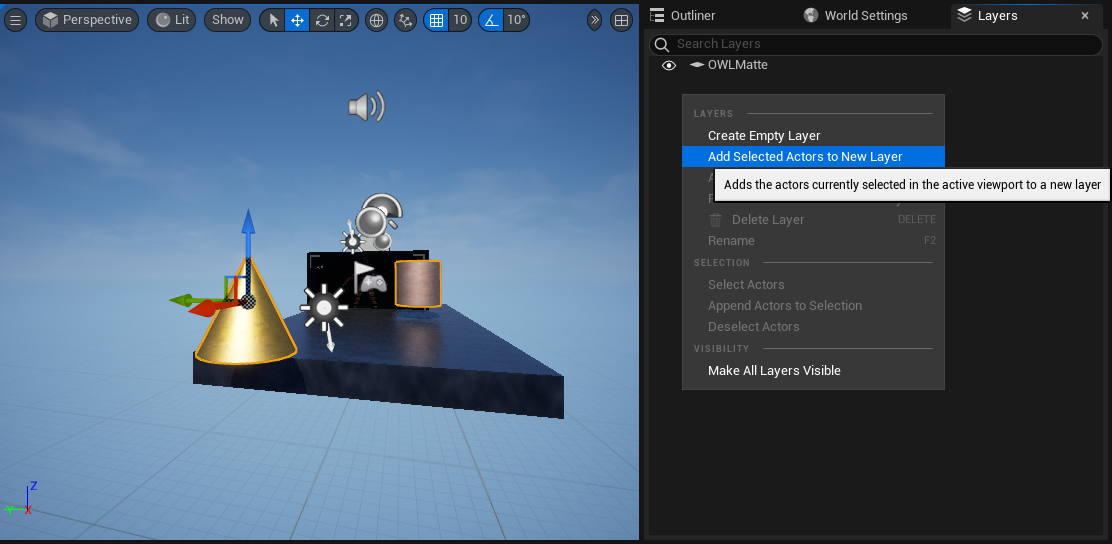
- Give the new Layer a name (use OWLMatte if you are a beginner):

- Now go back to the Details panel of your Matte and in Composure> Input> Capture Actors you can now select your layer:
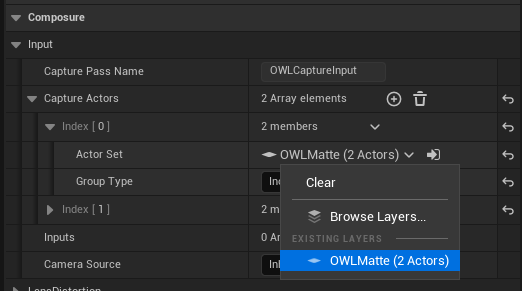
- In Group Type select 'Include' (to include only those Actors in your layer):

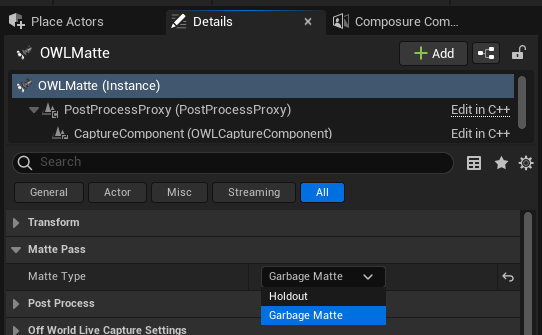
- Finally, we want to choose the type of Matte. In this case we want 'Garbage Matte' because we want to cut out the select shapes from the Media Plate so that they appear in front of it: Details> Matte Pass> Garbage Matte:
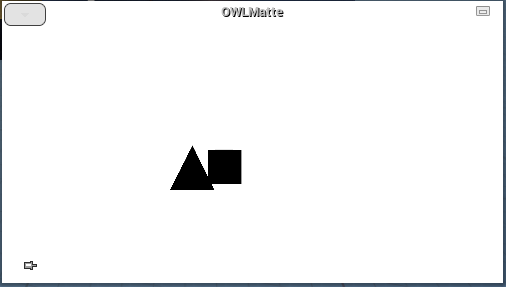
- Now in your OWL Matte thumbnail you can see the outline of the actors you want to cut out from your Media Plate:
- Right click on the main Comp you have just added and select 'Add Layer Element':
- Now we have our three layers set up, we can go to our main Comp to combine them together:
- In the Details panel of the Comp select the same Camera as you have used for your Layers:
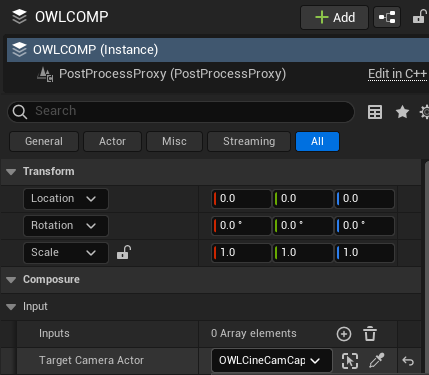
- Now we need to add a Transform Pass which combines our three layers into our final Comp: Details> Composure> Transform/ Compositing Passes > add Transform Pass: Compositing Element Material Pass:
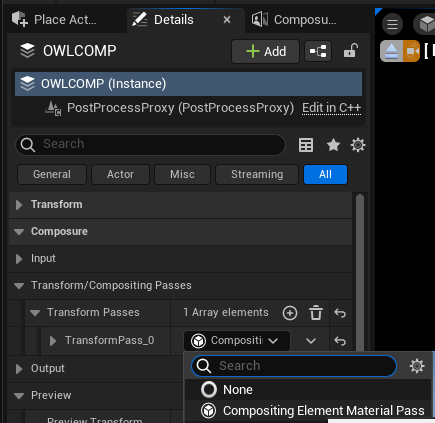
- In the panel that opens you need to Create New Asset: Material:
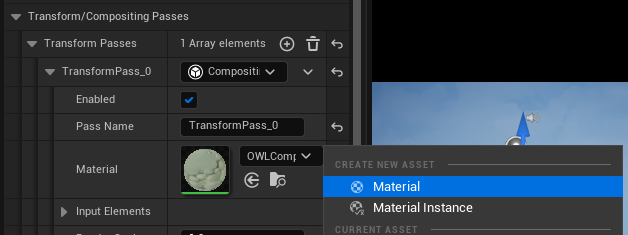
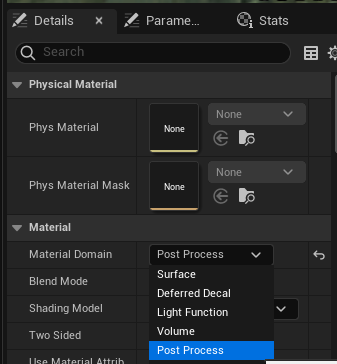
- In the Material Editor that pops-up in Details> Material change Material Domain to Post Process:
- Now copy-paste the Material blueprint below into your Material Editor:
- Finally, select each of the TextureSampleParameter2Ds and in the Details panel rename them each of your three layers like in the image below (if you have named your layers something else you need to use those names):
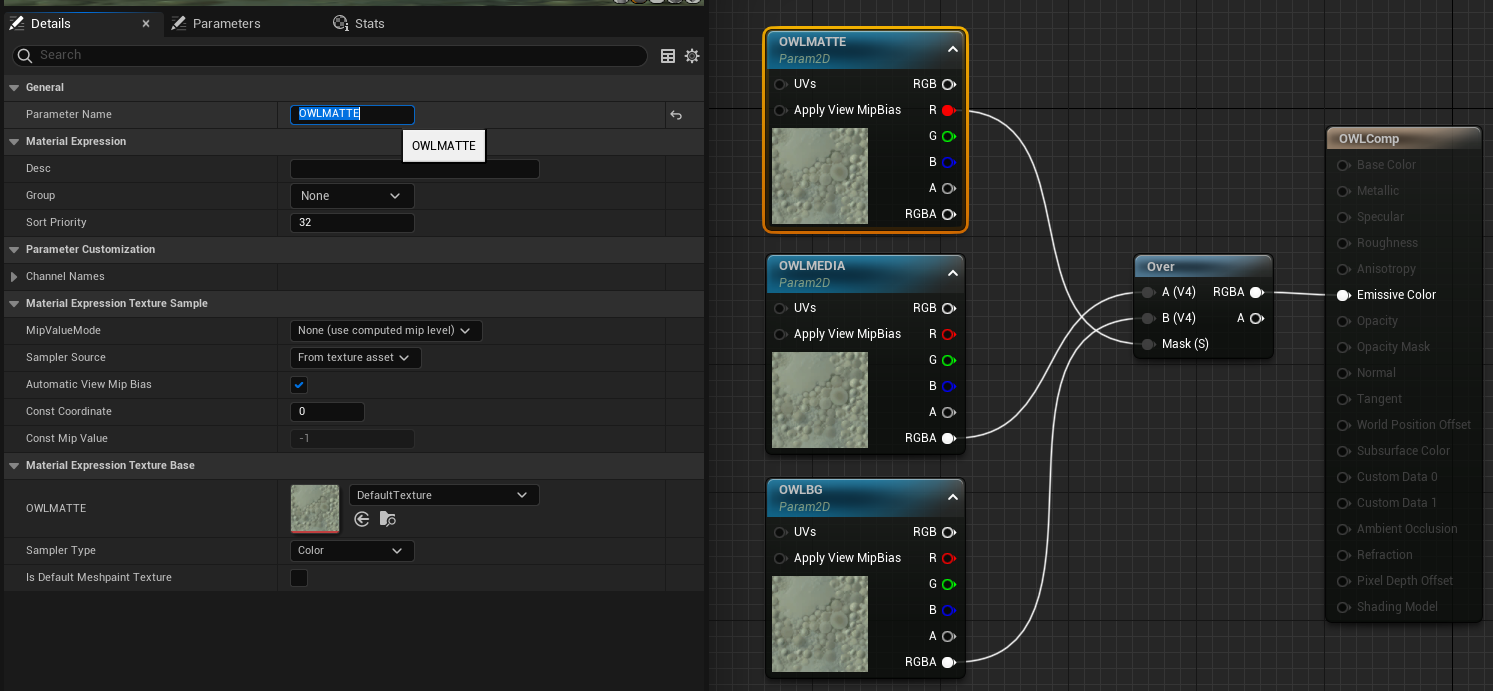
- The 'Over' node layers the Media Plate (A) over the OWLBG (B).
- The OWLMatte 'masks' the Media Plate (A) which cuts out the shapes in the Matte from the Media Plate.
- The Media Plate, OWLBG and OWLComp all use BGRA because they contain all colors and alpha.
- The OWLMatte only uses R because it only needs the single color to stencil out the shape from the Media Plate.
- Compile and save your Material! This material is combining our three layers into a single image:

- You will now also see the three layers that you have added in your Materials in your Transform Pass:
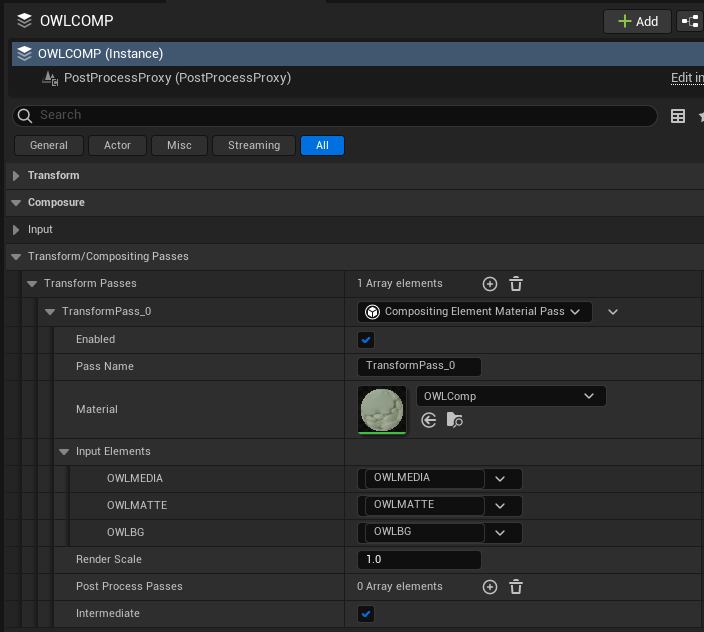
- We have now successfully combined the three layers into a single image:

- In the Details panel of the Comp select the same Camera as you have used for your Layers:
- However, If we check our Comp we can see that the Media feed fills the whole screen and is not properly scaled to our scene:
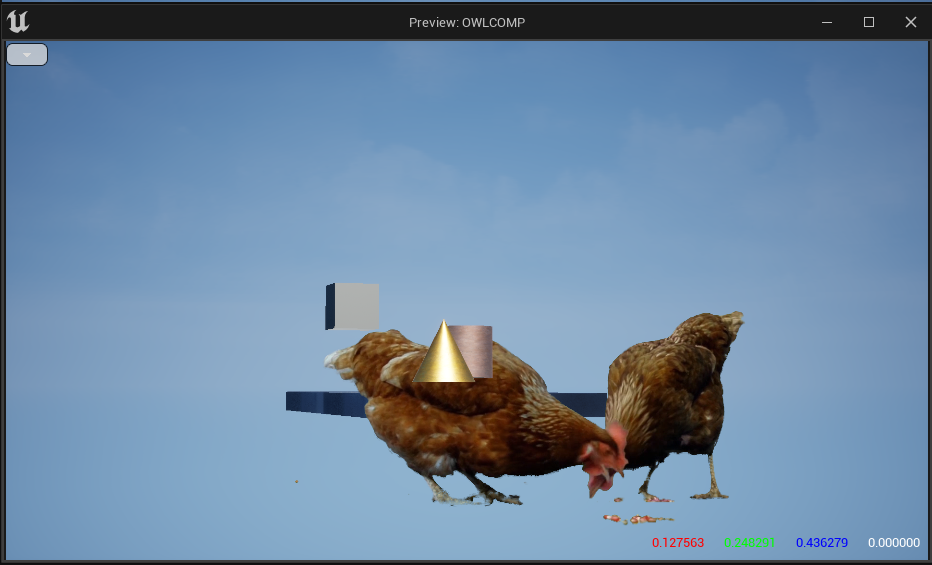
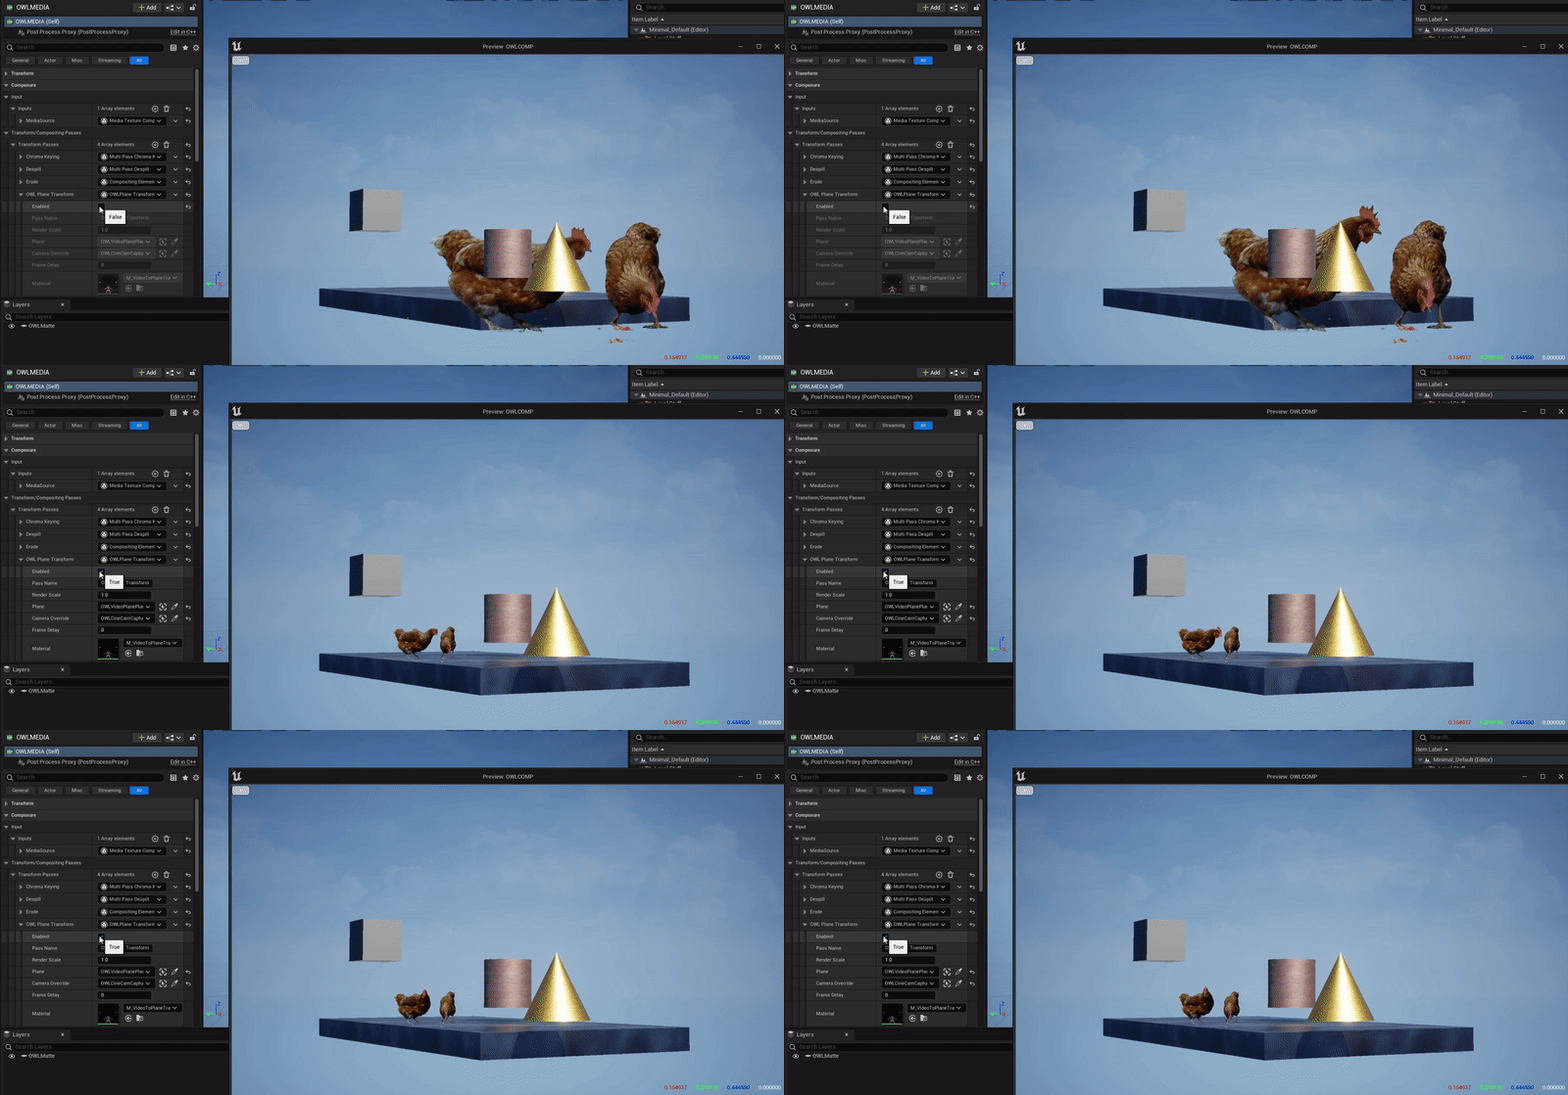
- To solve this, we need to add an OWL Video Plane Placement Actor which dynamically scales the size of the media feed to match the position of your camera:
.gif)
- Go to 'Place Actors', search 'OWL', select OWLVideo Plane Placement and drop it into your scene:
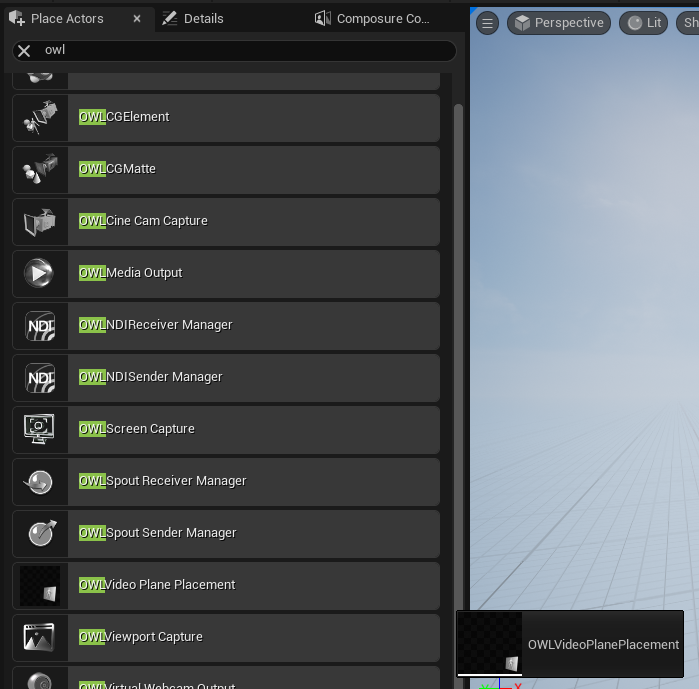
- You will now see a Video plane with the OWL logo which you can position in your scene where you want your talent to go (this can also be controlled dynamically):
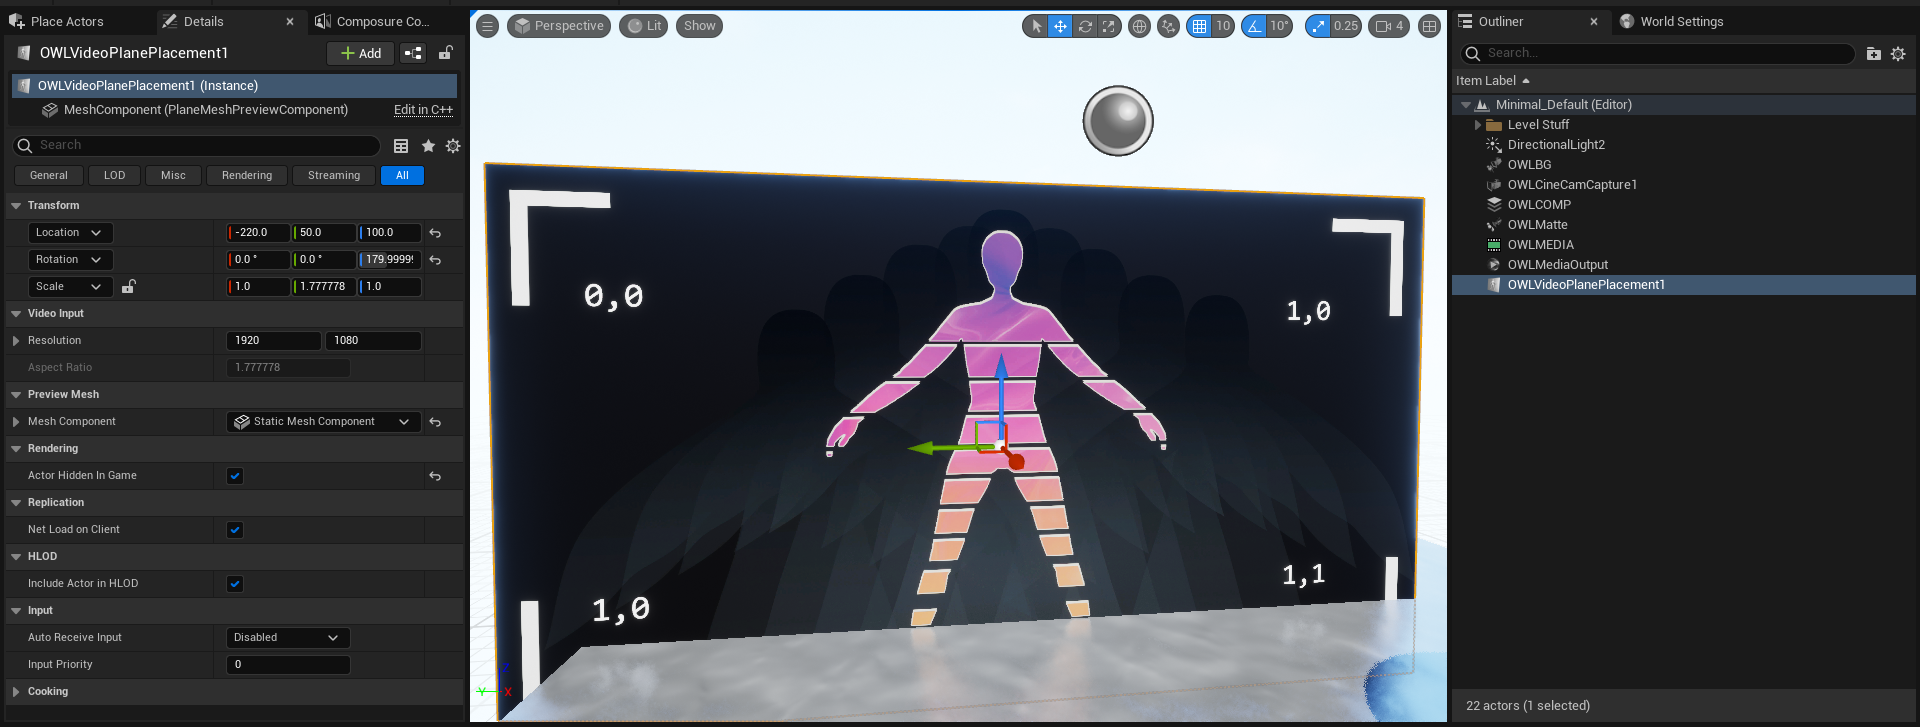
- Now in your Media Plate Details panel go to Composure> Transform/Compositing add a new Transform Pass and select OWLPlane Transform Pass:

- In the OWL Plane Transform Pass select:
- For Plane, the OWL Video Plane you added in step 9/10; and
- For Camera Override, the Camera you are using for your OWL CG Elements (steps 4.4-4.6 above):
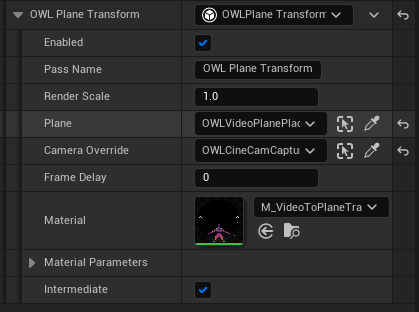
- Now when 'Enabled' is ticked you will see your Media scale perfectly into your scene:
.gif)
- To solve this, we need to add an OWL Video Plane Placement Actor which dynamically scales the size of the media feed to match the position of your camera:
- Congratulations! You have now created a simple Comp in Unreal. However, you move the camera you will see your three layers perfectly aligned together creating the illusion that they are all part of the same 3D space!
.gif)
- You can output your Comp by going to the Details panel of your main Comp> Output> Outputs:
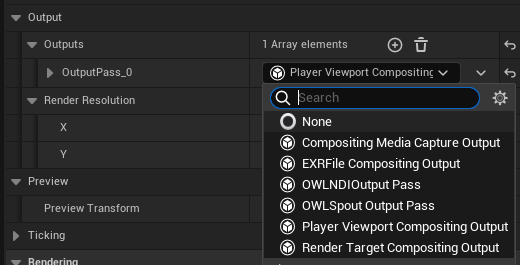
- The OWL NDI and Spout Output Passes let you stream your output direct to OBS or VMIX (see linked guides).
- Alternatively, you can use the Render Target Compositing Output and record direct to disk using OWL Media Output as shown here: