Lumen is the Default global illumination method for Unreal Engine and is highly recommended.
Lumen can cause 'seams' to appear (differences in visuals at the edge of the six faces that generate the camera image) due to the use of screen-space effects in post-processing.
The tips below should help you remove seams in almost all cases.
If seams are completely unavoidable then the alternatives are:
- Bake your Lighting (see guide below) which is very effective unless you need lights to dynamically respond to interactive scene elements.
- Render with Path-Tracing.
- Face Blend Percent: The most important setting is this percentage which adds a blend between the different cube faces and can be found in the 360Capture camera details panel.

- Increasing the Face Blend Percentage will increase the resolution of each of the 6 faces then will overlap and blend the edges of these faces.
-
A face blend of 5% will clean up most visual artefacts.
-
This will increase the workload put on the GPU when rendering. This is worth noting especially when rendering very high resolutions (tiling will likely be required).
- This can be used for all Lumen issues as well as other post-process settings for which seams can appear :
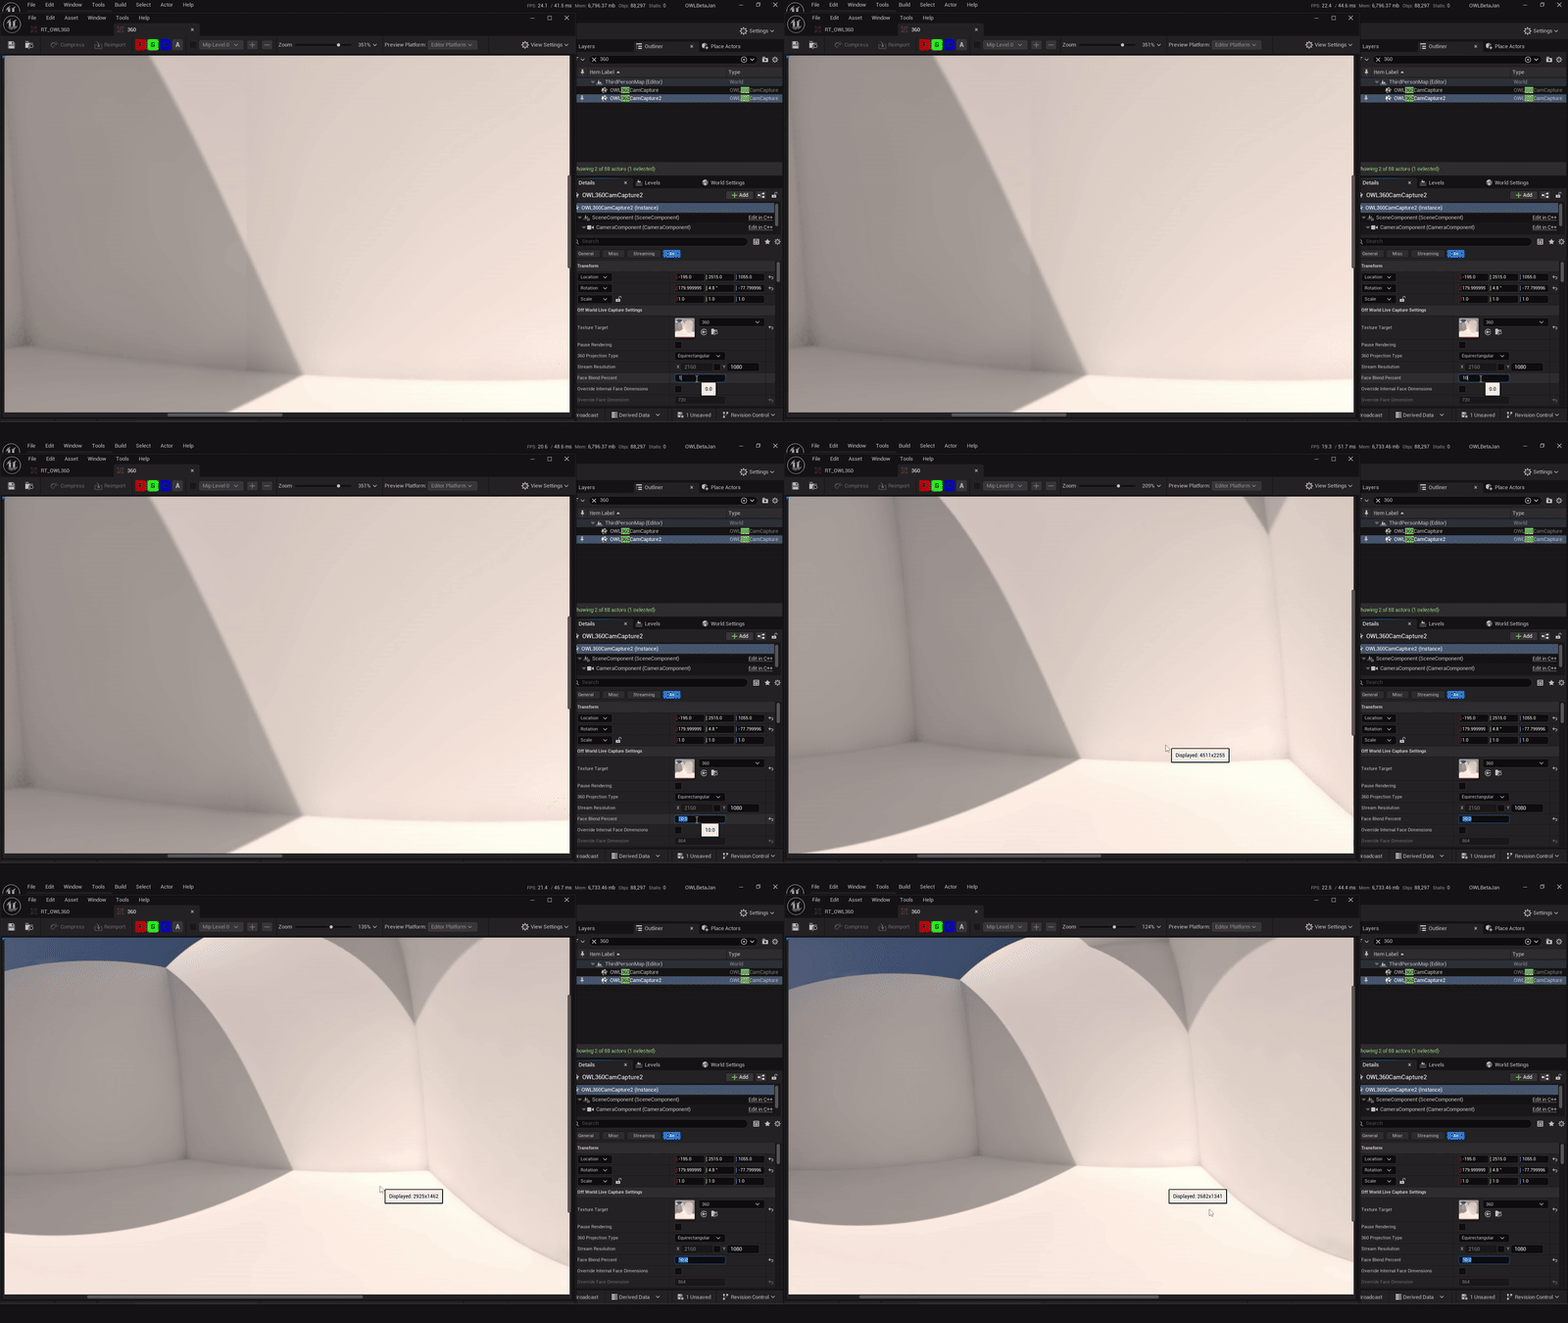.gif)
- Use Hardware Ray-Tracing: This can reduce seams because Lumen relies less on screen space effects to generate lighting.

- Cube Face Rotation: Using the Cube Face Rotation settings can prevent seams by ensuring that elements that affect screen-space effects are always positioned inside a face.
- Below is an example of four faces causing seams because of the position of an emissive mesh:
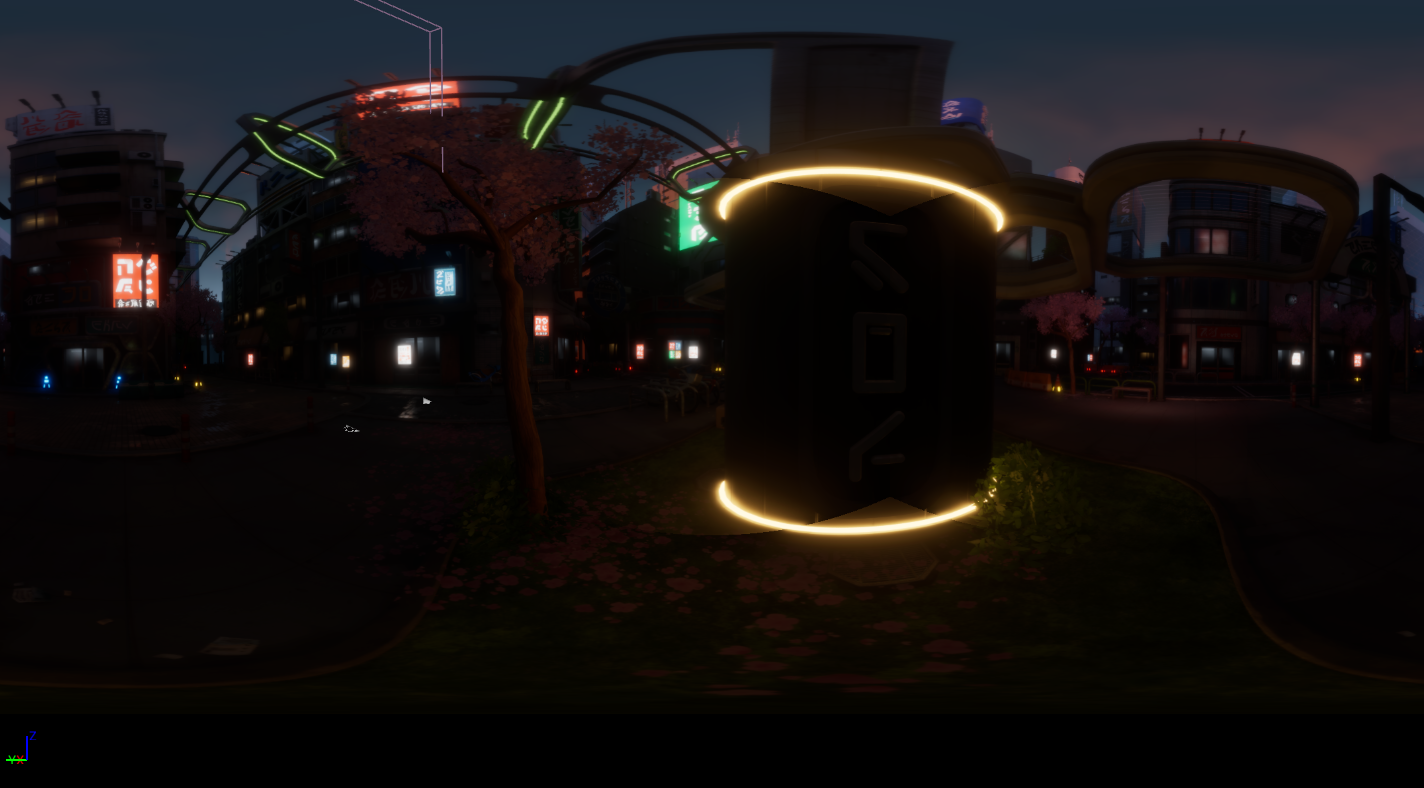
-
To remove a seam like this without using Face Blending, turn on Show Debug Face Colors and use the Cube Face Rotation values to position the seams so that they do not cross the emissive material:
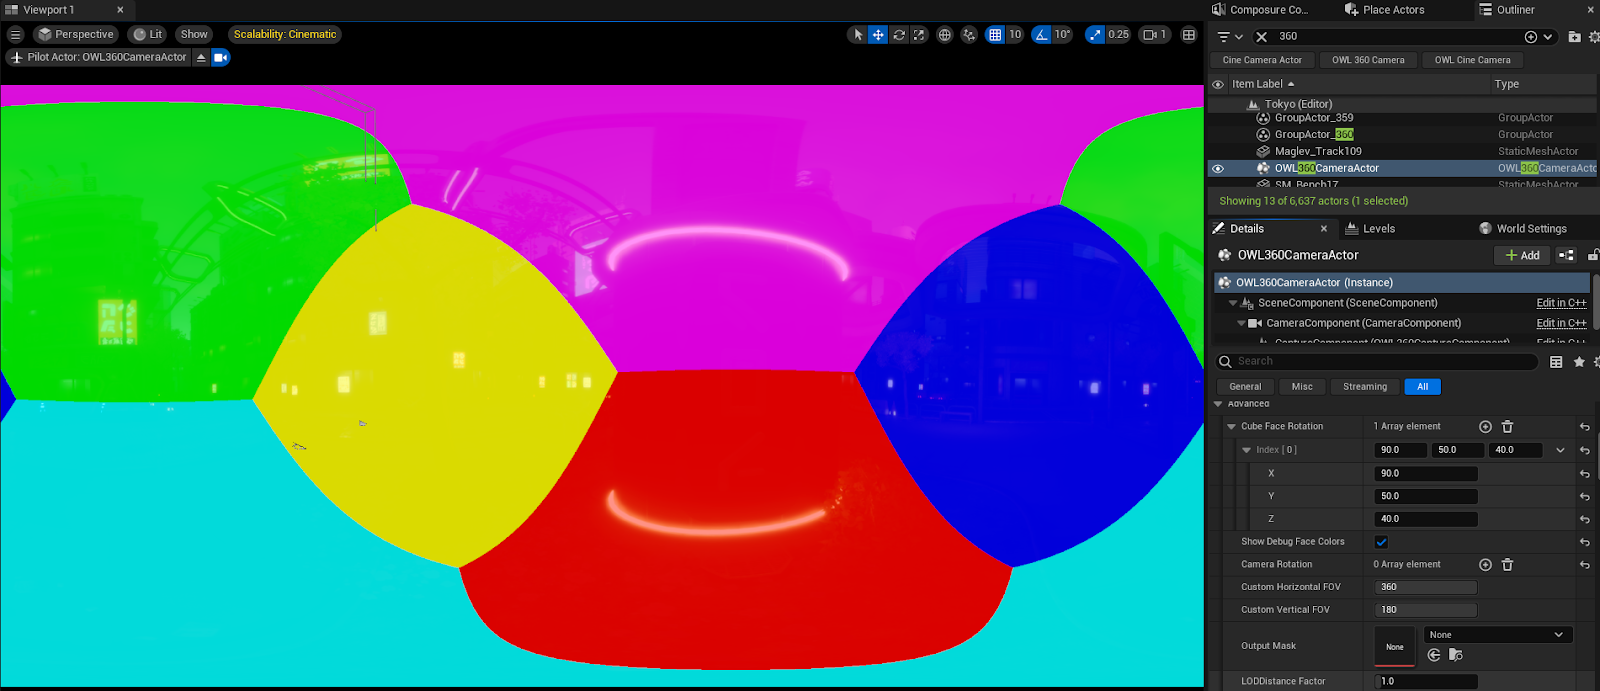
-
Now the seams will be invisible:
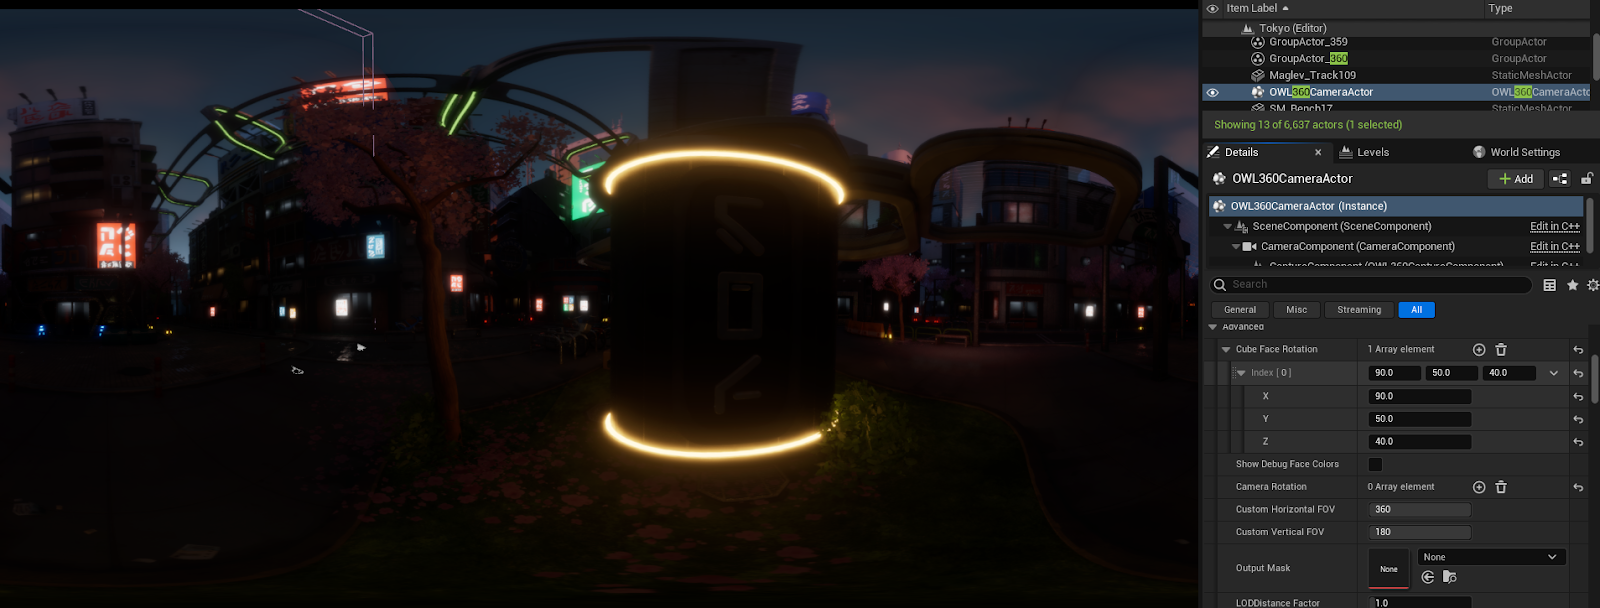
- This can be effective when rendering driving plates by positioning the cube face edges at the horizon line:
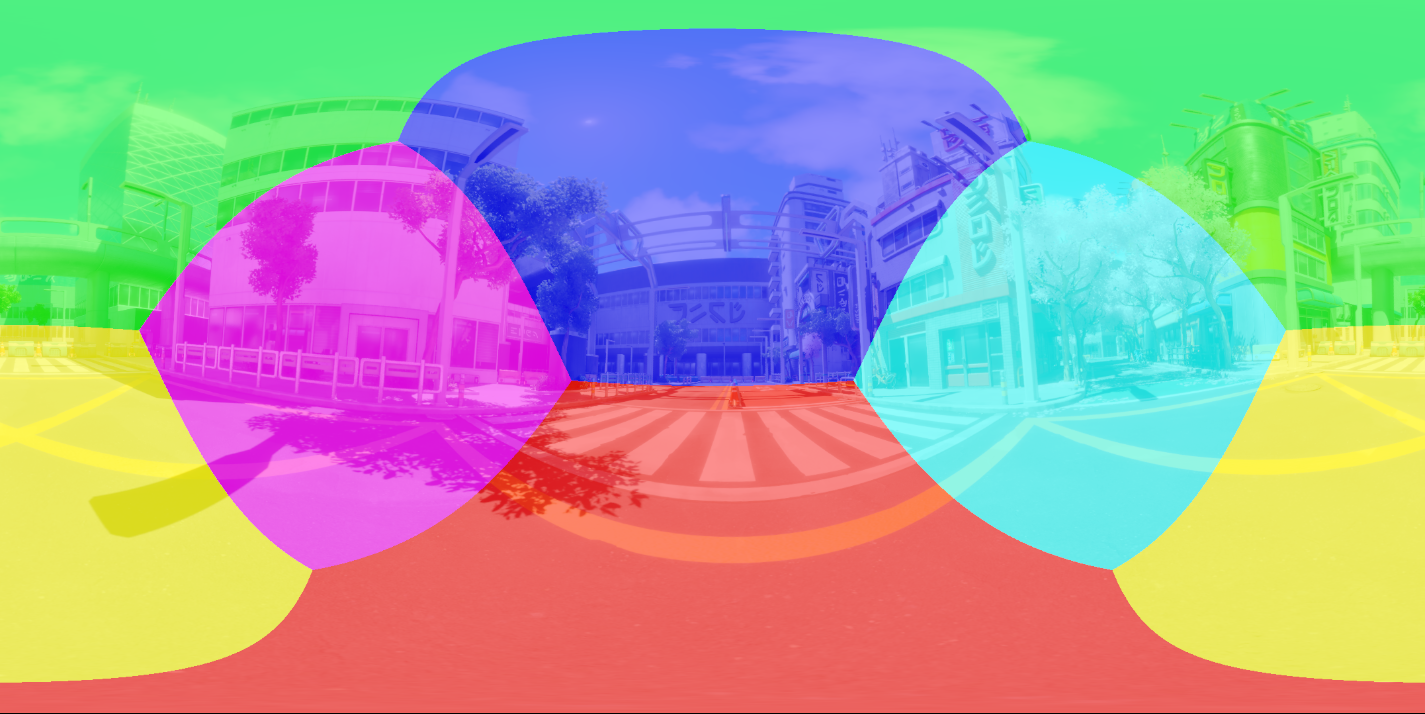
- Below is an example of four faces causing seams because of the position of an emissive mesh:
- Local Exposure Seams: Add a console variable Setting to your Movie Render Queue Settings:
- Use the Console Variable ‘r.LocalExposure’ and set the value to 0:
- With Local Exposure turned off you may start to see underexposed shadows. This can be fixed using the Shadows Gain in the OWL360Cam Post Process Section.
- Use the Console Variable ‘r.LocalExposure’ and set the value to 0:
- Turning Off Screen Traces: fixes a lot of interior seams caused by bounce lighting.
- Find the Post Process Volume in your scene, search for Screen Traces, then Untick the checkbox:
- You may notice some of the Global Illumination is lost by doing this and your image will have a more stark contrast.
- Find the Post Process Volume in your scene, search for Screen Traces, then Untick the checkbox:
- Meshes causing seams due to Indirect Lighting
- The meshes can be removed from Lumen Scene using by using the Mesh's Details panel to disable one of the following:
- For Software Ray Tracing, unchecking the box for Affect Distance Field Lighting.
- For Hardware Ray Tracing, unchecking the box for Visible in Ray Tracing.
- You can also separate complex objects in your modeling software to ensure that Unreal Engine can shade them more accurately, which can improve Lumen reflections and reduce seams.
- The meshes can be removed from Lumen Scene using by using the Mesh's Details panel to disable one of the following:
- Using Temporal Anti-Aliasing to Reduce Seams and Improve Global Illumination:
- In moving imagery it can be useful to add temporal anti aliasing samples to remove seams and improve shadows and reflections.
- Here is an comparison of 8 temporal samples with no anti aliasing.
- Baking Lighting: If you bake your lighting, it will not be calculated in real-time which avoids seams due to differences between what each face of the 360 Camera is looking at.
- Ensure "Allow Static Lighting" is ticked in Project Settings:
- In World Settings, untick "Force No Precomputed Lighting":
- In the Build drop down, in "Lighting Quality" select "Production":
- Then, in the Build Drop Down, select "Build Lighting Only":
- Wait until the build is complete:
- Once the build is complete you can set "Global Illumination" to None to reveal the fully baked in lighting in your scene:
- Ensure "Allow Static Lighting" is ticked in Project Settings: