N.B Please either "Clear" your Render Target or tick "Pause Rendering" in the Details panel of the OWL 360 Camera when you are finished with your preview to preserve GPU performance. For maximum performance see tips here.
Overview/ Key Tips
- High resolution rendering can take a long time, so use the Render Target preview as a first review of the output.
- Certain factors such as relative distance, motion and brightness can only be truly previewed in the final intended output format.
- Use the NDI output alongside preview programs such as Meta’d NDI receiver or Dome preview tools to test any sequences as a second review stage. This will help save time by getting a feel for the render before starting a full render.
- Render a shorter Custom Playback Range at the intended resolution as a third review stage. This will help you to gauge how the final encoding settings, color pipeline settings and frame rates feel in the final output format before committing to a full render.
- This will also give an idea of how long the full render will take by multiplying the custom range’s render time up to the full frame range amount.
- Run the shorter frame range through Post Production software such as Premier Pro, or Davinci considering Bitrate, Frame Rate and Colour Conversion so that the full pipeline has been established before waiting for the full render from UE.
How To Use the OWL Camera to Preview
You can use the OWL 360 Camera/ Capture Component Render Target to preview your output in real-time before you start your Render:
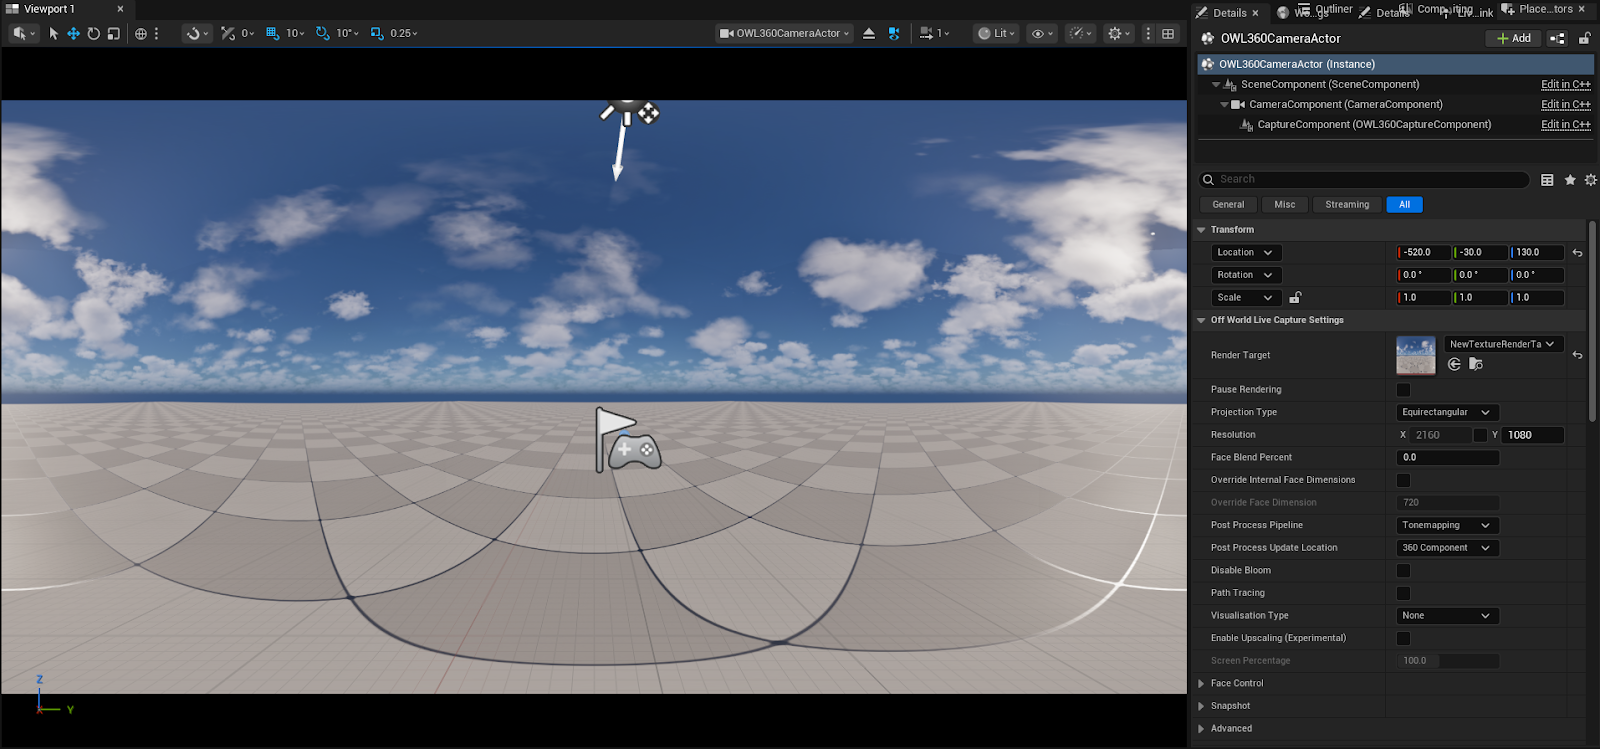
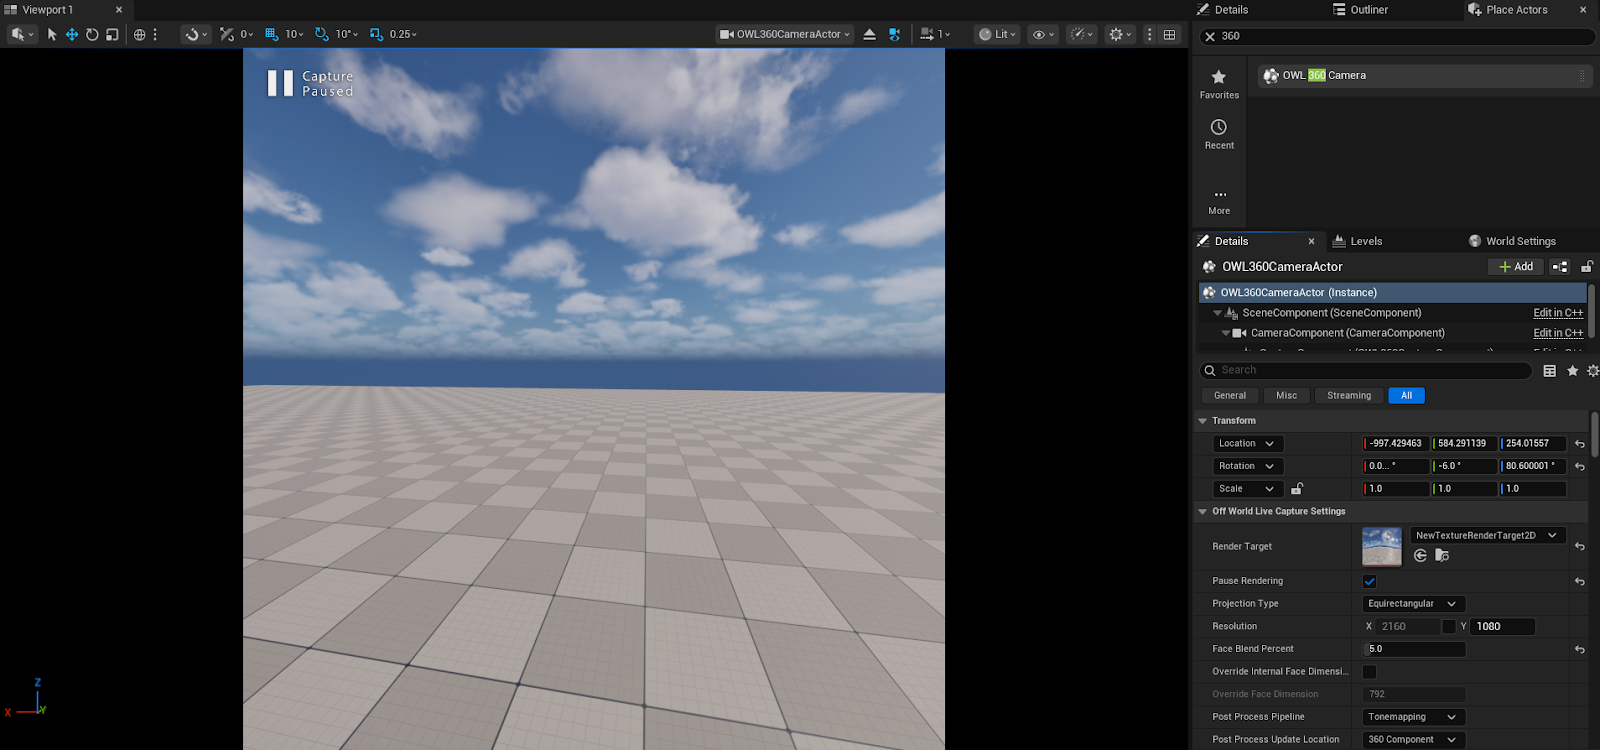
- Select your 360 Camera in Outliner.
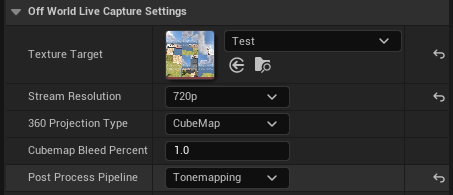
- In its Details panel select the resolution you would like to preview at. We recommend a lower resolution (720p or 1080p) as it's normally possible to see all details but it's not as performance heavy as 4K:
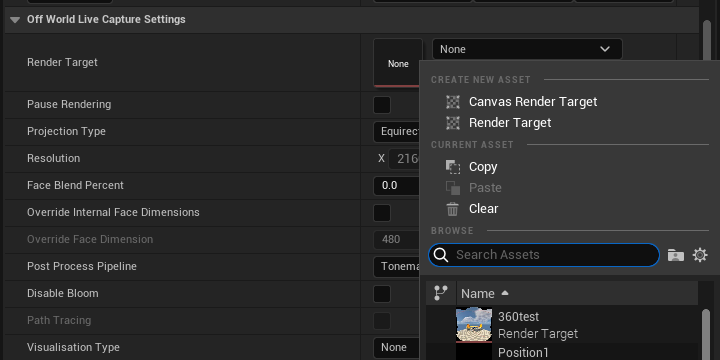
- Then add a Render Target (Texture Target) by selecting the drop down and creating a new one if required:
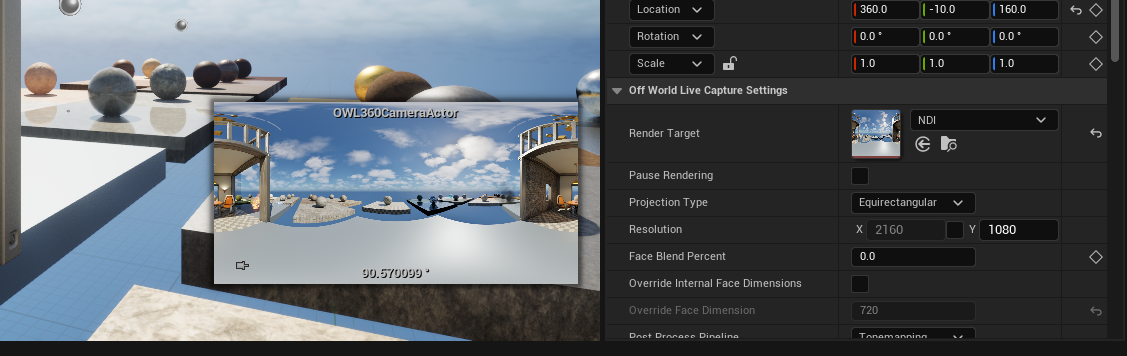
- Once you add a Render Target you will see your projection in the Camera preview in the Unreal Viewport. When the Render Target is unpaused using the Pause Rendering checkbox, the 360 output will become visible.
To pin this window to the viewport so that it stays visible when not selected, use the Pin Preview button in the bottom left corner of the Preview Window:
- Ensure that Post-Process Pipeline 'Tonemapping' is selected. 360 Bloom is not currently available in the MRQ integration:
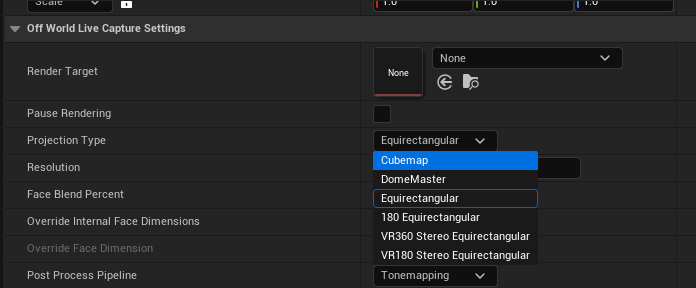
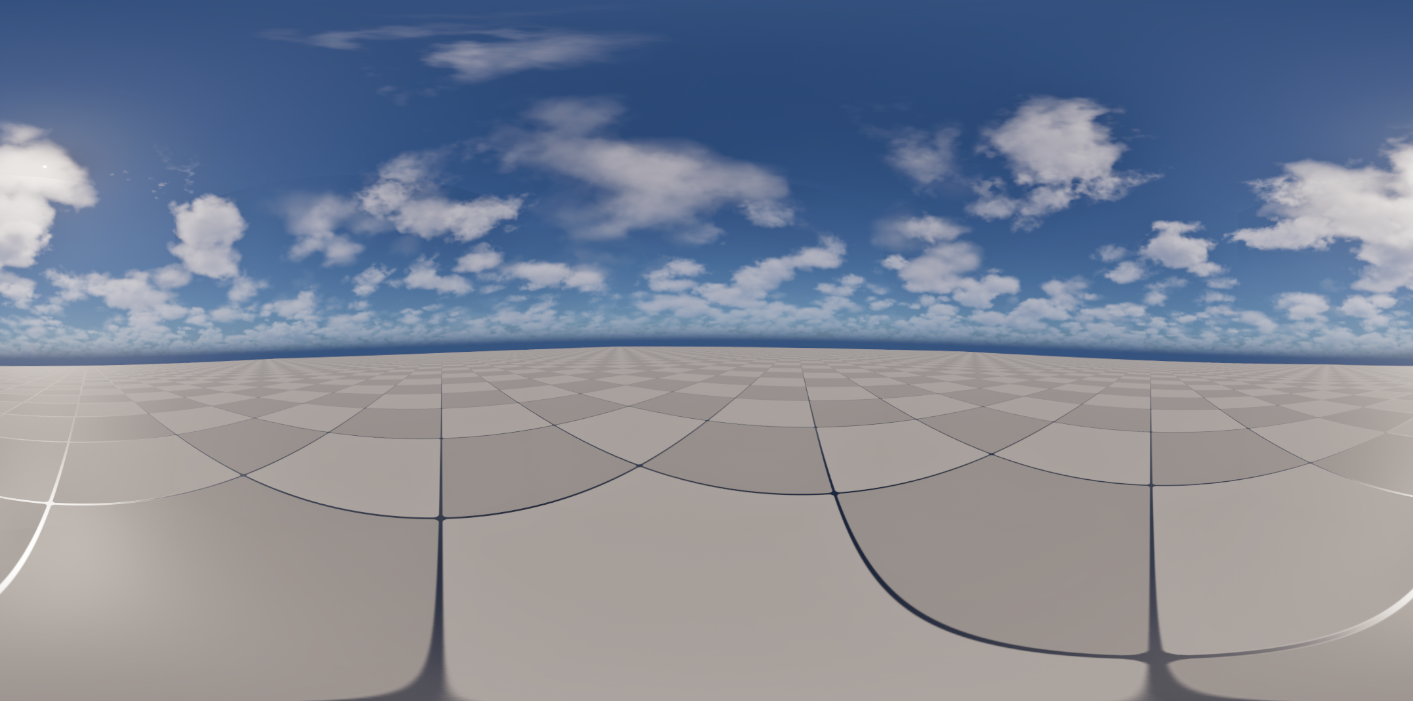
- Select the output format you want to test with. You can either select the format you will render with or we recommend selecting Equirectangular if you want to check for seams:
- When you open the Render Target you will see your output being rendered in real-time. This will also work as you play your Sequence:
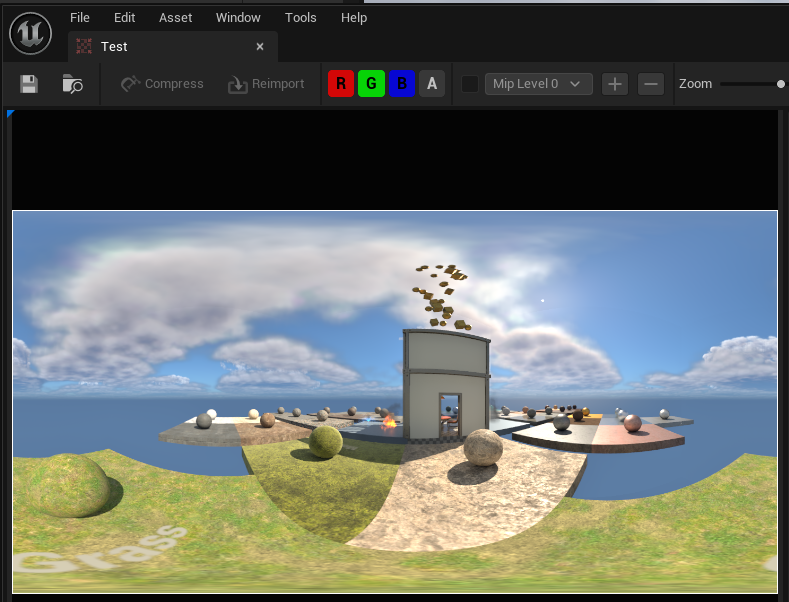
-
To Pilot the Camera, right click on the OWL360CameraActor and select ‘PilotOWL360CameraActor’ or press Ctrl+Shift+P with the Actor selected.

- With the Render Target assigned and the 360 camera Piloted a preview of the 360 output will be visible over the viewport.
- This preview is used to navigate the level, scout for shots and have an accurate idea of what the final rendered output will look like. The icons in the Editor Viewport do not respond to the 360 output distortion, so to hide these icons, go into game view by pressing ‘G’.
- You may want to pause rendering the 360 camera render target to preserve performance. Below is an example of how to Pause Rendering during Runtime using the Level Blueprint.
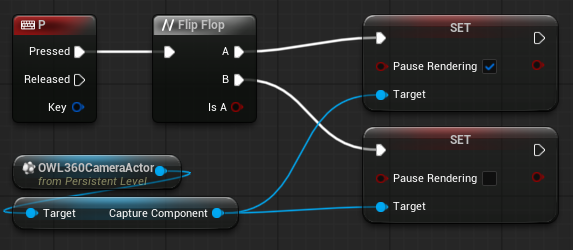
- Enabling Pause Rendering will return to the default 360CineCameraActor's view, showing the 1:1 aspect ratio front face of the camera.
- Enabling Pause Rendering will return to the default 360CineCameraActor's view, showing the 1:1 aspect ratio front face of the camera.
Previz in Headset or in Mock-Up Venue via Spout or NDI
- You can live-stream the Render Target to a headset or a previz software in real-time to preview your content in real-time, making edits before committing to your final render.
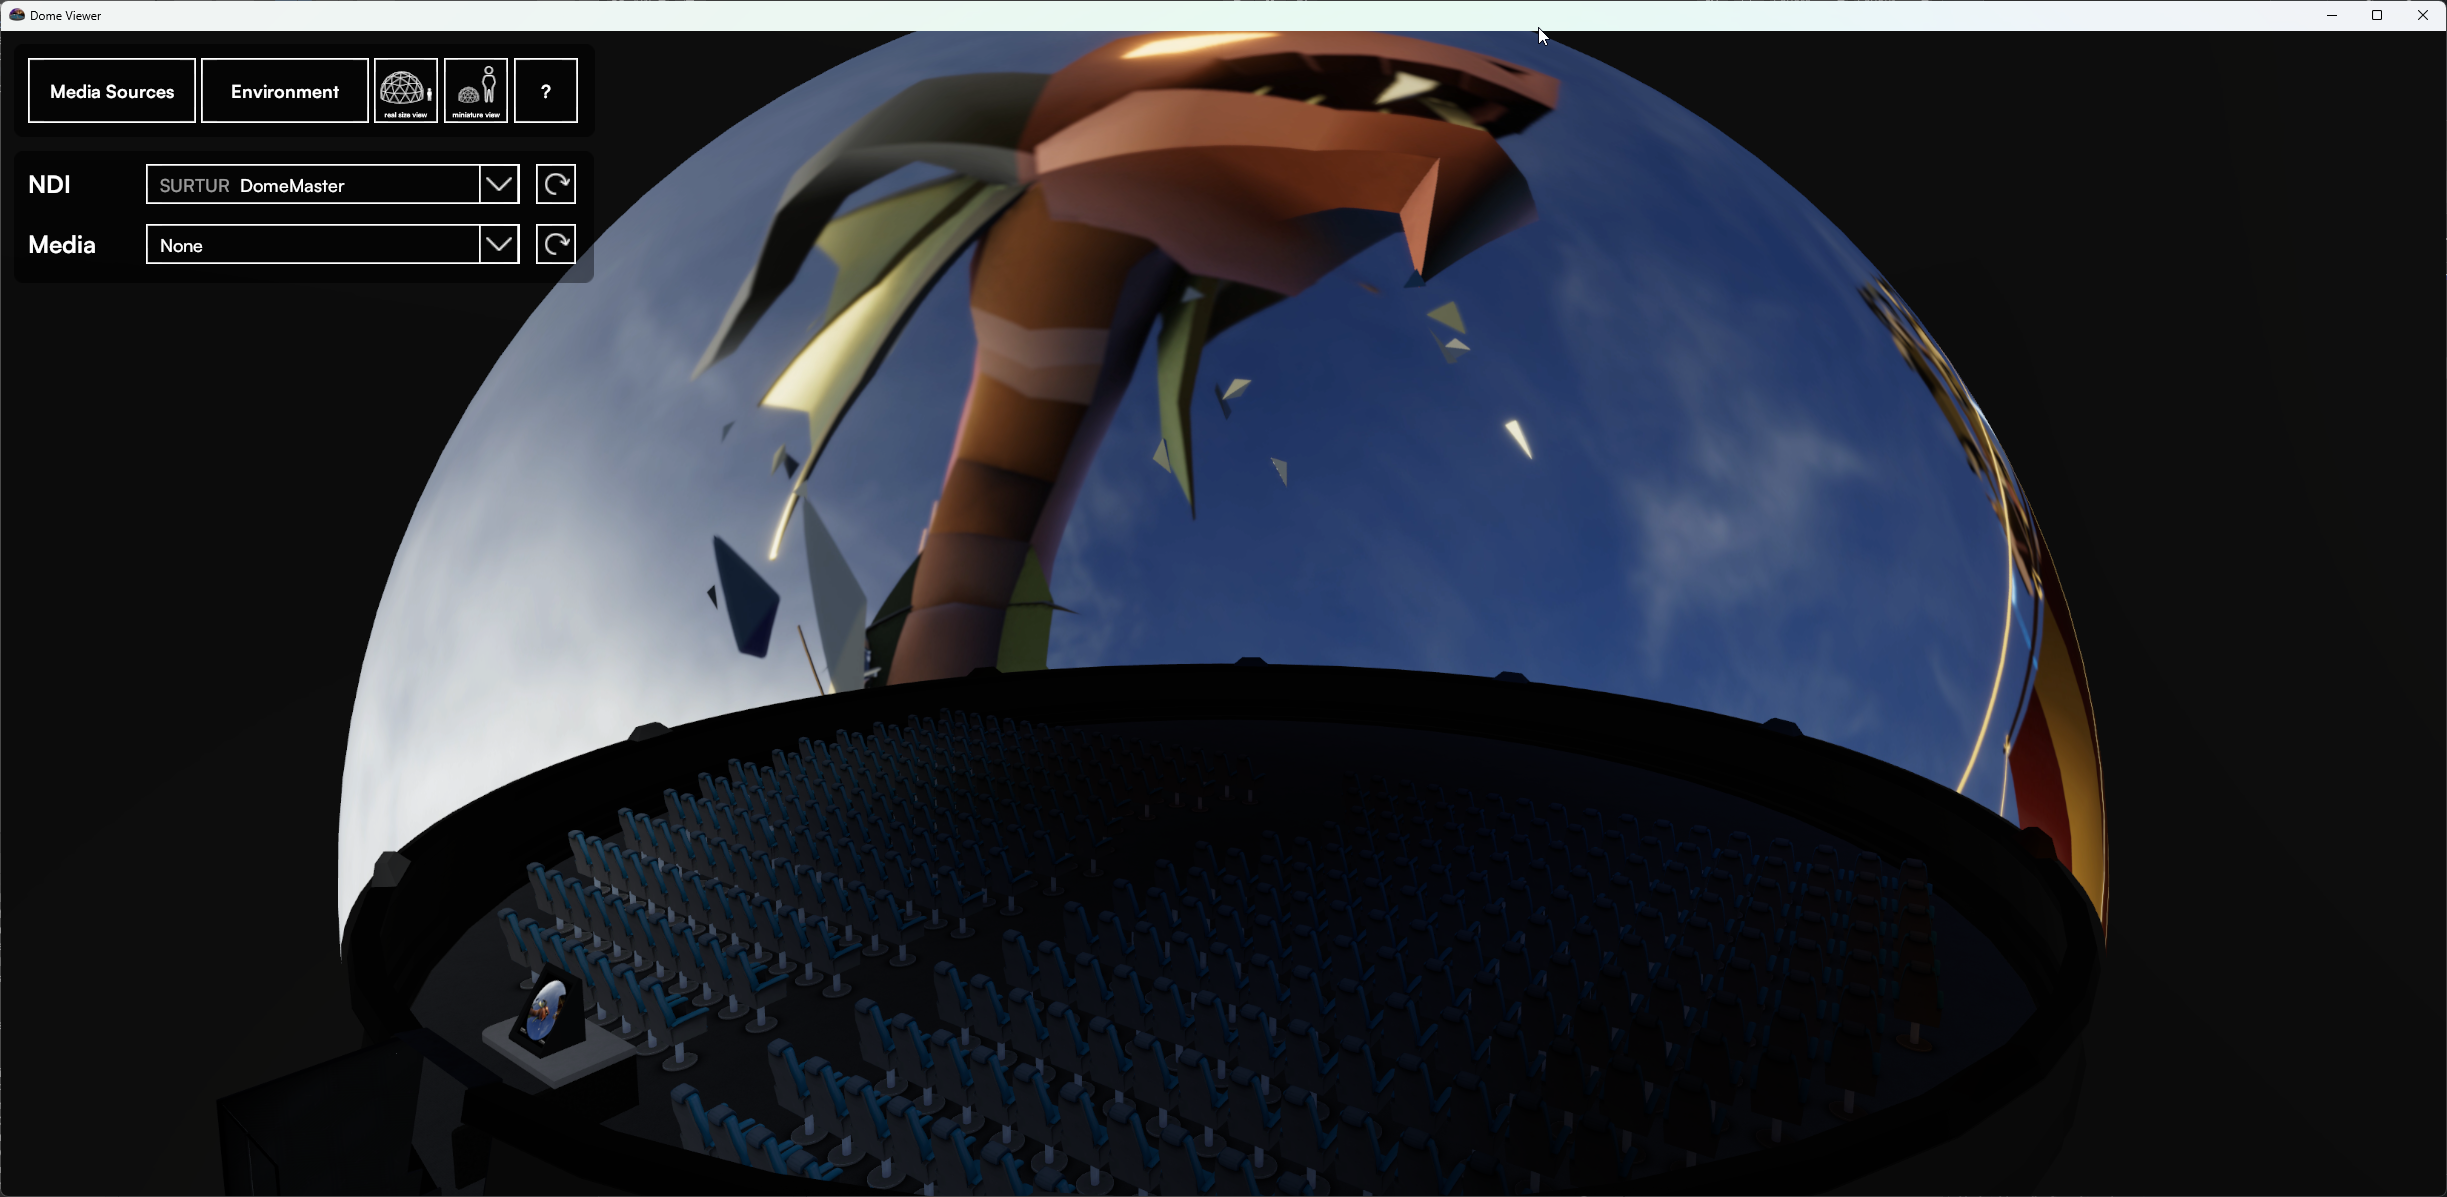
- If you are doing a DomeMaster projection, then you can use the DomeViewer software both in Oculus or Windows to preview your real-time content.
- If you are outputting VR content then you want to view your 180/ 360 stereo output in your headset. You can use the VR.NDIUntethered app in Oculus to receive a live feed direct to the headset where you can previz the content.
- In both cases, to send your stream from Unreal:
- Go to Place Actors and add an OWL NDI Sender Manager to your level:
-
In the Details Panel for the NDI Sender Manager, assign the same Render Target to the Source Render Target parameter as you had for your 360 Camera. Give the Sender a Name and make it active.
- Alternatively, you can follow the same steps with the OWL Spout Sender Manager which can also be found in the Off World Live Place Actors panel.
- Spout can only send on the same machine, but NDI can send over the network, so pick these as you prefer.
- Go to Place Actors and add an OWL NDI Sender Manager to your level:
- Once you have your Spout or NDI output set up, you can go to DomeViewer and select them as Media Sources in the top left. You will now see your live-rendered output in your Dome!

- If you are outputting VR content then you want to view your 180/ 360 stereo output in your headset. You can use the VR.NDIUntethered app in Oculus to receive a live feed direct to the headset where you can previz the content in stereoscopic format:
- You will need both your headset and computer connected to the same network, ideally via cable but fast WIFI is also fine.
- It is not recommended to go above 4K resolution for real time playback.

