NDI is a protocol which allows you to share a video and audio over the network between machines (including over the internet using NDI Bridge).
You can live-stream to Unreal Engine via NDI either into a Render Target or in to Unreal's Media Framework which can be used with nDisplay, Composure, Media Plate and other useful tools:
Instantly Input with the Media Input Wizard:
- In the Off World Live Unreal Editor drop down select the Media Input Wizard:
- In the window that opens:
- Select NDI as your input format.
- You need an active NDI Sender to receive, such as from OBS Studio. You can select this from the list or refresh if you don't see it.
- You can select if you want to include audio and alpha channel. If you select audio, a Sound Wave will be automatically added to your level through which you can manage the audio playback.
- You can select between three options of how to receive the texture:
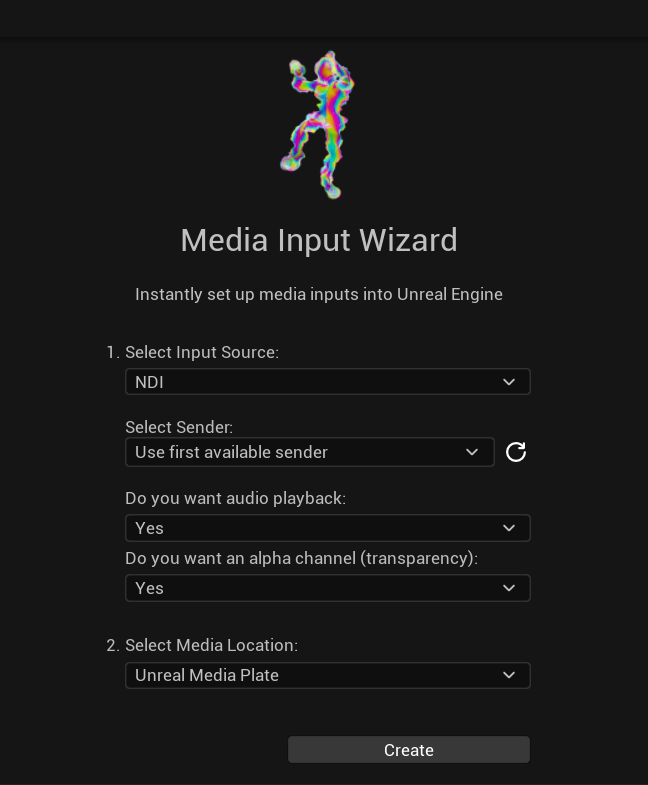
- Media Plate: This is Unreal's media plate which avoids anti-aliasing. We recommend this option if you want clean media in your scene. This uses the Media Framework NDI input below.
- Material: This is to an Unreal material which you can use as you like in your scene. This uses the Render Target input below.
- Plane: This is to a standard Unreal plane. This will have ghosting on it due to Unreal post processing so we recommend the Media Plate unless you need a plane for a specific reason. This uses the Render Target input below.
- Click create and the sender will automatically be generated in your scene.
Use Unreal Media Framework to Input NDI into nDisplay, Composure, etc
NDI can now be received via an Actor created in the Content Browser, which is compatible with Media Plate, Composure and nDisplay workflows.
- To add a Media source right click the Content Browser and select NDI Source:
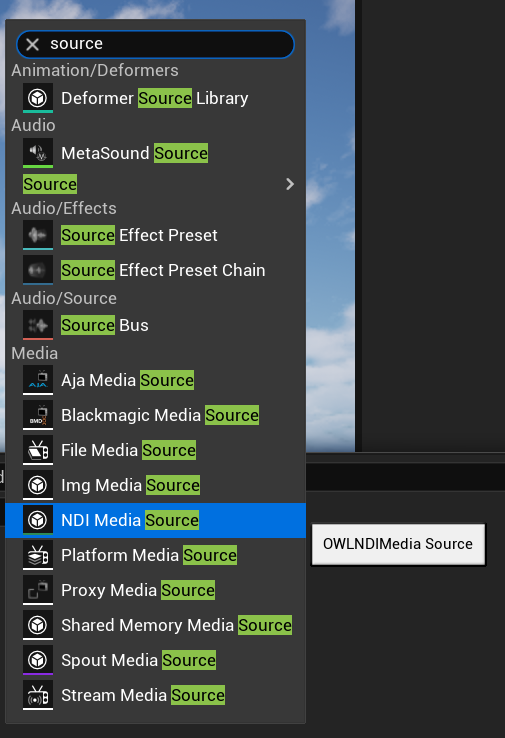 :
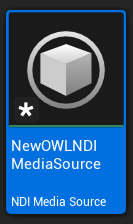
: - This will create a NDI Media Source Actor. Click to access it’s properties.
- Use the NDI Sender Name dropdown to select a NDI source from the list of active sources. If you don't select it will just use the first available active sender. Use the refresh button if a new source has been initiated since the NDI Media Source Actor has been open.

- Bandwidth: Is used to select between Highest (the native stream resolution which will consume more bandwidth), Lowest (a 640x380 resolution stream) Audio only or Metadata only.
- Color Format: Selects between 10bit color input (Best) (this is if you are sending from a 10bit source) and 8bit color input (Fastest).
- Use the Fix Gamma Checkbox for media sources that are in a different colorspace to UE’s default sRGB colorspace. Quicktime video are an example of media sources that can be fixed with this option. This helps ensure proper color reproduction when receiving from external applications. Keep this unticked if you want to receive the raw color input.
- Convert 8-bit textures to 16-bit format for better color precision.
Useful when working with HDR workflows or when higher precision is needed. - Use OCIO will convert the colors of the NDI input into your selected OCIO color space.
- Enable Audio will input any audio from the NDI source into Unreal and you can pick the reference level from the drop down.
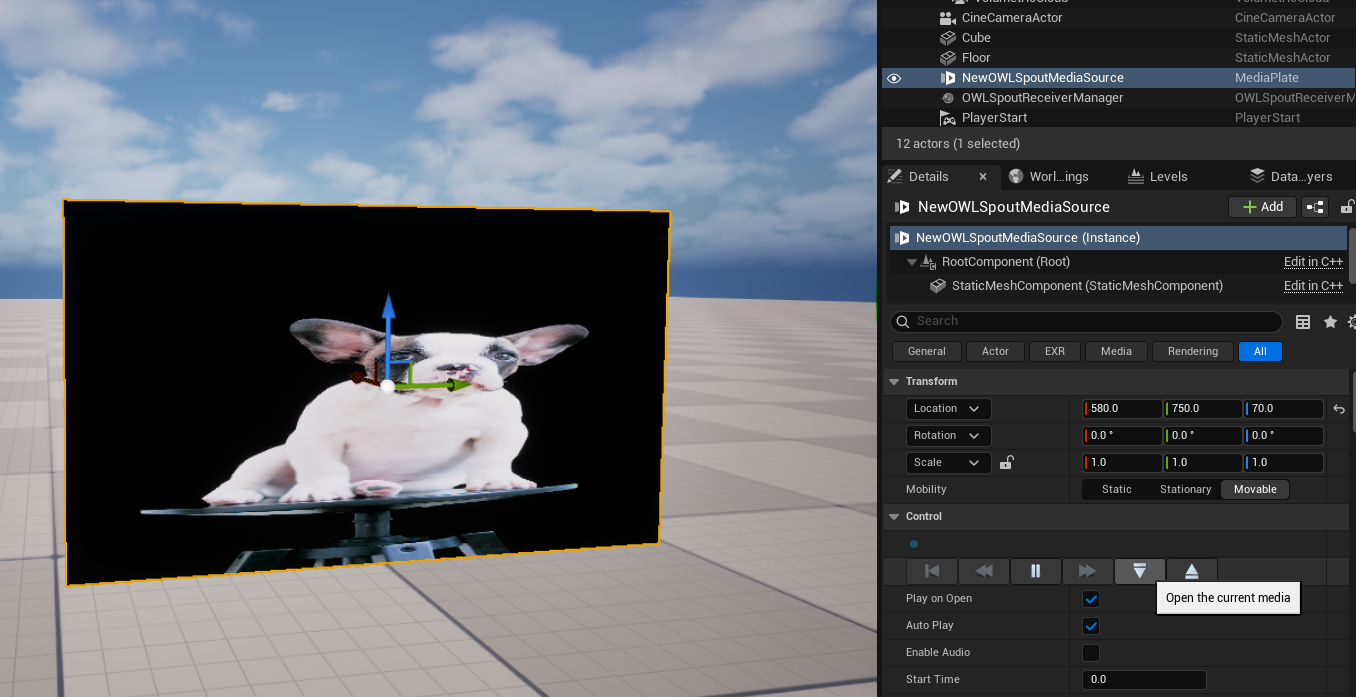
- Dragging the OWL NDI Media Source Directly in to the viewport will create a new Unreal Media Plate Actor with the Source already assigned. Click the Open button in the Details panel of the Media plate to view the Source:
- If you want to add the NDI input as a Source to an existing Unreal Media Plate then navigate to the media Plate’s Details panel, find the Playlist Section, ensure the Media Plate resource is set to Asset and then select the NDI Source from the dropdown:

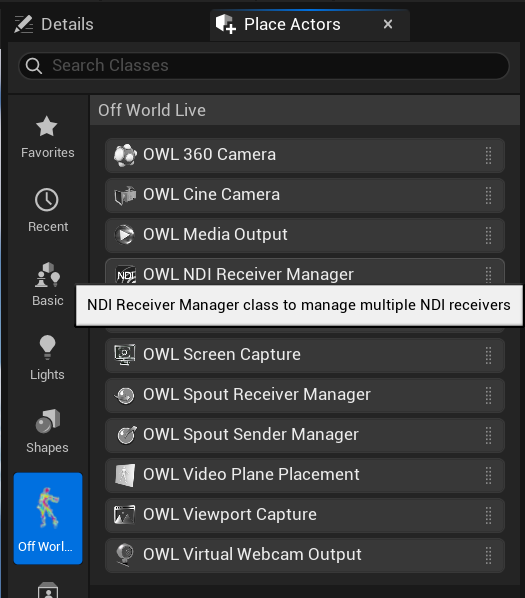
Use the OWL NDI Receiver Manager to receive NDI to a Render Target
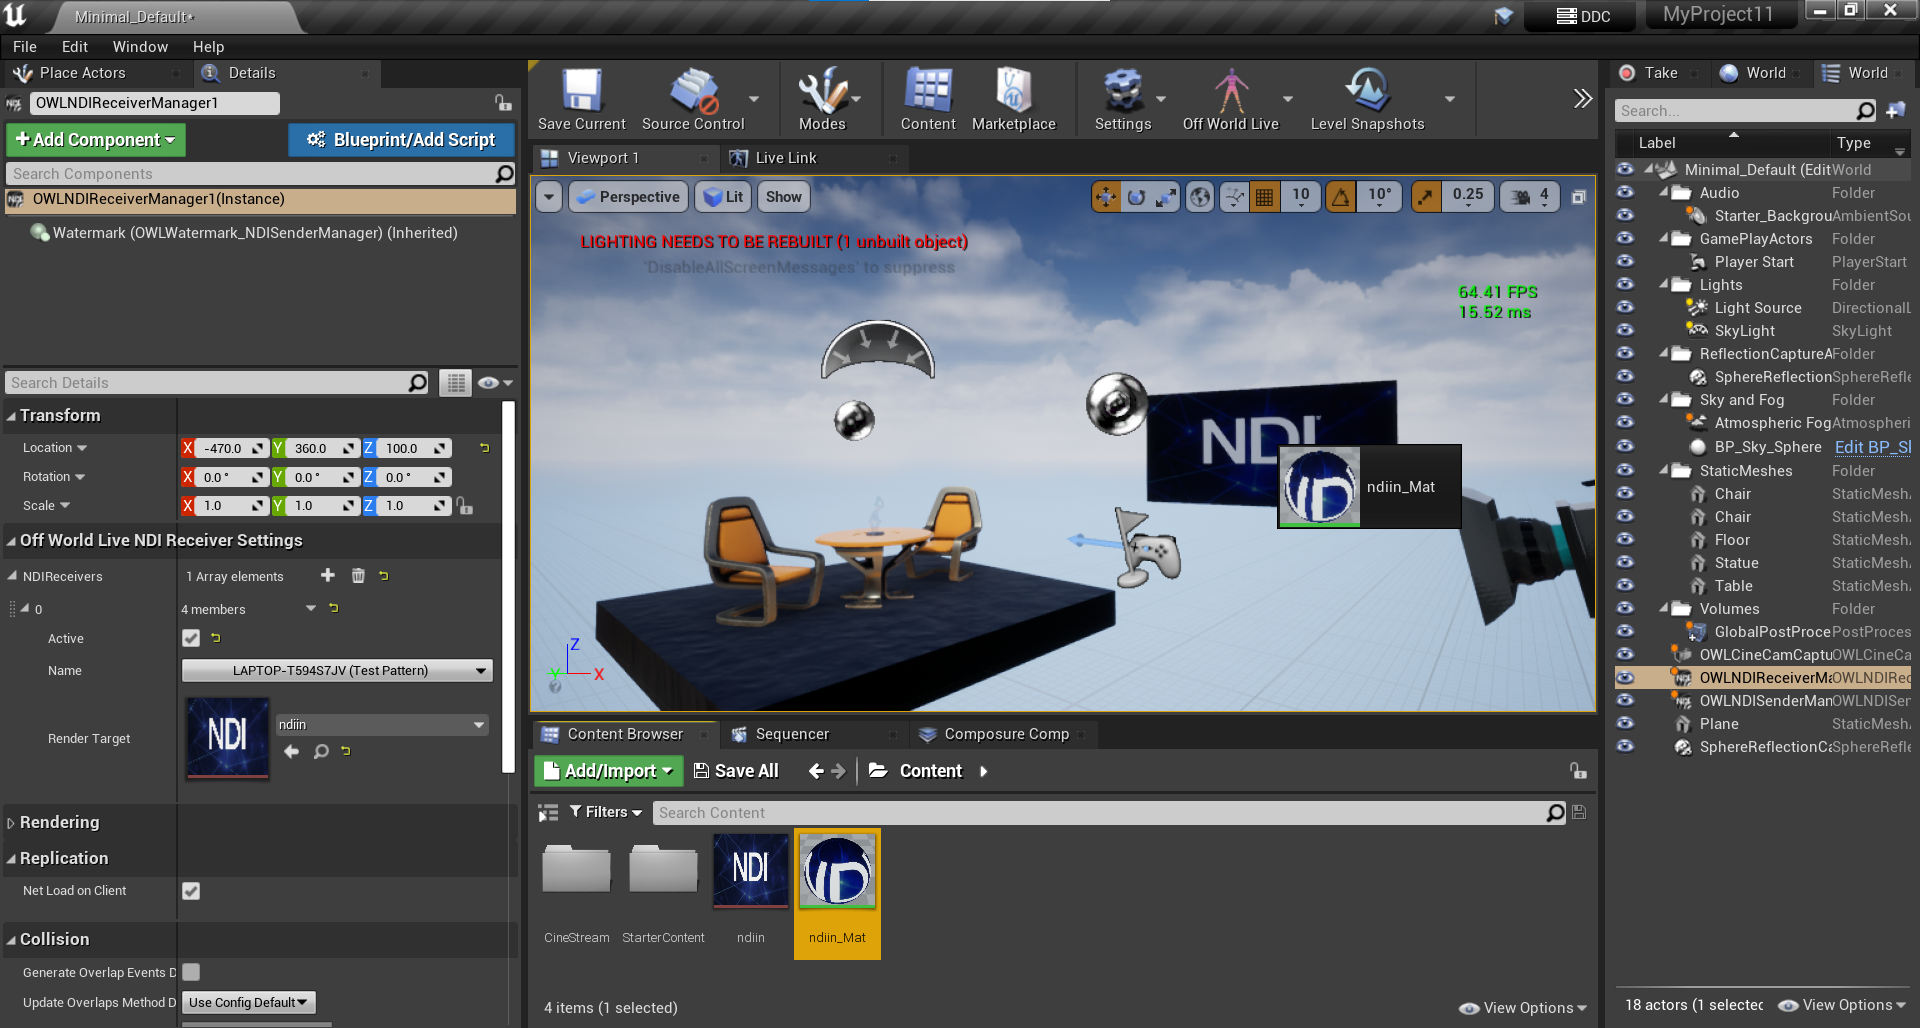
- Go to the 'Place Actors' panel > 'Off World Live' and drag-and-drop the 'OWL NDI Receiver Manager' into your scene:
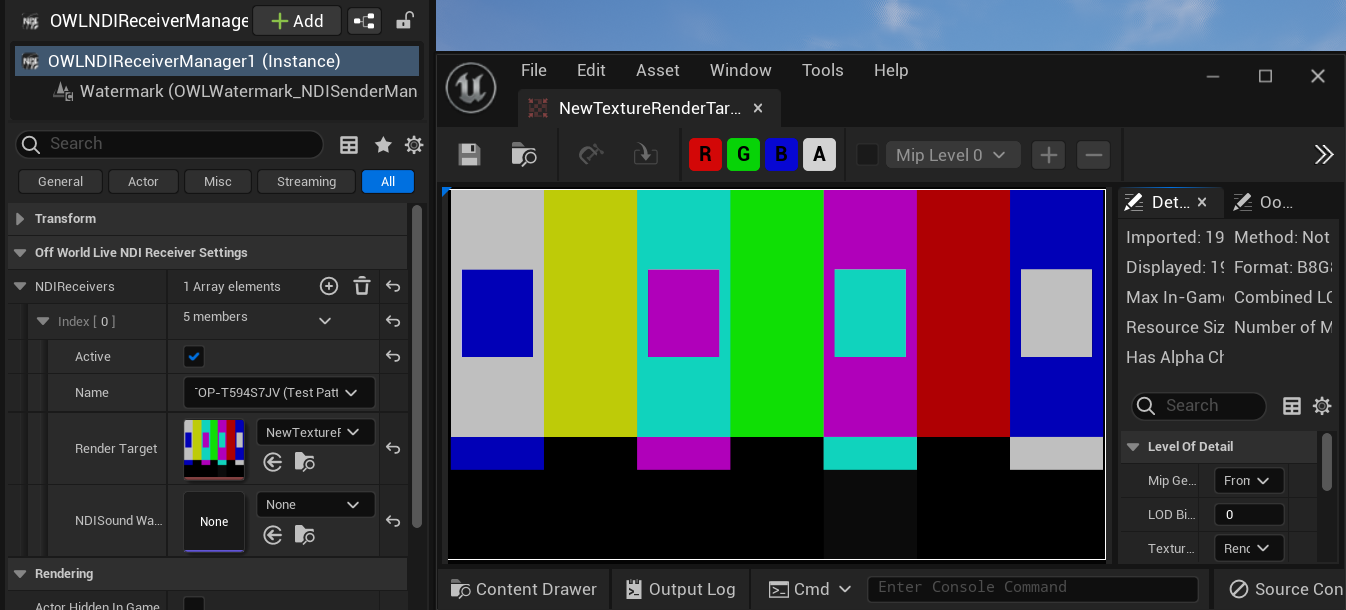
- In the 'Details' panel, go to 'Off World Live NDI Receiver Settings' and adjsut your settings to create your input:

- Active can be toggled to start/ stop the receiver
- You need to add or create a Render Target to receive the video input.
- You can select between different Senders in the drop down or just use the First Sender.
- For Color Management and Performance please see the descriptions above.
- To add audio you need to create a Sound Wave using the drop down. You can then select a Reference Level if required. The audio sync mode lets you have automatically audio-video sync or create a delay if you need.
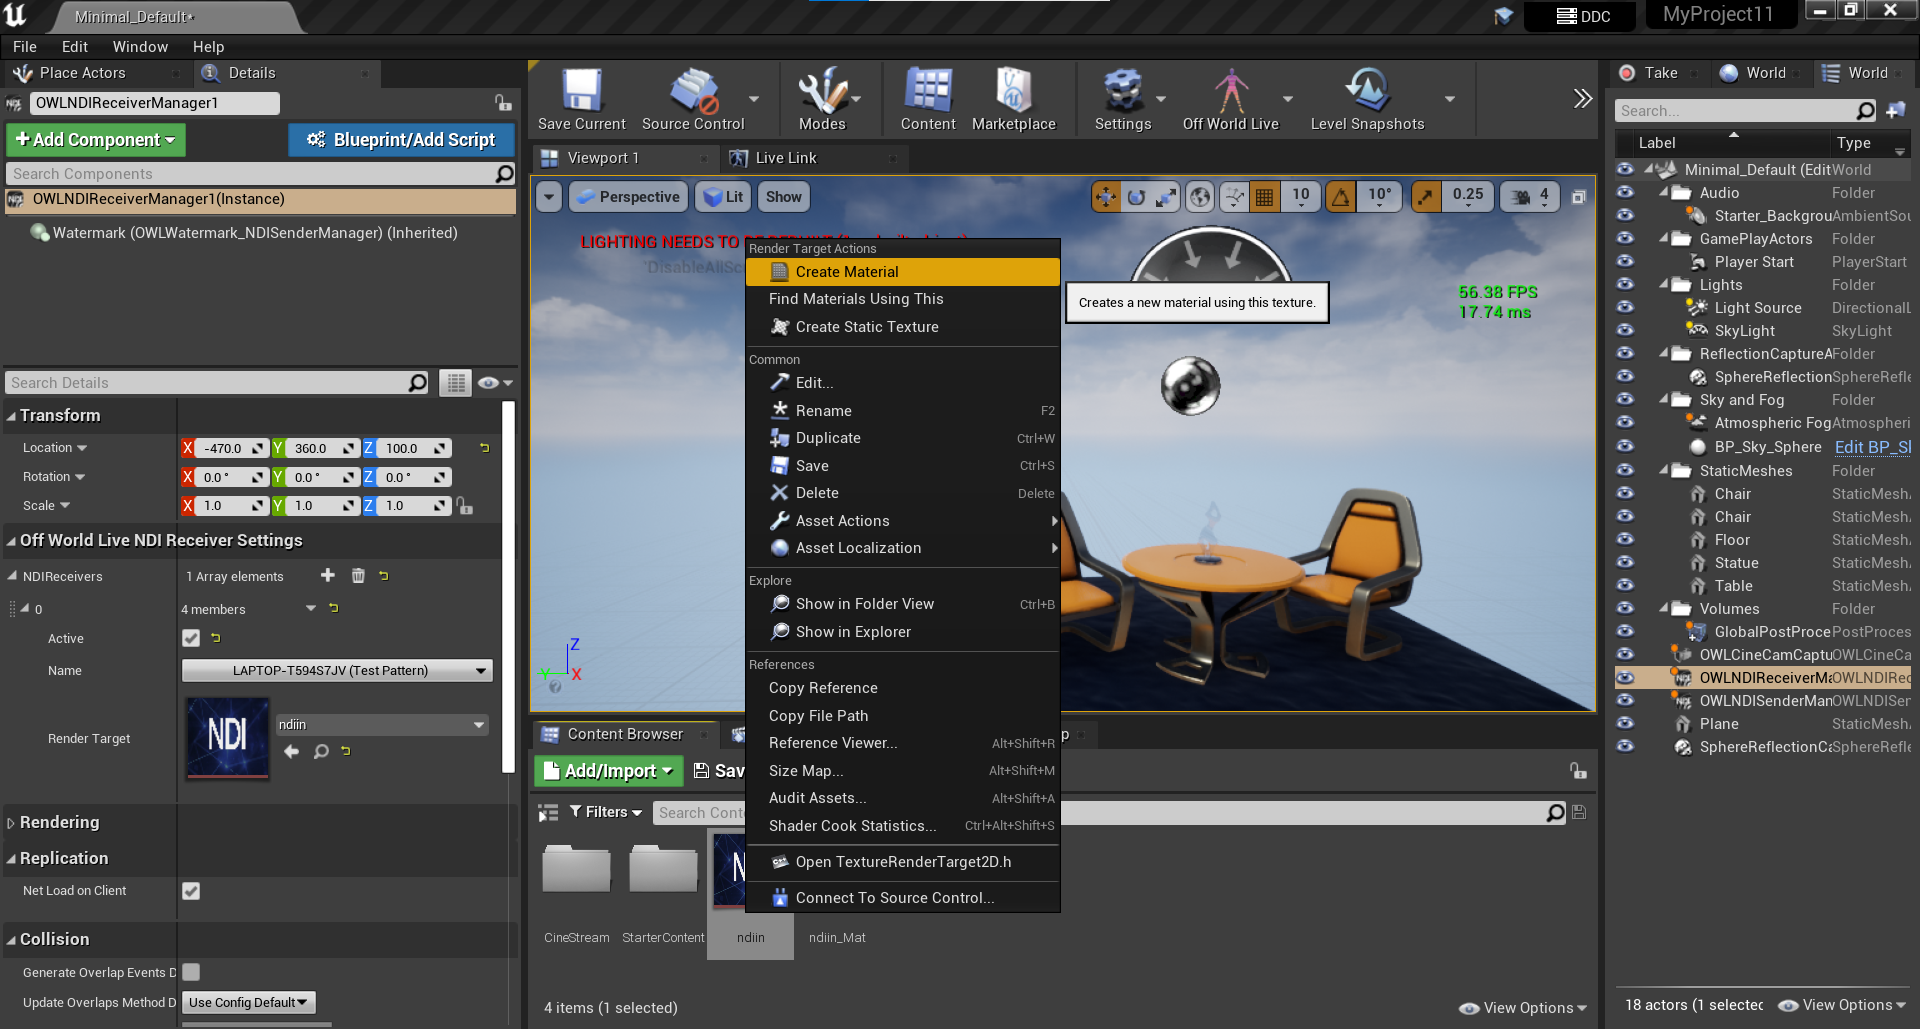
- Your NDI source is now sending to a Render Target in Unreal:
- To add your NDI feed into your level onto a plane, find your Render Target in the Content Browser and create a Material from it:
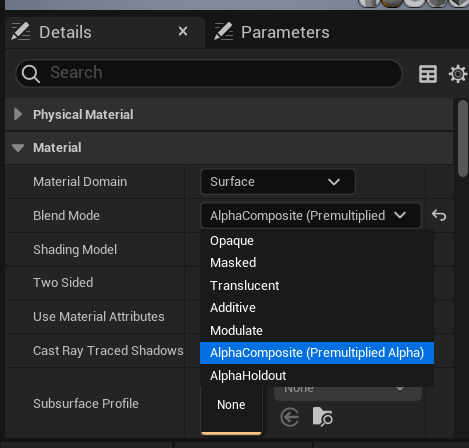
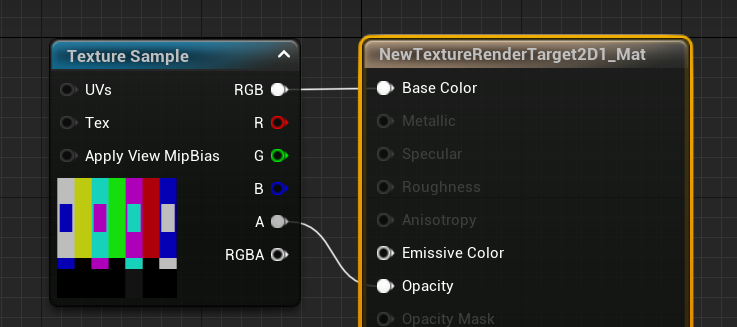
- If your material contains Alpha then double click on the Material thumbnail to open it and then in it's details panel select 'AlphaComposite':
- In the main canvas of your Material connect the 'Alpha' node to 'Opacity':
- Select the Plane or other element in your level you want to show your video on and drag and drop the Material from your Render Target onto it:
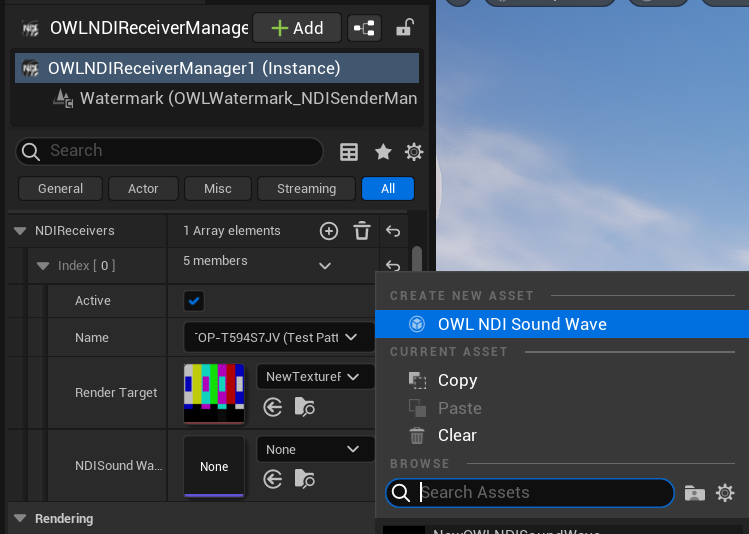
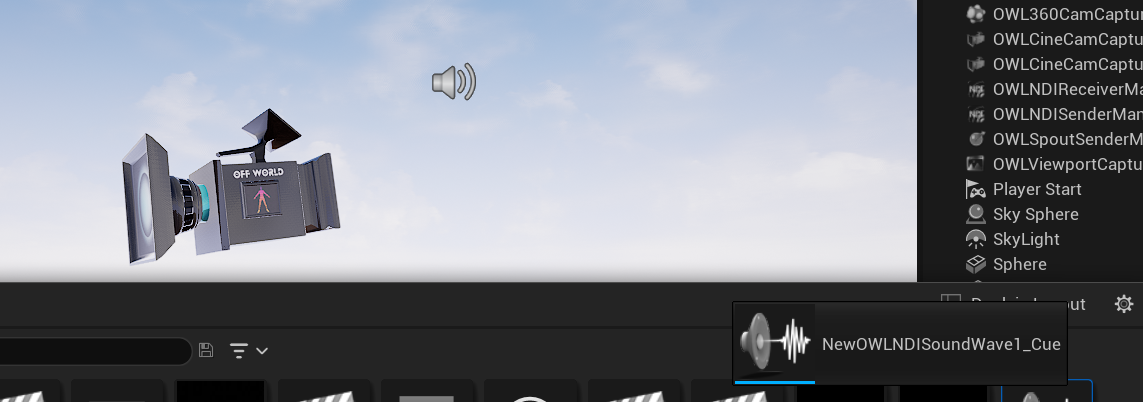
- If you want to receive audio from your NDI source then in NDI SoundWave open the drop down list and add a new Sound Wave:
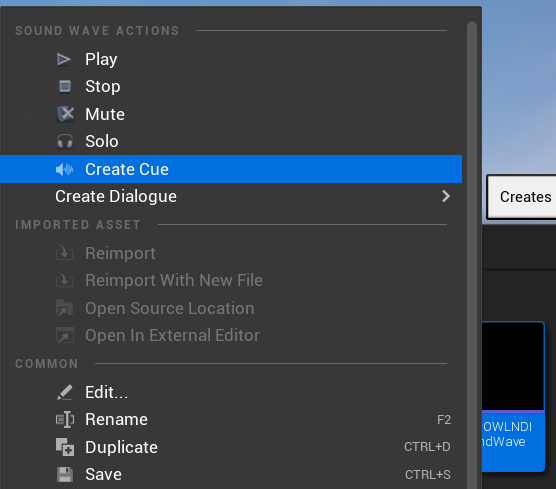
- This SoundWave will receive your sound but if you want it to play continuously in your level in and out of runtime then you need to convert it into a SoundCue. Find the SoundWave in your Content Browser, right click on it and select 'Create Cue':
- Now drag and drop the Sound Cue into your level and the sound from your NDI source will play:
- You will now see your NDI feed playing in your level.