
Anti Aliasing cleans up edges and reflections that would otherwise look unnaturally crisp or jagged. It works by taking samples from parts of the pixel and using those samples to smooth out colors (either within a frame or between multiple frames) so that the elements in your scene have smoother edges.
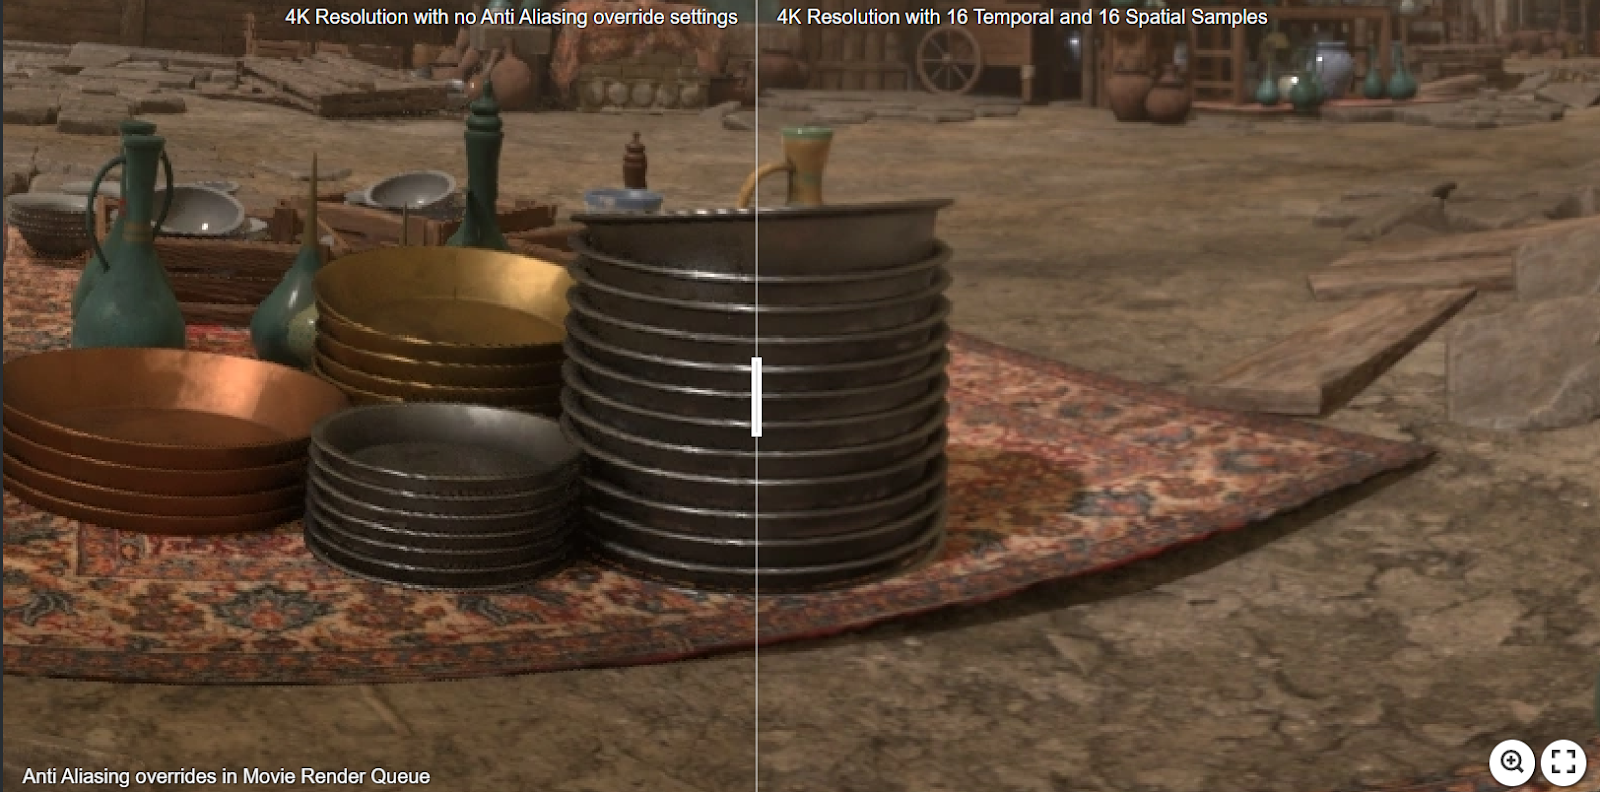
There are two types of samples used to control Anti-Aliasing:
- Temporal Samples: These are samples taken across multiple frames which helps smooth out moving objects or effects caused by moving cameras.
- Spatial Samples: These are samples taken around the area of a pixel to determine the best average of colors with the goal of smoothing transitions between the colors to stop jagged lines.
How does Path Tracing use Temporal and Spatial Samples?
Path-tracing is different to deferred rendering:
- It turns off default anti-aliasing methods like TAA (Temporal Anti-Aliasing) and TSR (Temporal Super Resolution).
- The blending of Temporal Samples happens on the CPU.
- The blending of Spatial Samples happens on the GPU.
- Denoising happens on the last spatial sample where temporal blends the denoised frames.
Therefore, when using Path-tracing:
- You need to use both Temporal and Spatial samples.
- You need to add a LOT more samples than when using Deferred Rendering.
What's the Most Efficient Way to Add Samples in Path-Tracing?
Epic suggests:
- Gradually increase the number of Spatial Samples until you get an acceptable anti-aliased image.
- Gradually increase the number of Temporal Samples until you get clean motion blur and/ or less flickering in denoising.
- Divide the number of Spatial Samples by the number of Temporal Samples to get your final number.
- For example, if you need 100 Spatial Samples and 4 Temporal Samples then your final settings should be 25 Spatial (100/4) and 4 Temporal.
Anti-Aliasing Samples isn't the Only Setting you Need to Care About!
In particular, Epic notes that in the following areas it's better to change other settings such as:
- Shadows: "If you see chattering in the shadows consider raising the Samples Per Pixel on the lights. If you have any softness to your shadow at all you’ll want to consider raising it above 1. Especially for Area Lights."
- Reflections: "If you see noise in the reflections then have a look at the settings in the Post Process Volume... They all have their own Samples/Quality.
- Refractions, Global Illumination, Ambient Occlusion: "If you see noise in your refractions, Global Illumination, or Ambient Occlusion, that needs to be addressed in the Post Process Volume, not Movie Render Queue."
Review Console Variables (CVars): They will be Affecting your Renders!
Epic says "A lot of people don’t realize that everything in the “Game Overrides” section in MRQ is having an effect on your render even if you don’t have it active in the GUI." 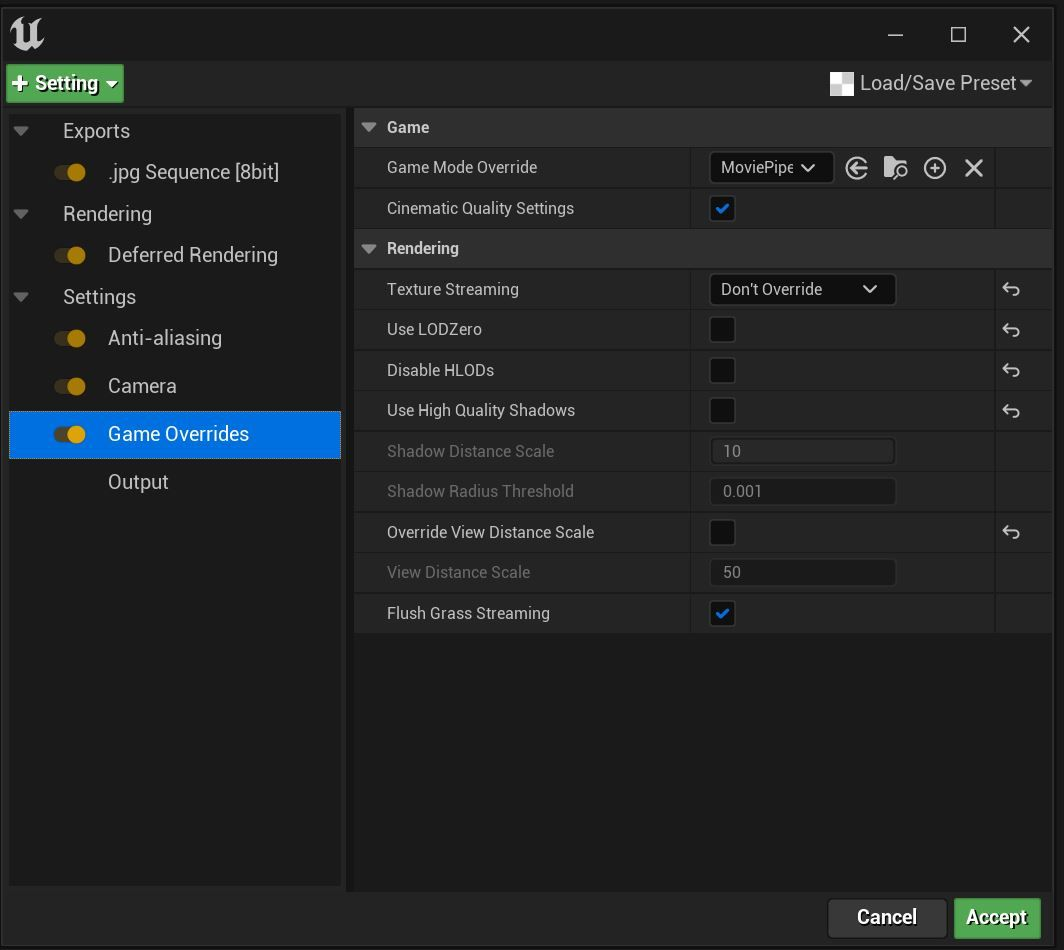
Epic recommends:
- Remove all Console Variable overrides unless you have a specific reason you are including them.
- If you see any large low-frequency noise, that's from Denoisers. You have to find the right Denoiser (Ambient Occlusion, Global Illumination, Reflections, etc.) and shut it off.
- If you disable all the options in the Game Overrides section, aside from Flush Grass Streaming, that will get you as close as possible to what you are seeing in the Editor Viewport (assuming you don’t have any CVar overrides in MRQ).
- The geometry LOD settings here will NOT override anything Nanite. They are only for non-nanite actors.