- Go to Place Actors and in the Off World Live section find the OWL Cinecam and drag and drop it into your level:
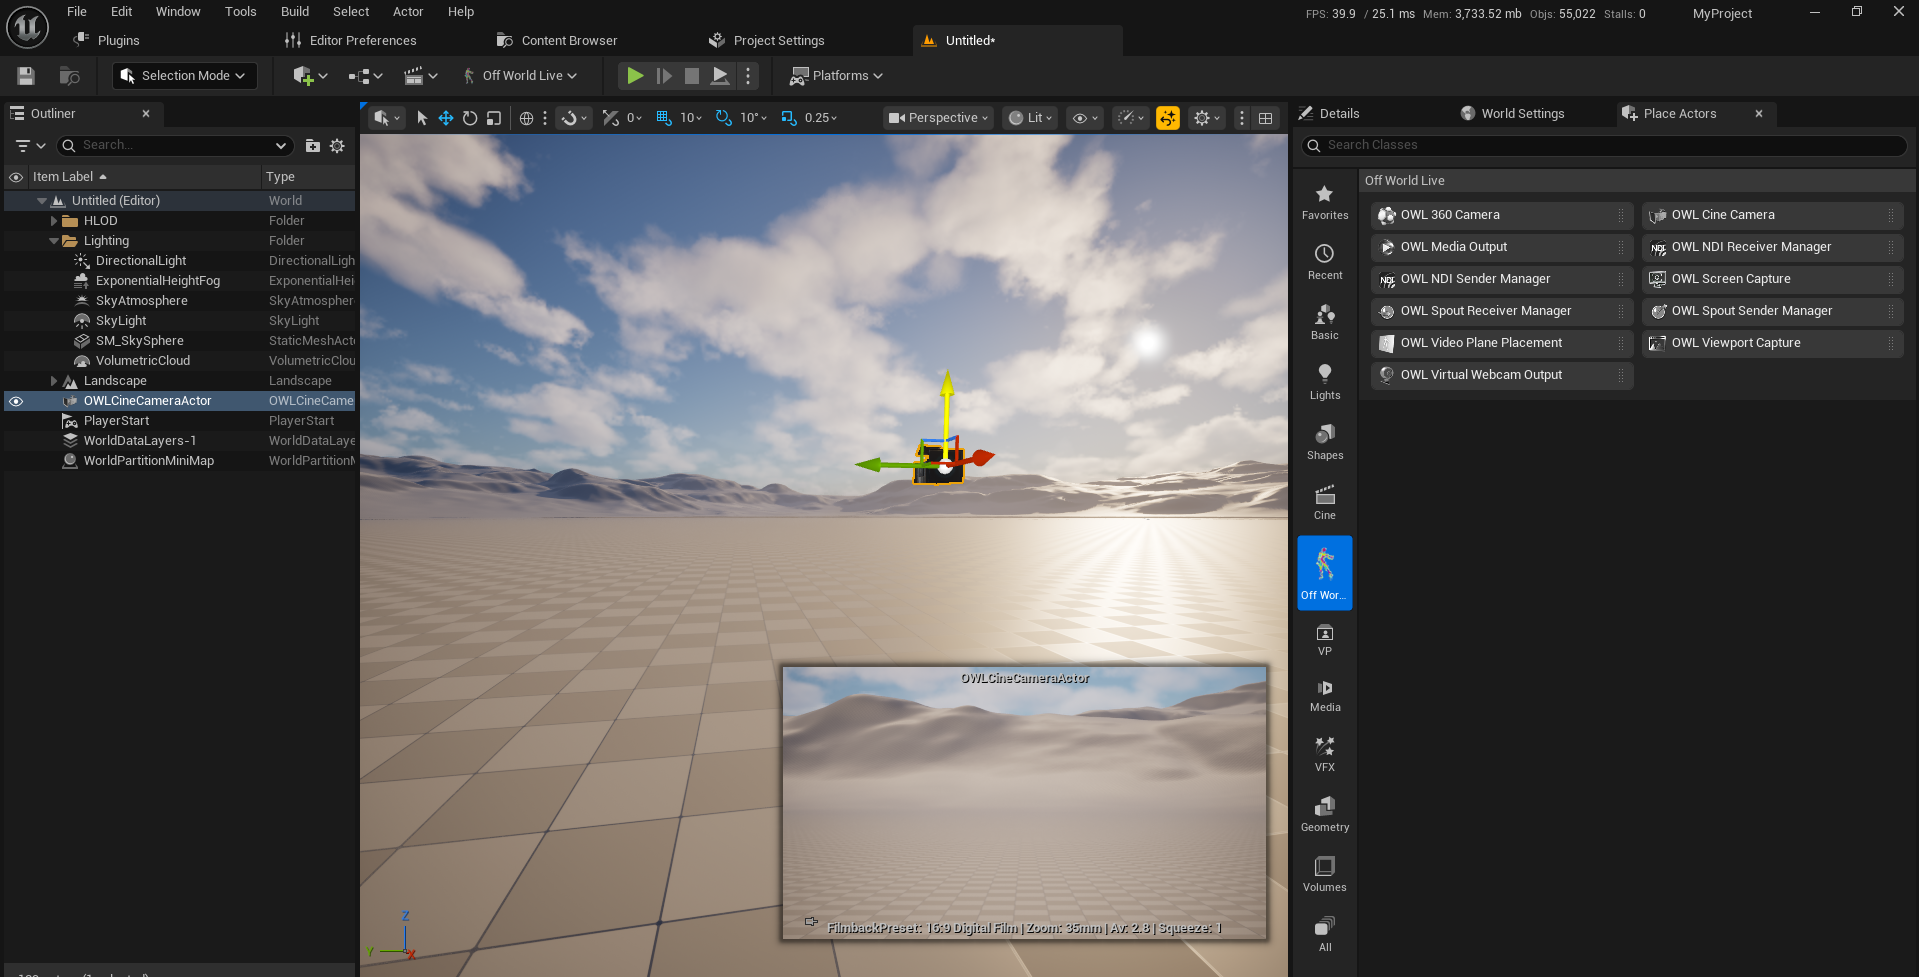
- The OWL Cinecam includes all the capabilities of the Unreal Cinecam plus a large range of additional features (see below).
- The OWL Cinecam can be used to:
- Live-stream from Unreal using the Render Target and an OWL media sender (NDI/ RMTP/ SRT/ Spout etc).
- Render sequences in Movie Render Queue.
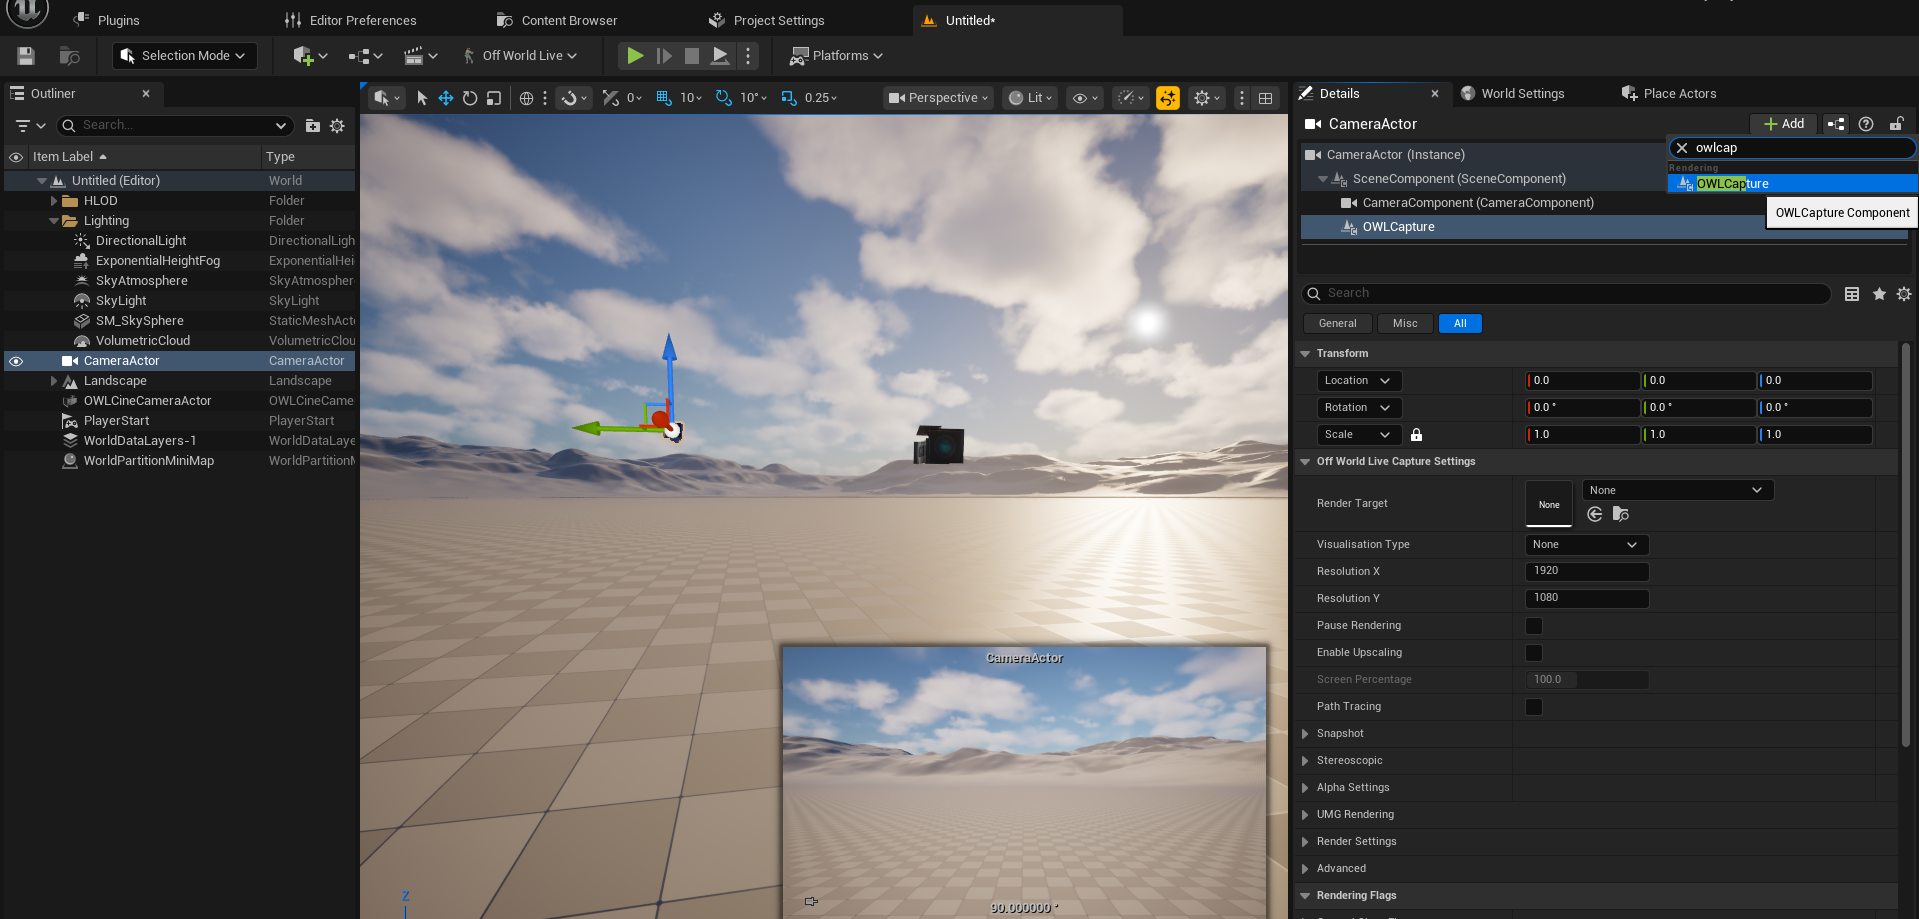
- You can also add the OWL Cinecam Component to any existing Unreal camera:
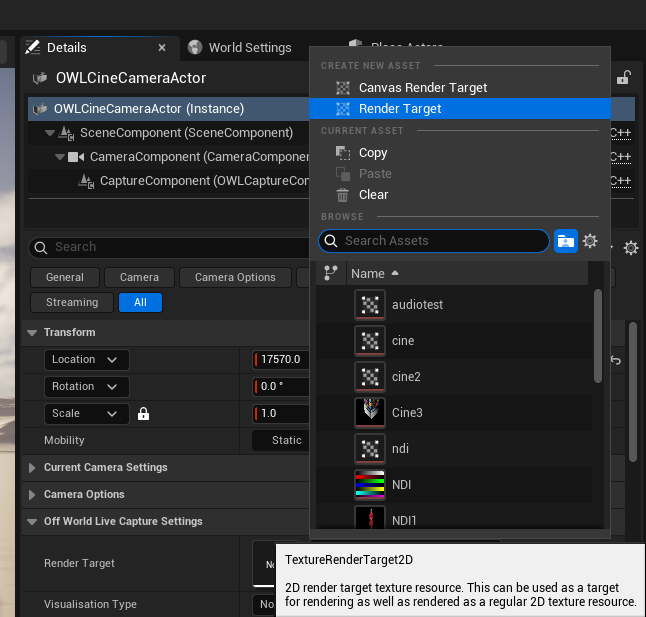
- If you want to live-stream with the OWL Cinecam then you should first add a Render Target in the Details panel, either selecting an existing one or selecting Create New Asset> Render Target to make a new one:
- You can then use the other settings in the Details panel to modify your content. All these features can also be controlled from Blueprints :
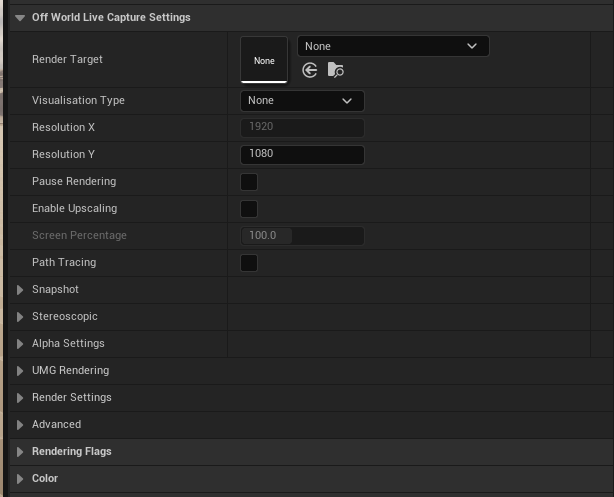
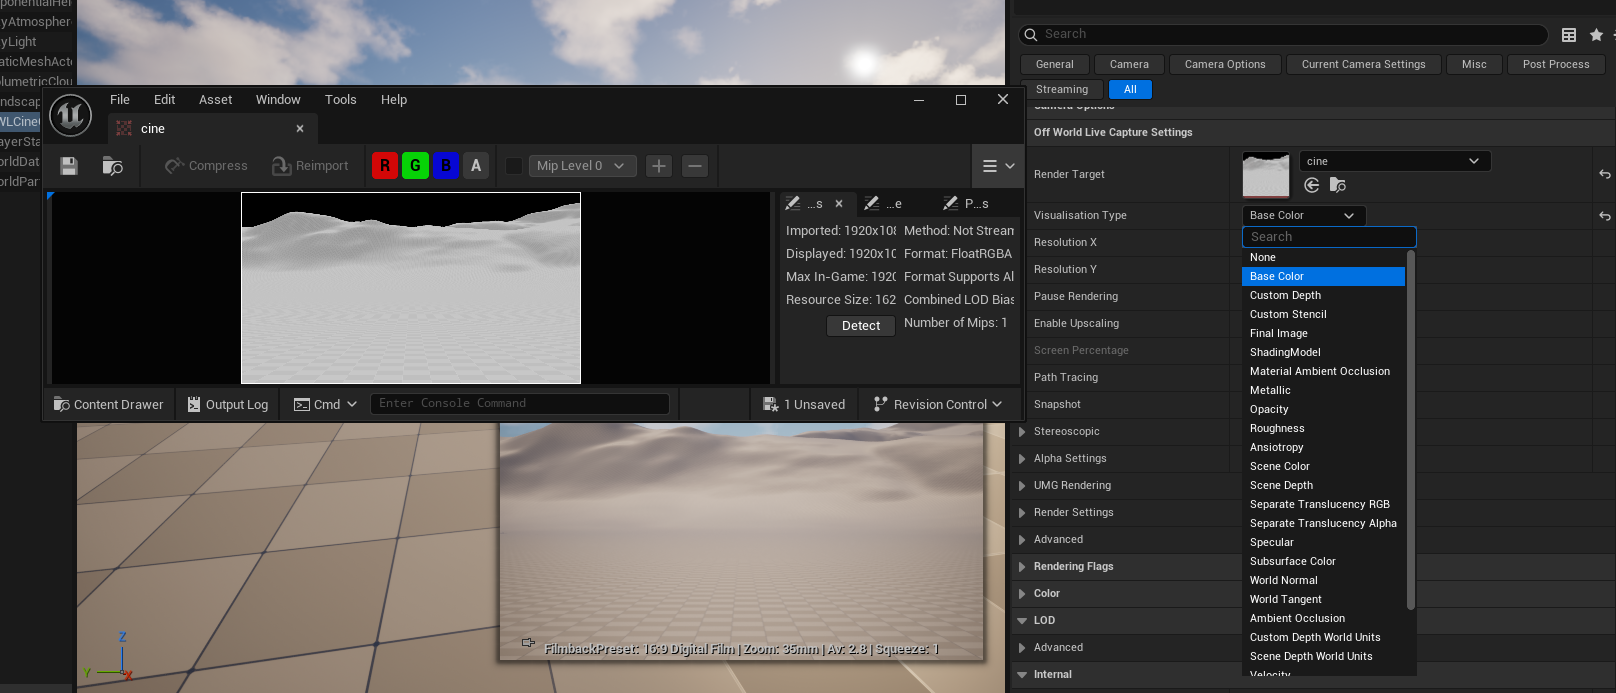
- Visualisation Type: This allows you to output Custom Buffers from the Cinecam:
- Resolution changes the resolution output of the camera. The aspect ratio is adopted automatically from the Filmback Settings of the camera but can be unlocked by unticking 'Constrain Aspect Ratio' in the Camera Options section above the OWL settings.
- Pause Rendering is used to stop the Render Target from rendering which will increase your performance. You can use this if you are not streaming from the camera or if you have a multi-cam set up and you want to switch between cameras with only one live output.
- Enable Upscaling lets you increase performance by using AI upscaling from TSR or DLSS in the camera. To do so, you set the % of the image you want rendered via upscaling rather than standard rendering.
- Path Tracing will let you preview your scene as it would look in the path-tracer. This is useful for snapshots or to preview for a render.
- Visualisation Type: This allows you to output Custom Buffers from the Cinecam:
- Snapshot will instantly generate a png from the Render Target of what the camera is seeing at that moment in time:
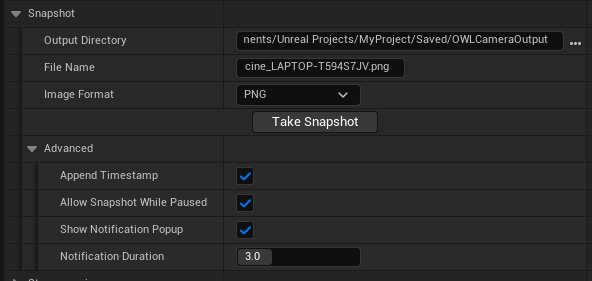

- You can set the file name and output directory.
- In advanced you can choose to include a timestamp on your png.
- Allow Snapshot while Paused enables you to generate pngs without having the Render Target of the camera active. If you want to have the ability to create images from multiple locations in your level this can be very useful.
- The notification pop-up tells the user that a snapshot has been taken. This can be switched off or modified.
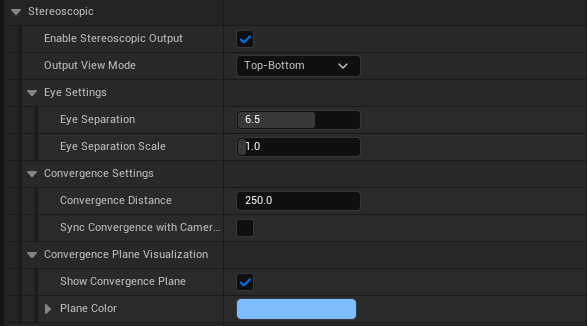
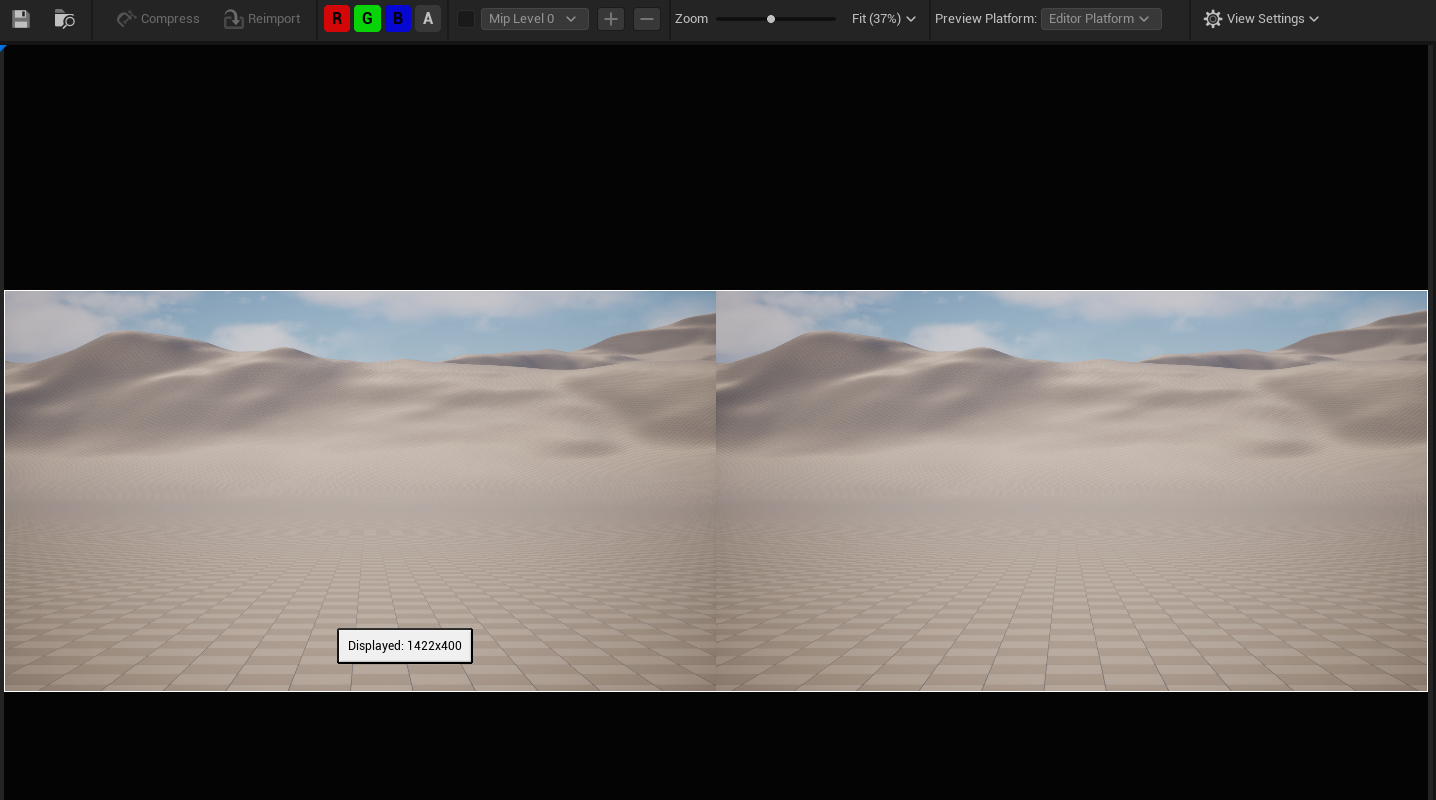
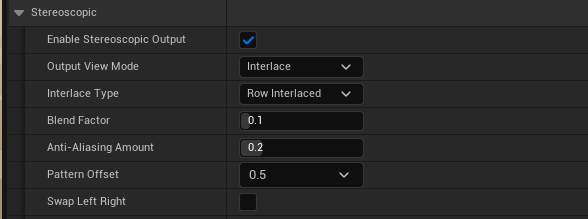
- Stereoscopic enables a stereo 3D output in the camera:
- There are four supported projection modes. The first two are good for VR headsets and the bottom two are good for 3D glasses:
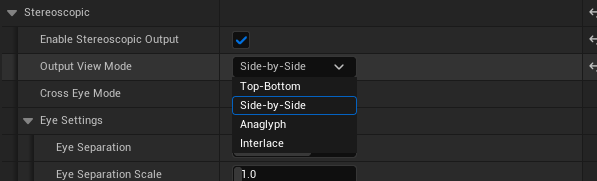
- Top-Bottom:
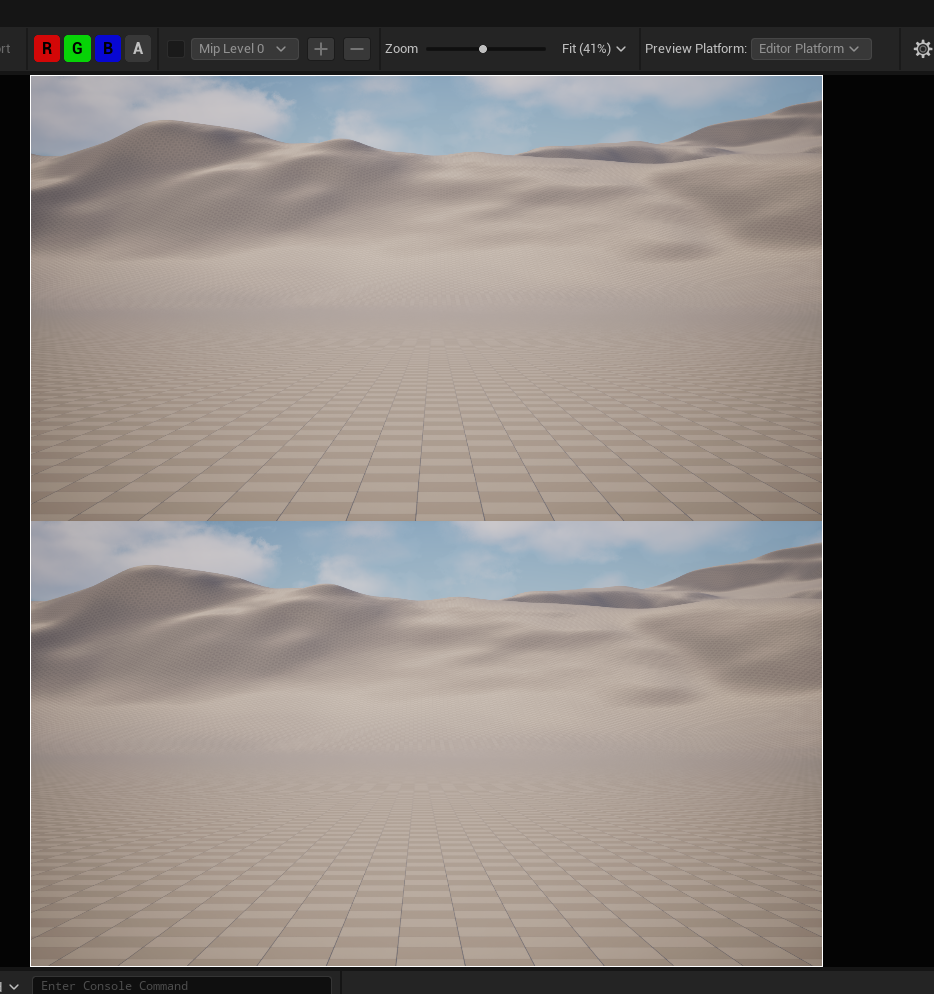
- Side-by-Side:
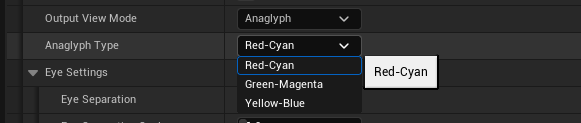
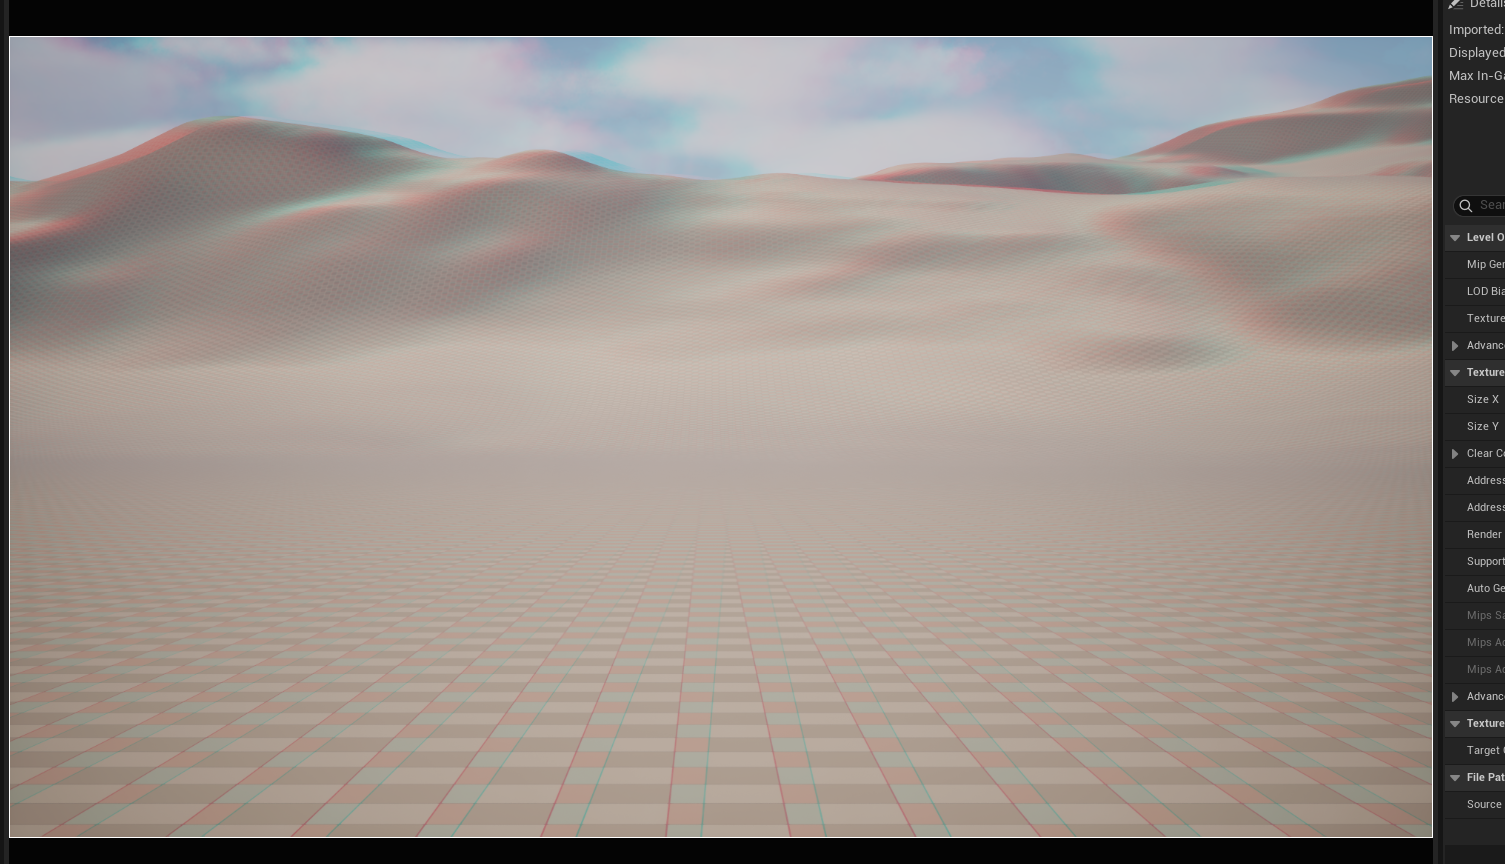
- Anaglyph:
- Interlaced:
- Top-Bottom:
- Eye Settings allows you to set the distance between the eyes and also the scale of the stereo effect:

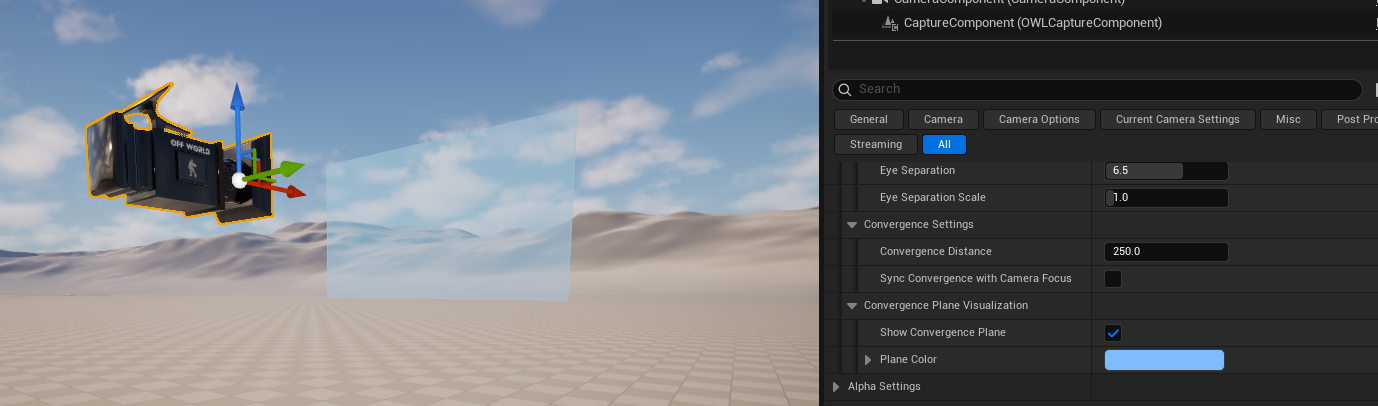
- Convergence Settings lets you move the point of focus of the two eyes. This is important for Stereo 3D as it creates the sensation of foreground and background objects:
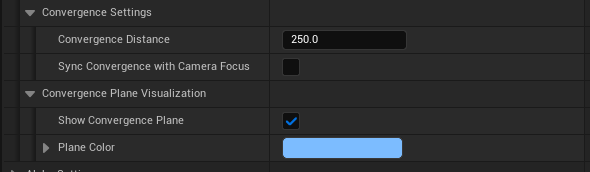
- The convergence distance is the point of focus of the two stereo cameras.
- This is visualized using the Convergence Plane:
- You can sync the convergence distance settings with your Focus Settings in the Cinecam (in the Details panel section above) so that you can use all the standard Cinecam Focus control settings to control the focus of the Stereo camera.
- There are four supported projection modes. The first two are good for VR headsets and the bottom two are good for 3D glasses:
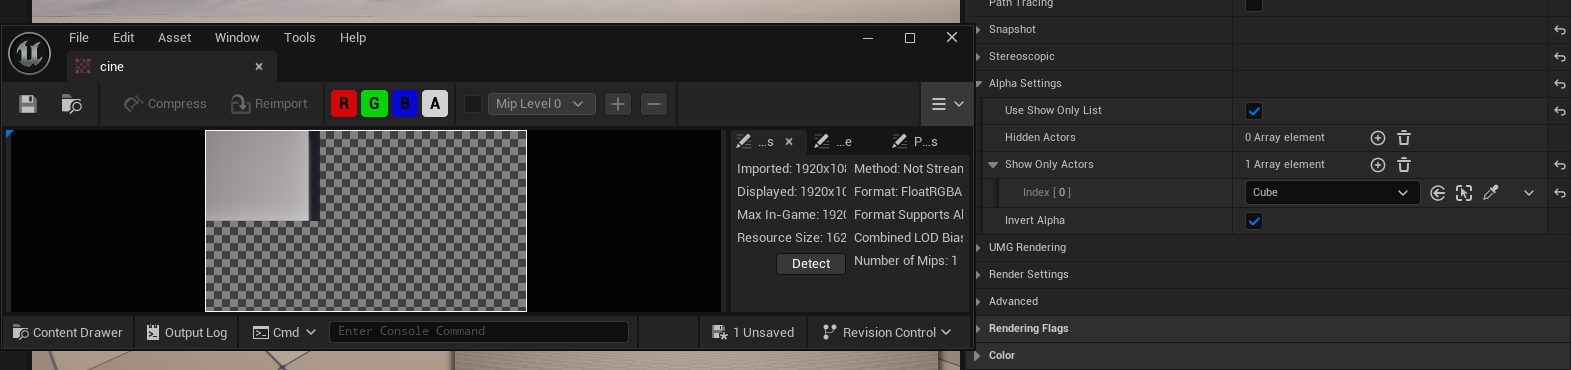
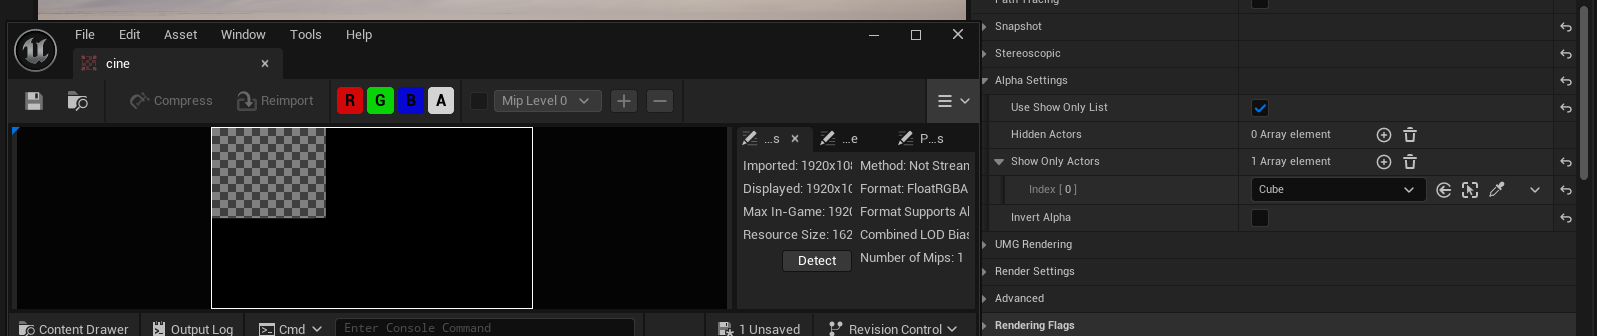
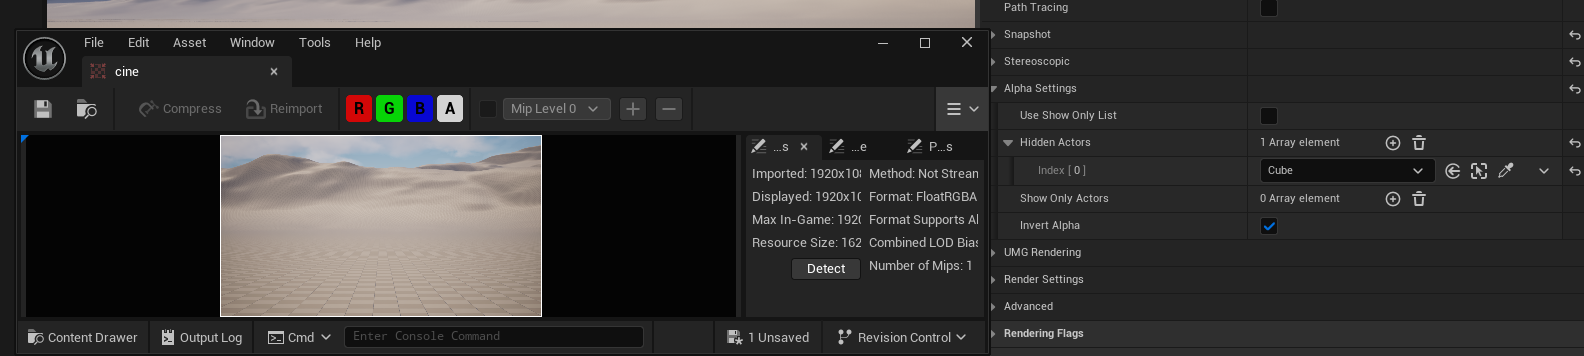
- Alpha Settings lets you show and hide objects from the Camera:
- If you tick Show Only and use the Show Only list to pick objects in your scene then you will render only the selected objects:
- If you want a stencil of those objects then you can select 'Invert Alpha' and you will send an alpha channel where the object was:
- If you want to hide an object from your scene then untick 'show only' and use the Hide Only list:
- If you tick Show Only and use the Show Only list to pick objects in your scene then you will render only the selected objects:
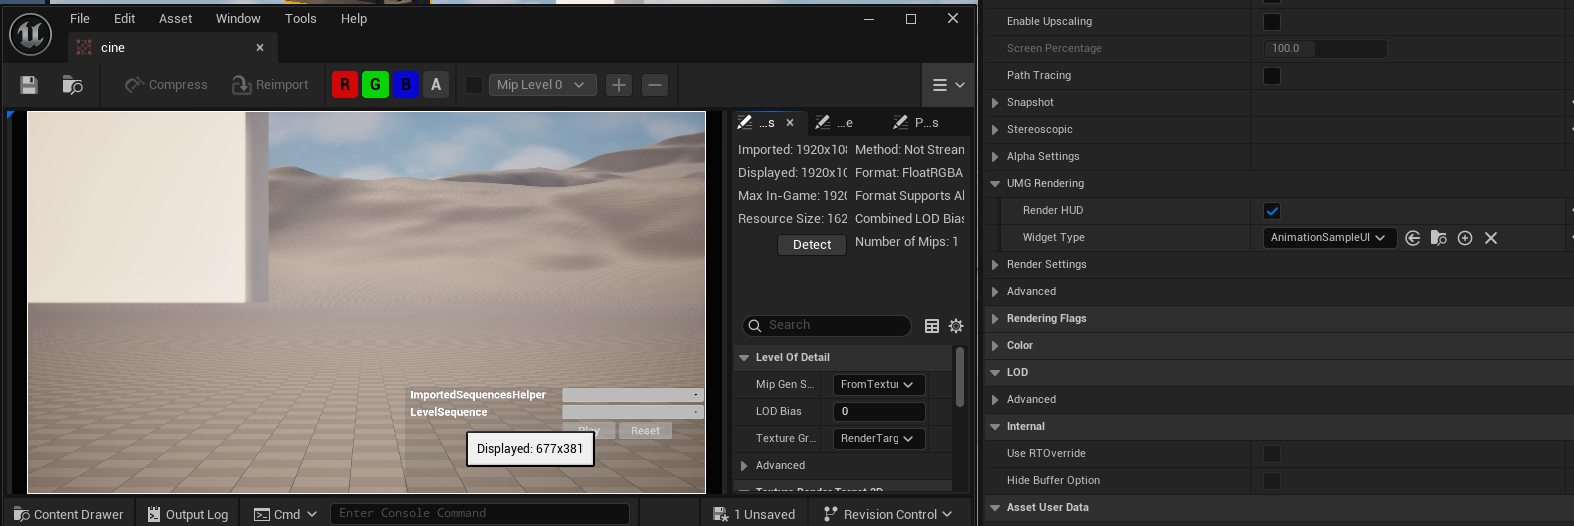
- UMG Settings lets you render a HUD or UMG on top of your Cinecam Render Target output. You can select any HUD blueprint from the drop down list:
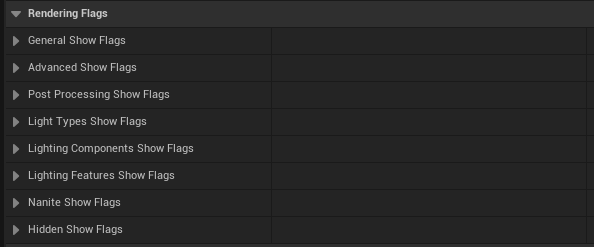
- Rendering Flags lets you see your content with different rendering effects disabled:
- In Color you can add an OCIO config so that your Cinecam output matches the exact color space you want to work in:

此页面未翻译成中文。 您可以选择其他语言:
Basic Set Up: OWL Cinecam and Component
How to set up the OWL Cinecam for live-streamed and rendered content in Unreal Engine
作者
已更新 9月前